Chevy 1.5L and 1.4L Major Engine Problem: No Start “Surprise Culprit”

Major engine issue plaguing Chevy 1.5L and 1.4L engines – the dreaded “No Start Surprise Culprit.” In this enlightening video, we delve into the heart of the problem, revealing how a failed vacuum pump leads to an unexpected twist in the engine’s operation.

Codes that could also be set if you have this problem- P0011, P0014, P0016, P0017, P0018, P0021, or P0024 codes

Let’s take a look behind this perplexing issue. I will explain how the failed vacuum pump causes the camshaft reluctor wheel to spin on the camshaft, disrupting the engine’s timing and resulting in a no-start condition. But here’s the kicker – by unplugging the camshaft sensor, the vehicle miraculously starts and runs, providing a temporary workaround if you get stuck on the side of the road.

If you’ve been scratching your head over mysterious engine problems, this video is a must-watch. Arm yourself with knowledge, save your engine, and hit the road with confidence. Don’t forget to like, comment, and subscribe for more invaluable automotive insights. Let’s uncover the truth behind the “No Start Surprise Culprit” together!

Subscribe to my YouTube channel here: https://goo.gl/j1pCfn
For the most common automotive fixes to the most common car and truck problems. DIY auto repair to help you save money.

Connect with me:
Website: https://flatratemechanic.com
Facebook: https://www.facebook.com/groups/diyrepair
Instagram: https://goo.gl/NCjRhM

Tools I Use Everyday: Amazon Store https://goo.gl/M8MpdC

P1101 Chevy Cruze and Malibu- Fix!

Understanding the P1101 Code

The P1101 code primarily indicates a problem with the Mass Airflow (MAF) sensor in Chevy Cruze and Malibu models. This sensor plays a crucial role in measuring the volume of air entering the engine, which is essential for maintaining the correct air-fuel ratio. A fault in the MAF sensor can lead to inefficiencies in engine performance, including reduced power output, decreased fuel efficiency, and potential stalling or starting issues.

Diagnostic and Repair Guide

  1. PCV Valve and Mass Airflow System Inspection: Begin by inspecting the PCV valve for any signs of faultiness. A rattling sound from the valve upon shaking indicates it needs replacement. For the MAF sensor, use an OBD-II scanner to check for proper voltage readings. Abnormal readings suggest the sensor needs replacement.
  2. Oxygen Sensor Check: A faulty oxygen sensor might contribute to the P1101 code by storing additional trouble codes. Replace any malfunctioning sensors to avoid exacerbating the issue.
  3. Air Filter and Throttle Body: Inspect the air filter for any blockages that could restrict airflow to the engine. A dirty throttle body can also impede airflow, necessitating cleaning or replacement if it’s contributing to the P1101 code.
  4. Vacuum Leak Identification: Vacuum leaks in the engine can disrupt the air-fuel mixture, leading to the P1101 code. Utilize a smoke machine to detect leaks in the intake manifold or any part of the air intake system. Smoke emanating from any component indicates a leak that must be repaired.
  5. Inspecting the Intake Hose: Damage or leaks in the intake hose can lead to issues similar to those caused by vacuum leaks, as they can allow unmeasured air into the engine, disrupting the air-fuel balance.

Preventive Maintenance Tips

  • Regularly inspect and clean the MAF sensor and replace the air filter as needed to prevent blockages.
  • Inspect hoses and connections within the air intake system for signs of wear or damage and replace as necessary to prevent future vacuum leaks.

Now, let’s explore the steps you can take to resolve the P1101 code and get your Chevy Cruze or Malibu back on track:

  1. Inspect MAF Sensor Connections: Begin by inspecting the connections to the MAF sensor. Ensure that the electrical connector is securely attached and that there are no visible signs of damage or corrosion.
  2. Clean MAF Sensor: Over time, the MAF sensor can accumulate dirt, oil, or other contaminants, affecting its performance. Use a specialized MAF sensor cleaner to carefully clean the sensor. Be gentle to avoid damaging delicate components.
  3. Check Air Filter: A clogged or dirty air filter can also cause issues with airflow, leading to MAF sensor problems. Inspect the air filter and replace it if necessary.
  4. Inspect for Vacuum Leaks: Vacuum leaks can disrupt the airflow and lead to irregular MAF sensor readings. Perform a thorough inspection of the vacuum lines and connections, repairing any leaks you find.
  5. Reset ECM: After completing the above steps, reset the ECM to clear the trouble code. You can do this by disconnecting the battery for a few minutes or using a diagnostic tool.
  6. Monitor Performance: Once you’ve addressed the potential causes of the P1101 code, monitor your vehicle’s performance. If the check engine light remains off and the engine operates smoothly, you’ve likely resolved the issue.

Professional Assistance:

If you’re uncomfortable performing these steps yourself or if the issue persists after attempting the fixes, it’s advisable to seek assistance from a qualified mechanic or dealership. They have the expertise and diagnostic tools necessary to accurately diagnose and address the problem.

Conclusion:

Encountering the P1101 trouble code on your Chevy Cruze or Malibu can be concerning, but it’s not an insurmountable obstacle. By following the steps outlined above, you can effectively diagnose and resolve the issue, restoring your vehicle’s performance and efficiency. Remember, regular maintenance and prompt attention to warning signs are key to keeping your vehicle running smoothly for years to come.

P0013 P0014 Common Causes “Cheapest Fix” VVT Solenoid

[svp]http://www.youtube.com/watch?v=teBGz3LK3E4[/svp]
In this video, we will discuss the most common reasons a p0013 and P0014 code may be set in your car or truck.

So we got a p0013 exhaust camshaft position actuator valve solenoid circuit and a p0014 exhaust camshaft position performance. The most common reason this code will set and cause your check engine light to come on is due to low engine oil. Or oil is not being changed when it should.

So if your engine oil looks low or dirty that is definitely the first thing you will want to do to try and fix both code P0013 and code P0014.

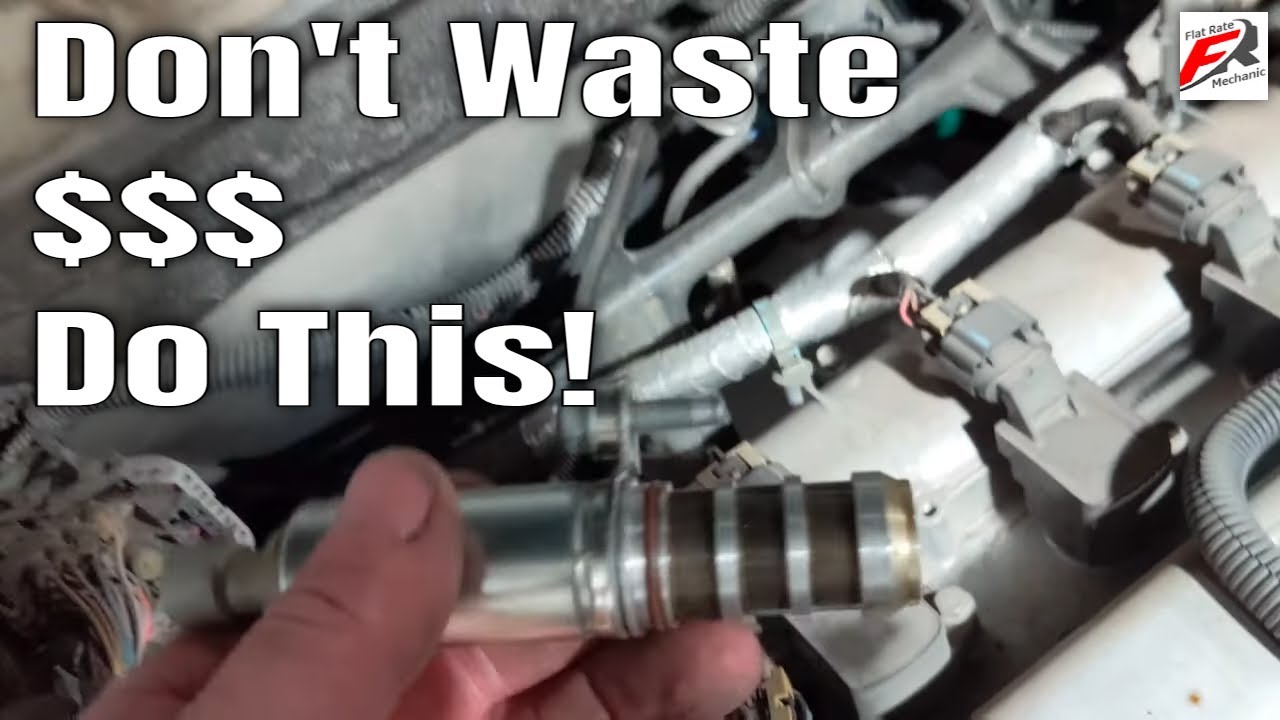
The next thing you will want to do is remove both VVT solenoids and test them by supplying power and ground, if it clicks the VVT valve is good.

Before reinstalling both VVT solenoids I would recommend cleaning them with brake clean. In most cases just cleaning VVT solenoids and changing engine oil will be enuff to fix P0013 and P0014.

Let us know in the comments if this worked for you!

The Most Common Cost of repair is $250 to $450
The Most Common labor 1 hr

You can get these variable valve timing solenoids on amazon here: https://amzn.to/3smB7Cm

When it comes to maintaining your vehicle, there are a few common issues that can arise. One of these issues is related to the Variable Valve Timing (VVT) Solenoid. The P0013 and P0014 codes are related to this issue and can be caused by a variety of factors. In this article, we will explore the common causes of these codes and the “cheapest fix” for resolving them.

What is the VVT Solenoid?

The VVT solenoid is a small valve that controls the amount of oil flow to the camshaft. This allows the camshaft to adjust the timing of the valves, which improves engine efficiency and performance. The VVT solenoid is controlled by the engine control module (ECM) and is triggered by a signal from the camshaft position sensor.

Common Causes of P0013 and P0014 Codes

There are a few common causes of P0013 and P0014 codes. These include:

  • A malfunctioning VVT solenoid
  • A clogged oil passage
  • An oil leak
  • A faulty camshaft position sensor
  • A malfunctioning engine control module

The “Cheapest Fix” for Resolving P0013 and P0014 Codes

The “cheapest fix” for resolving P0013 and P0014 codes is to simply replace the VVT solenoid. This is a relatively inexpensive repair and can often be done without having to remove the engine. However, it is important to also check for other issues that may be causing the problem, such as a clogged oil passage or an oil leak.

How to Prevent P0013 and P0014 Codes

To prevent P0013 and P0014 codes, it is important to regularly maintain your vehicle and change the oil as recommended by the manufacturer. This will help to keep the oil passages clean and free of debris. Additionally, it is important to address any oil leaks as soon as they are discovered to prevent further damage to the VVT solenoid.

In conclusion, P0013 and P0014 codes are common issues that can be caused by a variety of factors. The “cheapest fix” for resolving these codes is to simply replace the VVT solenoid. However, it is important to also check for other issues that may be causing the problem and address them as well. By regularly maintaining your vehicle and addressing any issues as soon as they are discovered, you can help to prevent P0013 and P0014 codes from occurring in the first place.

Q&A

Q1. What is the VVT Solenoid and how does it work?

A1. The VVT Solenoid is a small valve that controls the amount of oil flow to the camshaft. This allows the camshaft to adjust the timing of the valves, which improves engine efficiency and performance. The VVT solenoid is controlled by the engine control module (ECM) and is triggered by a signal from the camshaft position sensor.

Q2. What are the common causes of P0013 and P0014 codes?

A2. The common causes of P0013 and P0014 codes include: a malfunctioning VVT solenoid, a clogged oil passage, an oil leak, a faulty camshaft position sensor, and a malfunctioning engine control module.

Q3. What is the cheapest fix for resolving P0013 and P0014 codes?

A3. The cheapest fix for resolving P0013 and P0014 codes is to simply replace the VVT solenoid. This is a relatively inexpensive repair and can often be done without having to remove the engine.

Q4. How can I prevent P0013 and P0014 codes from happening?

A4. To prevent P0013 and P0014 codes, it is important to regularly maintain your vehicle and change the oil as recommended by the manufacturer. This will help to keep the oil passages clean and free of debris. Additionally, it is important to address any oil leaks as soon as they are discovered to prevent further damage to the VVT solenoid.

Q5. Is it important to check for other issues when resolving P0013 and P0014 codes?

A5. Yes, it is important to also check for other issues that may be causing the problem, such as a clogged oil passage or an oil leak when resolving P0013 and P0014 codes. This will ensure that the underlying cause of the problem is addressed and will prevent the codes from recurring.

Q6. How much does it cost to repair codes p0013 and p0014 codes?

A6. The cost of repairing codes P0013 and P0014 can vary depending on the make and model of your vehicle, as well as the specific issues that are causing the codes to appear. In general, the cost can range from a few hundred dollars for a simple fix, such as replacing a faulty camshaft sensor, to several thousand dollars for a more complex repair, such as replacing the camshaft position actuator or the timing chain. It is best to consult with a mechanic or dealership to get a more accurate estimate for your specific vehicle.

Subscribe to my youtube channel here: https://goo.gl/j1pCfn
For the most common automotive fixes to the most common car and truck problems. DIY auto repair to help you save money.

Connect with me:
Facebook: https://www.facebook.com/groups/diyrepair

Check out The Flat Rate Mechanics Tool Store on Amazon https://goo.gl/M8MpdC

The Flat Rate Mechanic. 27-year ASE Master Automotive Technician and Advanced level ASE certified here to help you save money on your automotive repairs

P1101 Air Flow Volume Chevy Malibu “Help Needed”

All right flat rate mechanic here again and we’re diagnosing a p1101 for airflow volume on this Chevy Malibu which seems to be a pretty common problem. The customer came in and they had already replaced the mass airflow sensor one of my techs diagnosed it and we ended up cleaning the throttle body and putting in a map sensor. The check engine light still came back on so I’m gonna kind to go through what I found and how to check these first. What you really need to do if you’re trying to fix p1101 for the airflow is you’re going to need to smoke the actual boost side of this intake system so basically you’re going to have to block off where the air comes in here and lock it off here and you’re going to want to check for leaks through this uh through the turbo through the intercooler and see if you got any leaks on that air charge side of this whole system there’s any leaks whatsoever it’s going to cause that p1101

we did smoke that we took it up here we actually smoked it through here blocked this off we didn’t find any leaks so that all checked out good and we’ve replaced both the booth sensor and the mass airflow sensor or the map sensor sorry the only sensor we haven’t done is a boost sensor but thus far that seems to check out our right but I’m going to show you what we found um I do have this little deal here wants us to check some some of the perimeters on the scan tool which I have up right now we got our boost pressure sensor fuel trim manifold pressure and mass airflow so um and on here one of the first things it wants you to do is uh we want you to basically compare your boost pressure sensor to your Maps sensor pressure so we can go ahead and do that and you’re going to want to do that with the engine off so we’ll go ahead and shut the engine off and we’ll go to English here so we’ve got pounds and you can see where uh relatively close to win range we got 13.5 and 14.1 so I would consider that acceptable so now we’ll go ahead and start it the next thing he wants us to do is check the mass airflow sensor we should have approximately three grams per second at idle so we’re going to go ahead and check that next we’re going to go ahead and start it up and we’ll change our scan tool to metric so we can read grams per second and looks like we’re at about 2.8 and now this is a new Point 2.4 actually so this is a new mass airflow sensor our idle uh seems like we are idling very low we did do a throttle body cleaning Subscribe to my youtube channel here: https://goo.gl/j1pCfn

For the most common automotive fixes to the most common car and truck problems. DIY auto repair to help you save money. Connect with me:

Website: https://flatratemechanic.com

Facebook: https://www.facebook.com/groups/diyrepair

Twitter: https://goo.gl/mmpqts Instagram:

https://goo.gl/NCjRhM

Check out The Flat Rate Mechanics Tool Store on Amazon https://goo.gl/M8MpdC For Promotional offers, consulting, training, sponsorships or other inquiries contact me at FlatRateMechanic1@gmail.com

The Flat Rate Mechanic. 26-year ASE Master Automotive Technician and Advanced level ASE certified here to help you save money on your automotive repairs The Flat Rate Mechanic is a participant in the Amazon Influencer Program. Disclaimer: Due to factors beyond the control of The Flat Rate Mechanic, it cannot guarantee against unauthorized modifications of this information or improper use of this information. The Flat Rate Mechanic assumes no liability for property damage or injury incurred as a result of any of the information contained in this automotive repair video. The Flat Rate Mechanic recommends safe practices when working on cars or trucks with power tools, automotive lifts, lifting tools, jack stands, electrical equipment, blunt instruments, chemicals, lubricants, or any other tools or equipment seen or implied in this repair video. Due to factors beyond the control of The Flat Rate Mechanic, no information contained in this automotive repair video shall create any express or implied warranty or guarantee of any particular result. Any injury, damage, or loss that may result from improper use of these tools, equipment, or the information contained.

Complete Engine Build Time Lapse “Super Cool”

Amazing Time Lapse of engine rebuild

Complete Engine Build Time Lapse “Cool”. Start to finish engine restorations video in a fast time lapse.
Engine rebuild kits on Amazon https://amzn.to/2SPCOUL

Subscribe to my youtube channel here: https://goo.gl/j1pCfn
For the most common fixes to the most common problems

Amazing Time Lapse of engine rebuild

GMC Chevy P0332 P0327 Knock Sensor Circuit Low Input “TSB”

GMC Chevy P0332 P0327 Knock Sensor Circuit Low Input

Knock Sensors and Harness: https://amzn.to/2IuIgsq

Troubleshooting Knock Sensor Codes P0332 and P0327 on a Chevrolet Truck

If you’re working on a Chevrolet truck and you’ve encountered diagnostic trouble codes P0332 and P0327, there’s a good chance you’re dealing with a problem related to the knock sensors. These sensors are responsible for detecting engine knock or detonation and sending signals to the engine control module (ECM) so that the ignition timing can be adjusted accordingly. In this article, we’ll explain what can cause these codes to set, what the repair entails, and what the service bulletin is recommending to prevent future failures of the knock sensors.

What Causes Knock Sensor Codes P0332 and P0327 to Set?

There are several reasons why the knock sensors on a Chevrolet truck may fail, but the most common cause is a problem with the wiring or connections. Over time, the wires that connect the knock sensors to the ECM can become corroded or damaged, which can cause the resistance in the circuit to change. This can cause the ECM to receive incorrect signals from the sensors, resulting in the engine running poorly or setting diagnostic trouble codes.

Another common cause of knock sensor failure is a problem with the sensors themselves. The sensors can become damaged or worn out over time, which can cause them to lose their ability to detect engine knock. This can also result in the ECM receiving incorrect signals and setting diagnostic trouble codes.

What Does the Repair Entail?

The repair for knock sensor codes P0332 and P0327 will vary depending on the specific problem you’re dealing with. However, in most cases, the first step will be to disconnect the blue powertrain control module (PCM) connector and check the resistance value on the light blue wire at pin 11 for sensor two and the dark blue wire at pin 51. Both should be on the blue PCM connector, and the value should be between 93K and 107K ohms.

If the resistance is low, the next step will be to check the circuit for a shorted wire or a shorted sensor. This typically involves checking the wires for damage or corrosion and testing the sensors for continuity.

If the resistance is high, the next step will be to check for a corroded wire or a poor connection at the knock sensor. This will typically involve checking the wires for damage or corrosion and inspecting the connections for signs of wear or damage.

The next step is to use an AC voltmeter and check the Hz on each wire listed above while tapping on the engine block. You should be careful not to tap on any plastic engine components. While tapping on the block, the frequency on the meter should go over 125 hz.

Finally, if the problem is a faulty sensor or damaged wiring, the repair will typically involve replacing the knock sensors and/or repairing the damaged wiring.

What Does the Service Bulletin Recommend to Prevent Future Failures?

The service bulletin for knock sensor codes P0332 and P0327 recommends that technicians use a specifically designed harness with the knock sensors. This harness is designed to provide a secure and reliable connection between the sensors and the ECM, which can help to prevent problems with resistance and continuity.

In addition to using the correct harness, the service bulletin recommends that technicians use dielectric grease on the connectors to help prevent corrosion and damage. This grease can help to protect the connectors from the elements and prevent damage from moisture, dust, and other contaminants.

Average Reported Mileage: 338036
Tests/Procedures: 1. Disconnect the Blue Powertrain Control Module (PCM) connector and check the resistance value on the Light Blue wire at pin 11 for sensor two and the Dark Blue wire at pin 51. Both of these should be on the Blue PCM connector. The value should be 93K to 107K ohms.

2. If resistance is low, check the circuit for shorted wire or shorted sensor.

3. If resistance is high, check for corroded wire or poor connection at the knock sensor.

4. Use an AC voltmeter and check the Hz on each wire listed above while tapping on the engine block.

5. While tapping on the block, the frequency on the meter should go over 125 hz.

The one tool every mechanic should have: http://amzn.to/2FN2r70

Subscribe to my youtube channel here: https://goo.gl/j1pCfn

How to Diagnose a Bad Hydraulic Lifter Chevy GMC Trucks

How to Diagnose a Bad Hydraulic Lifter

In this video, I will show you how to diagnose a bad lifter or a hydraulic lifter noise or tick on Chevy and GMC trucks with a 5.3l, 6.0l, or 6.2l.

First I will identify what cylinder is affected by using the factory GM scan tool. Once we know that we will be pulling the valve cover of to check the lifter on this Chevy truck.

How to Fix a U1000 Code In Your Car

U1000 Fix

In this video, I will show you how to fix a u1000 code in your car. In many instances, if you have communication errors in your car there’s a good chance that it will not start and the scan tool will not communicate with the modules, therefore, making it very hard to diagnose.

In this video, I will show you ways around that and how to find out which model is are not communicating. I will be using the factory GM scan tool in this video. #U1000 #FlatRateMechanic #HowTo

The class 2 communication Data Network is very sensitive and anytime you have a module failure on that circuit you have to run the possibility of Bringing Down the whole network. Which in turn can cause many problems for you as a car owner and an auto repair technician. Communication error codes can be very tricky to diagnose sometimes.

Thanks for watching hope this video was helpful, Be glad to answer any questions or comments please leave them Below in the video description and be sure to subscribe to my channel this video was helpful.

The one tool every mechanic should have: http://amzn.to/2FN2r70

Subscribe here: https://goo.gl/j1pCfn

“Reduced Engine Power Message on Dash GMC Ford Chrysler “Heres What to Do” p2101″ on YouTube

In this video, I will show you what to do if the reduced engine power message illuminates in your dash. This works on most vehicles with electronic throttle control.

If you are driving along and the reduced engine power message illuminates in your dash you should pull over turn the key off and restart it and you should be able to continue driving normally until you can get your vehicle brought in to get looked at.


In many instances, you can just have the throttle body cleaned and relearned or disconnect the battery to relearn the throttle and in most cases that will fix the reduced engine power message in the dash.

This seems to be a very common problem on a lot of newer vehicles and fortunately, just by cleaning the throttle body a lot of case lot of times it will take care of this problem without having to replace any parts.

Reduced Engine Power

If you have a Nissan you will need to watch my other video on throttle relearn. Because after cleaning the throttle body on most Nissan the idle relearn must be done. That video is here: