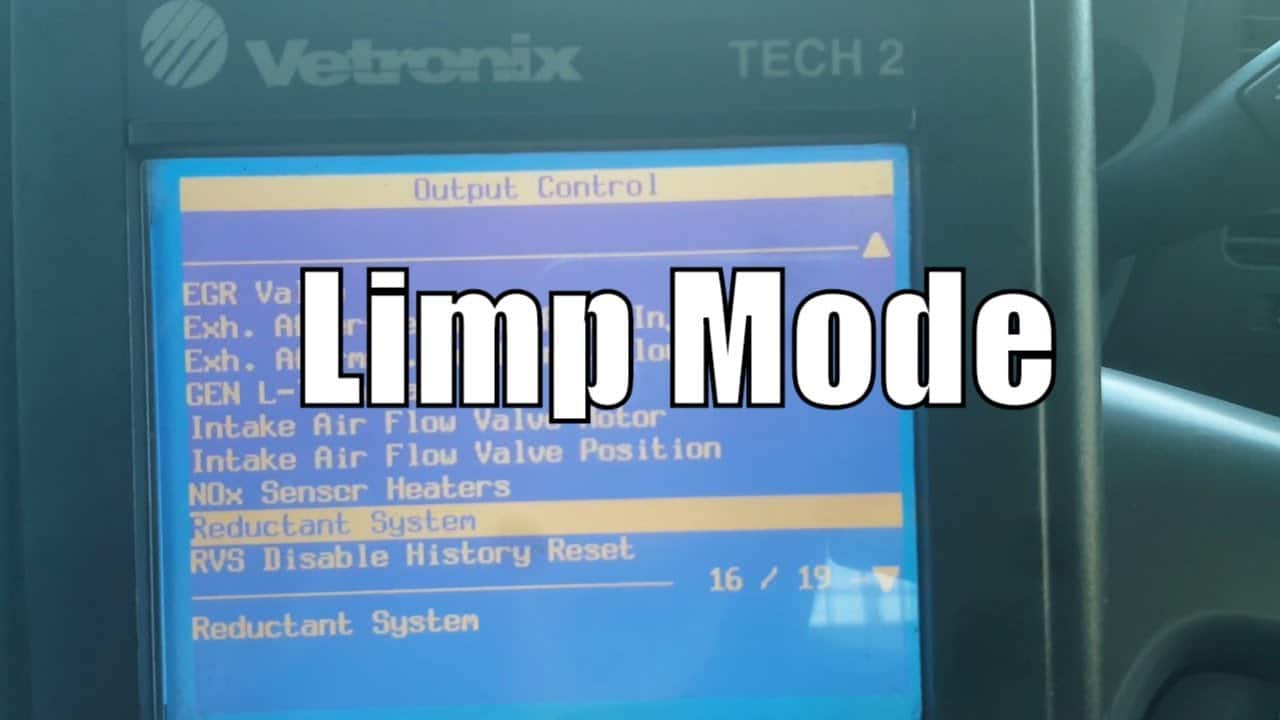
And this video we are working on a Duramax with a poor exhaust fluid quality message on the dash and the vehicle has gone into limp mode. This video is a diagnostic overview of what we did to fix the poor exhaust fluid quality message and get the vehicle out of limp mode.
We also had coolant temperature codes along with some glow plug codes. I will show you how to do a reductant fluid quality test along with a service Regen with the factory Tech 2 scan tool.
Subscribe to my youtube channel here: https://goo.gl/j1pCfn For the most common automotive fixes to the most common car and truck problems
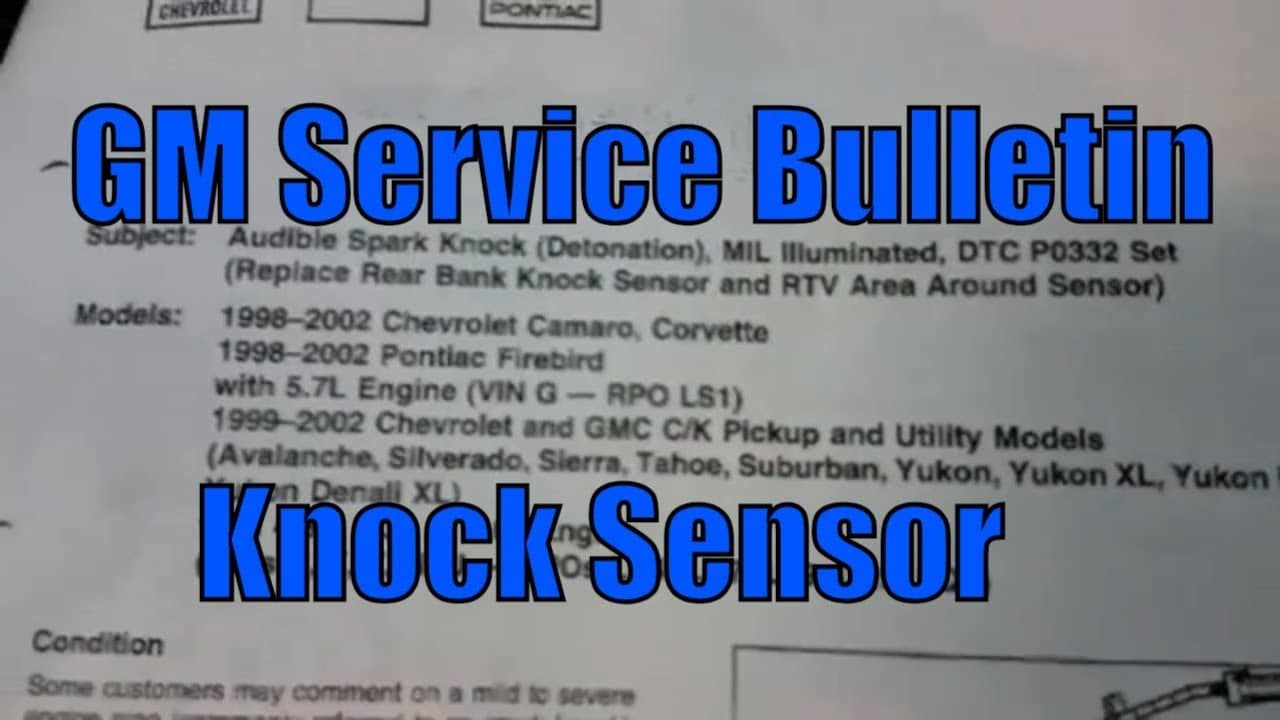
If you’re working on a Chevrolet truck and you’ve encountered diagnostic trouble codes P0332 and P0327, there’s a good chance you’re dealing with a problem related to the knock sensors. These sensors are responsible for detecting engine knock or detonation and sending signals to the engine control module (ECM) so that the ignition timing can be adjusted accordingly. In this article, we’ll explain what can cause these codes to set, what the repair entails, and what the service bulletin is recommending to prevent future failures of the knock sensors.
What Causes Knock Sensor Codes P0332 and P0327 to Set?
There are several reasons why the knock sensors on a Chevrolet truck may fail, but the most common cause is a problem with the wiring or connections. Over time, the wires that connect the knock sensors to the ECM can become corroded or damaged, which can cause the resistance in the circuit to change. This can cause the ECM to receive incorrect signals from the sensors, resulting in the engine running poorly or setting diagnostic trouble codes.
Another common cause of knock sensor failure is a problem with the sensors themselves. The sensors can become damaged or worn out over time, which can cause them to lose their ability to detect engine knock. This can also result in the ECM receiving incorrect signals and setting diagnostic trouble codes.
What Does the Repair Entail?
The repair for knock sensor codes P0332 and P0327 will vary depending on the specific problem you’re dealing with. However, in most cases, the first step will be to disconnect the blue powertrain control module (PCM) connector and check the resistance value on the light blue wire at pin 11 for sensor two and the dark blue wire at pin 51. Both should be on the blue PCM connector, and the value should be between 93K and 107K ohms.
If the resistance is low, the next step will be to check the circuit for a shorted wire or a shorted sensor. This typically involves checking the wires for damage or corrosion and testing the sensors for continuity.
If the resistance is high, the next step will be to check for a corroded wire or a poor connection at the knock sensor. This will typically involve checking the wires for damage or corrosion and inspecting the connections for signs of wear or damage.
The next step is to use an AC voltmeter and check the Hz on each wire listed above while tapping on the engine block. You should be careful not to tap on any plastic engine components. While tapping on the block, the frequency on the meter should go over 125 hz.
Finally, if the problem is a faulty sensor or damaged wiring, the repair will typically involve replacing the knock sensors and/or repairing the damaged wiring.
What Does the Service Bulletin Recommend to Prevent Future Failures?
The service bulletin for knock sensor codes P0332 and P0327 recommends that technicians use a specifically designed harness with the knock sensors. This harness is designed to provide a secure and reliable connection between the sensors and the ECM, which can help to prevent problems with resistance and continuity.
In addition to using the correct harness, the service bulletin recommends that technicians use dielectric grease on the connectors to help prevent corrosion and damage. This grease can help to protect the connectors from the elements and prevent damage from moisture, dust, and other contaminants.
Average Reported Mileage: 338036
Tests/Procedures: 1. Disconnect the Blue Powertrain Control Module (PCM) connector and check the resistance value on the Light Blue wire at pin 11 for sensor two and the Dark Blue wire at pin 51. Both of these should be on the Blue PCM connector. The value should be 93K to 107K ohms.
2. If resistance is low, check the circuit for shorted wire or shorted sensor.
3. If resistance is high, check for corroded wire or poor connection at the knock sensor.
4. Use an AC voltmeter and check the Hz on each wire listed above while tapping on the engine block.
5. While tapping on the block, the frequency on the meter should go over 125 hz.