Toyota vehicles are known for their durability and longevity, but like any vehicle, they require regular maintenance to keep them running at their best. One important aspect of maintenance is checking and changing the transmission fluid. In many vehicles, this is a straightforward process that involves checking the fluid level with a dipstick, but in some Toyota models, the process is a bit different.
Why Toyota CVT Transmission Fluid Check is Different
CVT stands for continuously variable transmission, which is a type of transmission that uses a belt or chain to change gears. Unlike traditional automatic transmissions that have a fixed number of gears, a CVT can change gears seamlessly, resulting in a smooth driving experience. However, because of the way CVT transmissions work, they require a different type of fluid than traditional transmissions.
In addition, many Toyota models with CVT transmissions do not have a traditional dipstick for checking the fluid level. Instead, the fluid level is checked electronically through the vehicle’s onboard computer. This can make it a bit more challenging for the average vehicle owner to check and change the fluid, but it’s still a relatively simple process that can be done at home with the right tools and knowledge.
How to Check CVT Transmission Fluid in Toyota
The first step in checking the CVT transmission fluid in your Toyota is to locate the transmission fluid check valve. This is usually located on the side of the transmission, near the bottom. The location can vary depending on the model and year of your vehicle, so it’s best to consult your owner’s manual or a repair manual for specific instructions.
Once you’ve located the check valve, you’ll need a special tool called a fluid level gauge. This is a long, thin tool that is inserted into the check valve to measure the fluid level. The gauge will have a scale on it that will indicate the fluid level.
It’s important to note that the fluid level should be checked with the vehicle running and at operating temperature, as the fluid level can vary depending on the temperature. It’s also important to check the fluid level when the vehicle is parked on level ground, as the fluid level can vary depending on the vehicle’s position.
What to Do If the Fluid Level is Low
If the fluid level is low, it’s important to add more transmission fluid as soon as possible. The type of transmission fluid recommended for your specific vehicle will be listed in your owner’s manual or a repair manual. It’s important to use the correct type of fluid, as using the wrong type of fluid can cause damage to the transmission.
It’s also important to note that overfilling the transmission fluid can also cause damage. The fluid level should be checked regularly and should be maintained at the proper level, as indicated by the fluid level gauge.
Conclusion
Checking and maintaining the transmission fluid in your Toyota is an important aspect of vehicle maintenance. While the process is a bit different for vehicles with CVT transmissions, it’s still relatively simple and can be done at home with the right tools and knowledge. If you’re unsure about how to check the fluid level in your specific vehicle, consult your owner’s manual or a repair manual for specific instructions. Regularly checking and maintaining the fluid level will help ensure that your vehicle’s transmission runs smoothly and lasts for years to come.
[svp]http://www.youtube.com/watch?v=IYugdaOXQA4[/svp]
In this video I’m going to show you how to service and check your CVT transmission in a Toyota Corolla is also applies to some Toyota Camrys. On the CVT transmissions there is no dipstick so you have to pull the fill plug and the drain check plug to check your fluid level.
[svp]http://www.youtube.com/watch?v=teBGz3LK3E4[/svp]
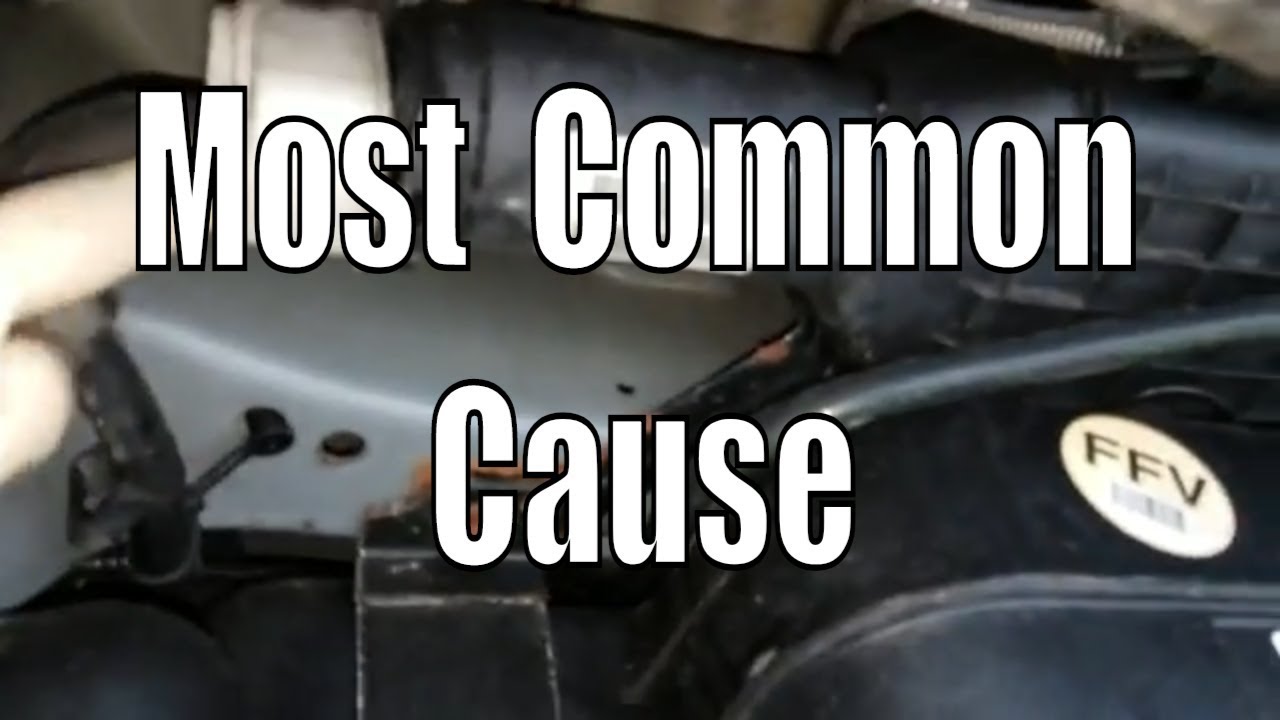
In this video, we will discuss the most common reasons a p0013 and P0014 code may be set in your car or truck.
So we got a p0013 exhaust camshaft position actuator valve solenoid circuit and a p0014 exhaust camshaft position performance. The most common reason this code will set and cause your check engine light to come on is due to low engine oil. Or oil is not being changed when it should.
So if your engine oil looks low or dirty that is definitely the first thing you will want to do to try and fix both code P0013 and code P0014.
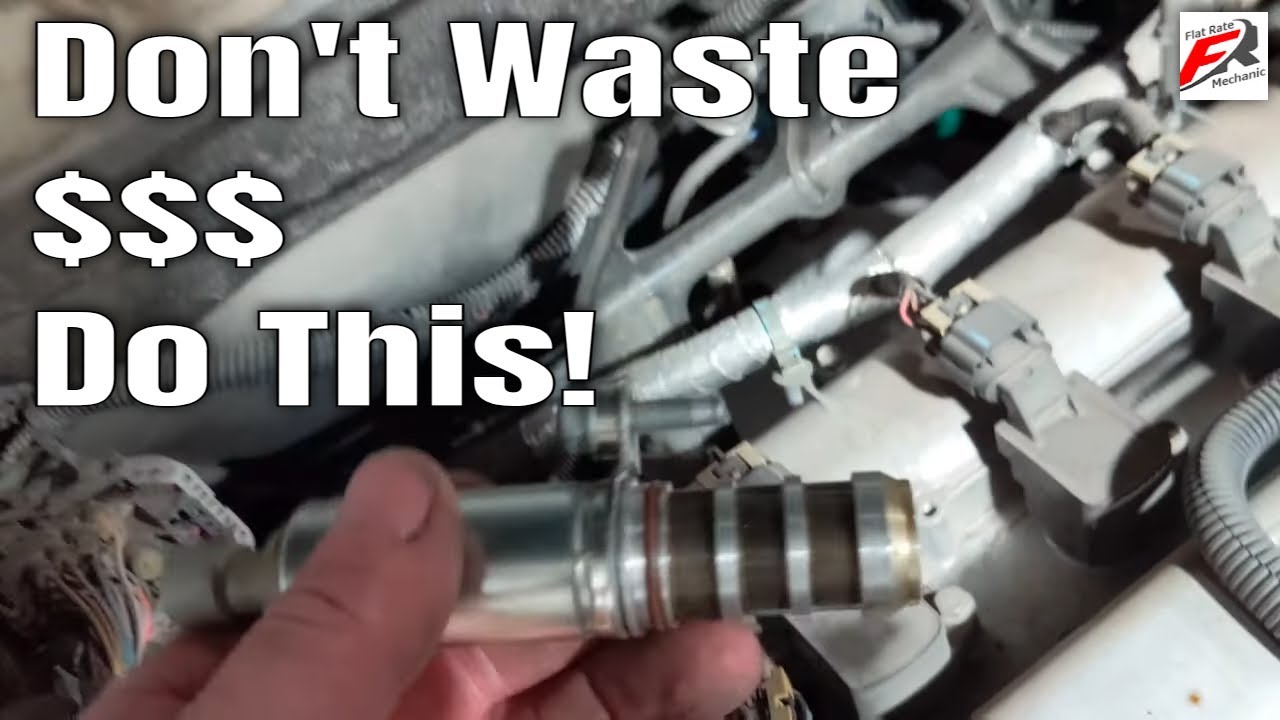
The next thing you will want to do is remove both VVT solenoids and test them by supplying power and ground, if it clicks the VVT valve is good.
Before reinstalling both VVT solenoids I would recommend cleaning them with brake clean. In most cases just cleaning VVT solenoids and changing engine oil will be enuff to fix P0013 and P0014.
Let us know in the comments if this worked for you!
The Most Common Cost of repair is $250 to $450
The Most Common labor 1 hr
When it comes to maintaining your vehicle, there are a few common issues that can arise. One of these issues is related to the Variable Valve Timing (VVT) Solenoid. The P0013 and P0014 codes are related to this issue and can be caused by a variety of factors. In this article, we will explore the common causes of these codes and the “cheapest fix” for resolving them.
What is the VVT Solenoid?
The VVT solenoid is a small valve that controls the amount of oil flow to the camshaft. This allows the camshaft to adjust the timing of the valves, which improves engine efficiency and performance. The VVT solenoid is controlled by the engine control module (ECM) and is triggered by a signal from the camshaft position sensor.
Common Causes of P0013 and P0014 Codes
There are a few common causes of P0013 and P0014 codes. These include:
A malfunctioning VVT solenoid
A clogged oil passage
An oil leak
A faulty camshaft position sensor
A malfunctioning engine control module
The “Cheapest Fix” for Resolving P0013 and P0014 Codes
The “cheapest fix” for resolving P0013 and P0014 codes is to simply replace the VVT solenoid. This is a relatively inexpensive repair and can often be done without having to remove the engine. However, it is important to also check for other issues that may be causing the problem, such as a clogged oil passage or an oil leak.
How to Prevent P0013 and P0014 Codes
To prevent P0013 and P0014 codes, it is important to regularly maintain your vehicle and change the oil as recommended by the manufacturer. This will help to keep the oil passages clean and free of debris. Additionally, it is important to address any oil leaks as soon as they are discovered to prevent further damage to the VVT solenoid.
In conclusion, P0013 and P0014 codes are common issues that can be caused by a variety of factors. The “cheapest fix” for resolving these codes is to simply replace the VVT solenoid. However, it is important to also check for other issues that may be causing the problem and address them as well. By regularly maintaining your vehicle and addressing any issues as soon as they are discovered, you can help to prevent P0013 and P0014 codes from occurring in the first place.
Q&A
Q1. What is the VVT Solenoid and how does it work?
A1. The VVT Solenoid is a small valve that controls the amount of oil flow to the camshaft. This allows the camshaft to adjust the timing of the valves, which improves engine efficiency and performance. The VVT solenoid is controlled by the engine control module (ECM) and is triggered by a signal from the camshaft position sensor.
Q2. What are the common causes of P0013 and P0014 codes?
A2. The common causes of P0013 and P0014 codes include: a malfunctioning VVT solenoid, a clogged oil passage, an oil leak, a faulty camshaft position sensor, and a malfunctioning engine control module.
Q3. What is the cheapest fix for resolving P0013 and P0014 codes?
A3. The cheapest fix for resolving P0013 and P0014 codes is to simply replace the VVT solenoid. This is a relatively inexpensive repair and can often be done without having to remove the engine.
Q4. How can I prevent P0013 and P0014 codes from happening?
A4. To prevent P0013 and P0014 codes, it is important to regularly maintain your vehicle and change the oil as recommended by the manufacturer. This will help to keep the oil passages clean and free of debris. Additionally, it is important to address any oil leaks as soon as they are discovered to prevent further damage to the VVT solenoid.
Q5. Is it important to check for other issues when resolving P0013 and P0014 codes?
A5. Yes, it is important to also check for other issues that may be causing the problem, such as a clogged oil passage or an oil leak when resolving P0013 and P0014 codes. This will ensure that the underlying cause of the problem is addressed and will prevent the codes from recurring.
Q6. How much does it cost to repair codes p0013 and p0014 codes?
A6. The cost of repairing codes P0013 and P0014 can vary depending on the make and model of your vehicle, as well as the specific issues that are causing the codes to appear. In general, the cost can range from a few hundred dollars for a simple fix, such as replacing a faulty camshaft sensor, to several thousand dollars for a more complex repair, such as replacing the camshaft position actuator or the timing chain. It is best to consult with a mechanic or dealership to get a more accurate estimate for your specific vehicle.
Subscribe to my youtube channel here: https://goo.gl/j1pCfn
For the most common automotive fixes to the most common car and truck problems. DIY auto repair to help you save money.
The Flat Rate Mechanic. 27-year ASE Master Automotive Technician and Advanced level ASE certified here to help you save money on your automotive repairs
[svp]http://www.youtube.com/watch?v=TGJVv3QsOVY[/svp]
In this video I’ll show you how to change the external automatic transmission filter in a Honda Odyssey.
On a lot of vehicles the transmission filter is located in the transmission pan and is only serviceable if you remove the automatic transmission pan and fluid.
On the Honda Odyssey, we have an external transmission filter that’s located on top of the transmission which is pretty easy to get to and service. You can pick one of these transmission filters from any local parts store.
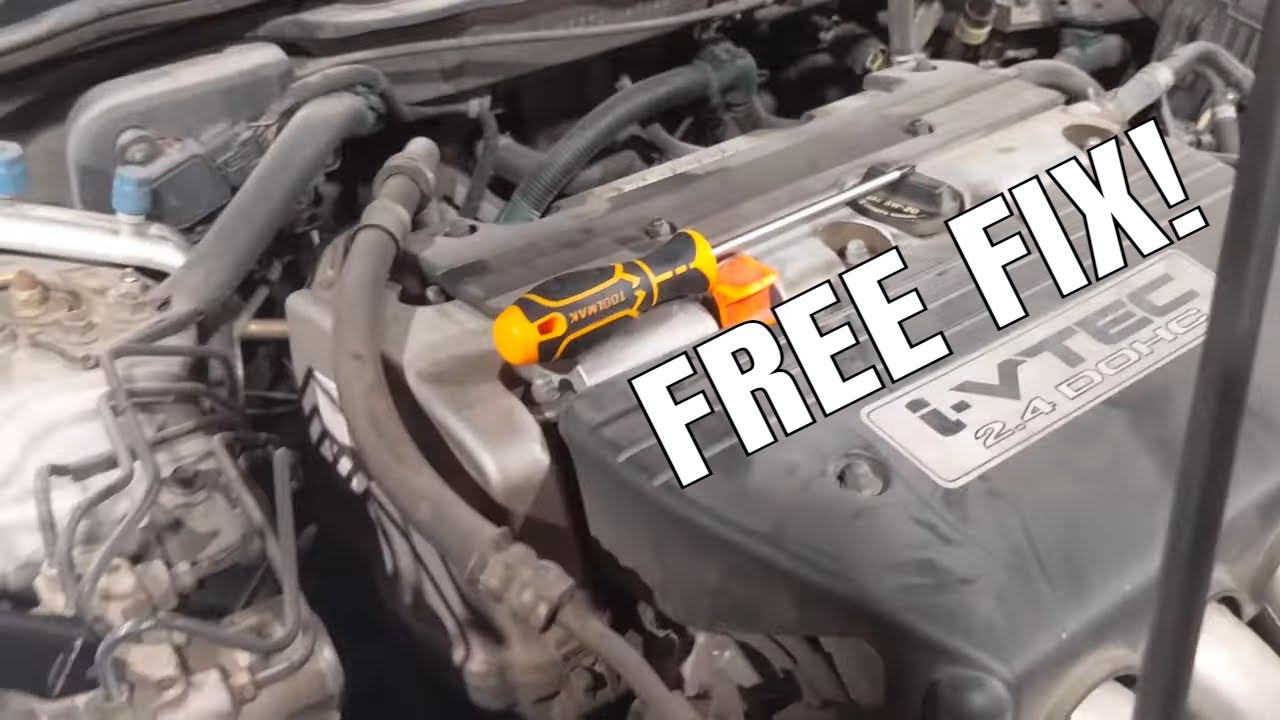
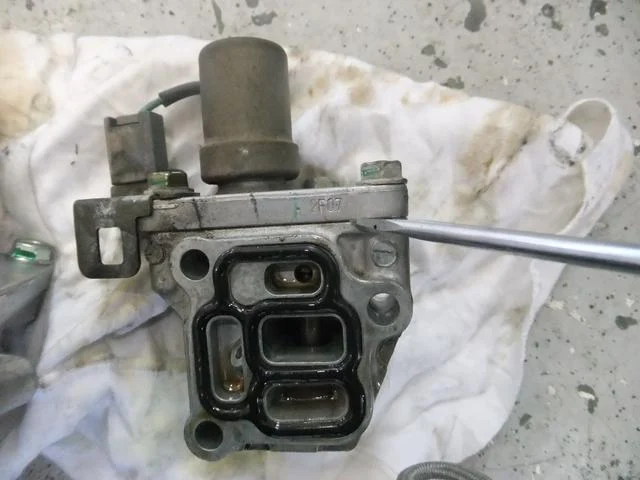
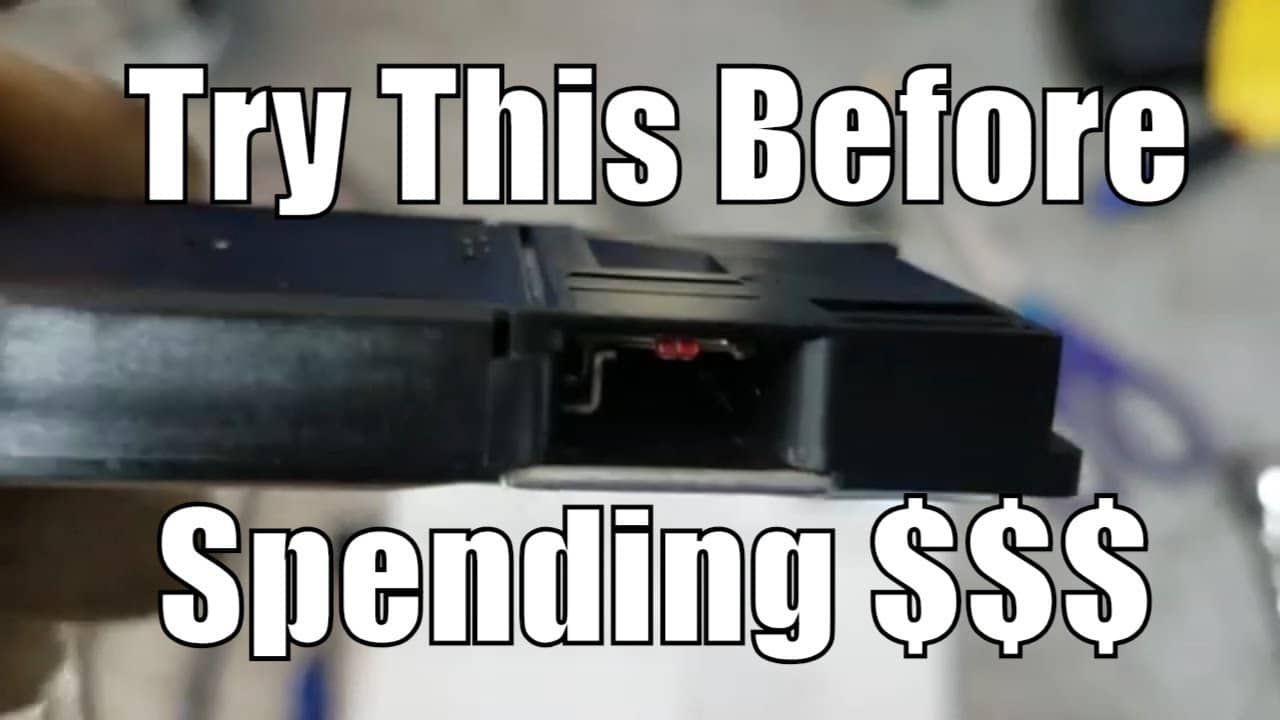
How to fix Honda code P2646 VTEC for free. You’re going to want to try and clean the screens for the spool valve the VTEC valve and one other screen on the front of the motor.
If you get a p2626 you will want to try these free fixes before replacing and part.
“P2646 Honda VTEC: Understanding the Importance of Proper Maintenance and Troubleshooting the Engine Code”
If you own a Honda VTEC engine, you know how powerful and efficient it can be. However, like any engine, it requires proper maintenance to ensure it runs smoothly and lasts for years to come. In this blog post, we’ll be discussing the “do this first” steps you should take to keep your P2646 Honda VTEC engine in top condition and troubleshoot the engine code P2646.
Understanding the P2646 Code
Engine code P2646 refers to a problem with the rocker arm oil control solenoid valve in a Honda VTEC engine. This solenoid valve controls the oil pressure that is sent to the rocker arms, which in turn control the engine’s valve timing. When the engine control module (ECM) detects a problem with the solenoid valve or the oil pressure it controls, it will set the P2646 code and illuminate the check engine light.
Possible causes for this code to be set include a faulty rocker arm oil control solenoid valve, low oil pressure, a blocked oil passage, or a problem with the oil control solenoid valve circuit. In some cases, the problem may be caused by a lack of proper maintenance, such as neglecting to change the oil or not properly maintaining the engine’s components.
It is important to diagnose and fix the problem as soon as possible, as continuing to drive with a P2646 code can cause further damage to the engine. A qualified mechanic will use a diagnostic scanner to read the code and diagnose the issue, and then make the necessary repairs.
Proper Maintenance to Avoid P2646 Code
First and foremost, it’s important to keep up with your regular oil changes. Your P2646 Honda VTEC engine has high-performance components that require clean oil to lubricate and protect them. Neglecting oil changes can lead to serious damage, including the P2646 code, and costly repairs. Make sure to follow the recommended oil change intervals in your owner’s manual and use the correct type of oil for your engine.
Next, pay attention to your engine’s air filter. The air filter is responsible for removing dirt, dust, and other debris from the air before it enters the P2646 Honda VTEC engine. A clogged air filter can decrease your engine’s performance and even cause damage. Check the air filter every time you change your oil and replace it if it’s dirty.
Another important step in maintaining your P2646 Honda VTEC engine is keeping an eye on your coolant levels. The coolant helps keep your engine at the proper operating temperature and prevents it from overheating. Make sure to check the coolant levels regularly and add more if needed.
Finally, make sure to have regular inspections and tune-ups. A qualified mechanic can detect and fix any potential issues before they become serious problems, such as the P2646 code. They can also check for worn-out parts and make sure everything is running smoothly in your P2646 Honda VTEC engine.
By following these “do this first” steps, you can help ensure that your P2646 Honda VTEC engine stays in top condition for years to come. Regular maintenance is key to keeping your engine running at its best and avoiding costly repairs, including the P2646 code. Regular maintenance is also the key to avoiding engine code P2646, and keeping your engine running at its best.
It is important to note that troubleshooting engine codes like P2646 should always be done by a qualified mechanic. They have the tools and knowledge to properly
The Cost to Repair Code P2645 Honda VTEC
The cost of repairing a P2646 code on a Honda VTEC engine can vary depending on the specific cause of the problem and the location of the repair. Some common repairs that may be required include replacing the rocker arm oil control solenoid valve, which can cost between $100 to $300 for the part alone. However, if the problem is caused by a lack of proper maintenance, such as low oil pressure or a clogged air filter, the cost of the repair will likely be less.
If the problem is caused by an issue with the oil control solenoid valve circuit, the repair cost may be higher, as it may require replacing the circuit or the engine control module.
Additionally, labor costs can vary greatly depending on the location of the repair and the experience of the mechanic. A qualified mechanic can give you a more accurate estimate of the repair cost after diagnosing the problem.
It’s also important to note that if the P2646 code is not addressed, it can lead to further damage to the engine, resulting in more costly repairs. Therefore, it’s essential to address the issue as soon as the code is detected and not to drive with the Check engine light on.
It is always recommended to check with different repair shops and compare the cost and reputation to make sure you get the best service and price.
For Promotional offers, consulting, training, sponsorships or other inquiries contact me at FlatRateMechanic1@gmail.com
The Flat Rate Mechanic. 26-year ASE Master Automotive Technician and Advanced level ASE certified here to help you save money on your automotive repairs
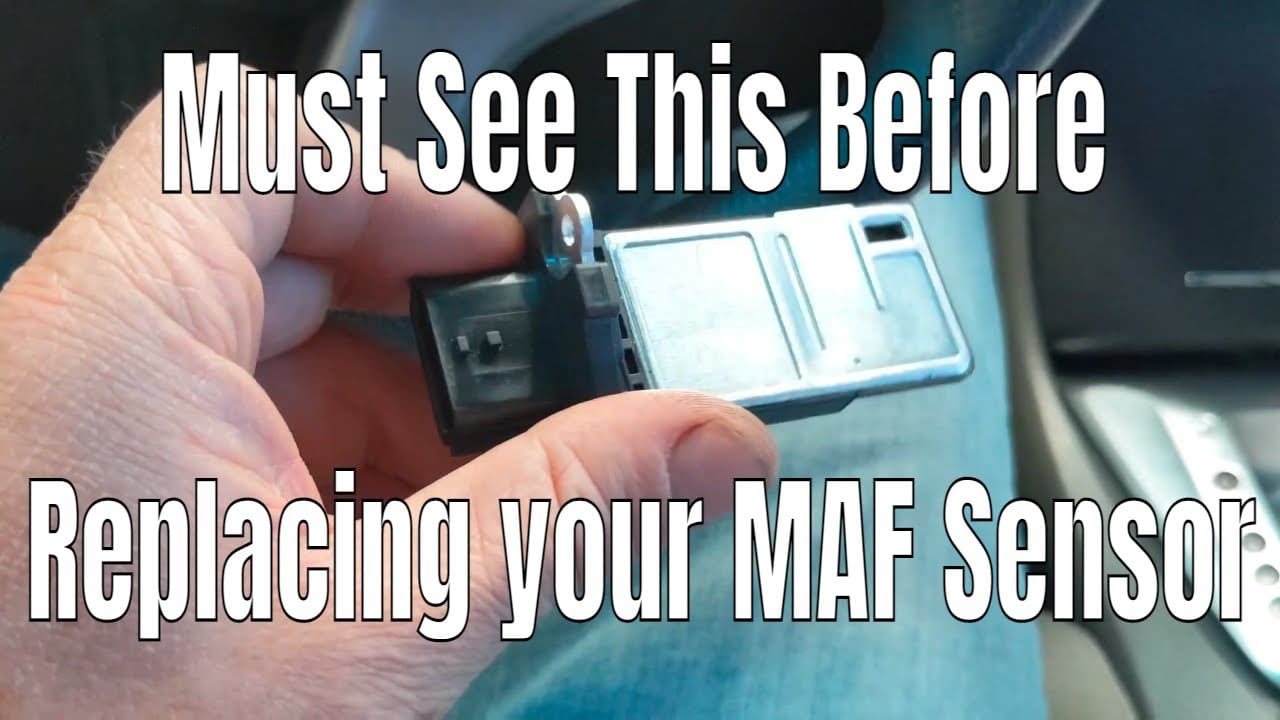
In this video, I will show you how to fix p0101 mass air flow sensor circuit. We’re working on a 2011 Nissan Altima and in this video, I just wanted to go over a few things we found. First, we tried cleaning the mass air flow sensor which in a lot of cases can help and is always a good thing to try before replacing the mass air flow sensor.
If you need to know how to clean the mass air flow sensor they do sell mass air flow sensor cleaner here https://amzn.to/3yef3wP . Sometimes just this alone will fix a p0101 On this vehicle, we actually had to replace the mass air flow sensor and also there’s a service bulletin that states a computer should be updated with new software to prevent this problem from happening. We deliver all this information in this video about Nissan’s mass air flow problems.
If you would like to see more great automotive video be sure to subscribe to The Flat Rate Mechanic Subscribe to my youtube channel here: https://goo.gl/j1pCfn For the most common automotive fixes to the most common car and truck problems. DIY auto repair to help you save money.
For Promotional offers, consulting, training, sponsorships or other inquiries contact me at FlatRateMechanic1@gmail.com The Flat Rate Mechanic. 26-year ASE Master Automotive Technician and Advanced level ASE certified here to help you save money on your automotive repairs The Flat Rate Mechanic is a participant in the Amazon Influencer Program.
Disclaimer: Due to factors beyond the control of The Flat Rate Mechanic, it cannot guarantee against unauthorized modifications of this information or improper use of this information. The Flat Rate Mechanic assumes no liability for property damage or injury incurred as a result of any of the information contained in this automotive repair video. The Flat Rate Mechanic recommends safe practices when working on cars or trucks with power tools, automotive lifts, lifting tools, jack stands, electrical equipment, blunt instruments, chemicals, lubricants, or any other tools or equipment seen or implied in this repair video. Due to factors beyond the control of The Flat Rate Mechanic, no information contained in this automotive repair video shall create any express or implied warranty or guarantee of any particular result. Any injury, damage, or loss that may result from improper use of these tools, equipment, or the information contained.
Most common cause of a p0101 “Mass Air Flow (MAF) Circuit/Performance Malfunction”?
Code P0101 Definition
Mass Air Flow (MAF) Circuit/Performance Malfunction
Code P0101 Meaning
The mass air flow (MAF) sensor measures the amount of air entering the engine. Check engine light code P0101 is set when the measurement of air entering the engine by the mass air flow sensor is outside of the manufacturer’s specified range.
Symptoms
Engine stalling
Difficulty starting
Lack of power
Rough idle
Causes
Dirty, obstructed, or faulty mass air flow sensor
Damaged or disconnected air intake boot (snorkel)
Vacuum leak
Clogged or improperly installed the air filter
Clogged catalytic converter / restricted exhaust
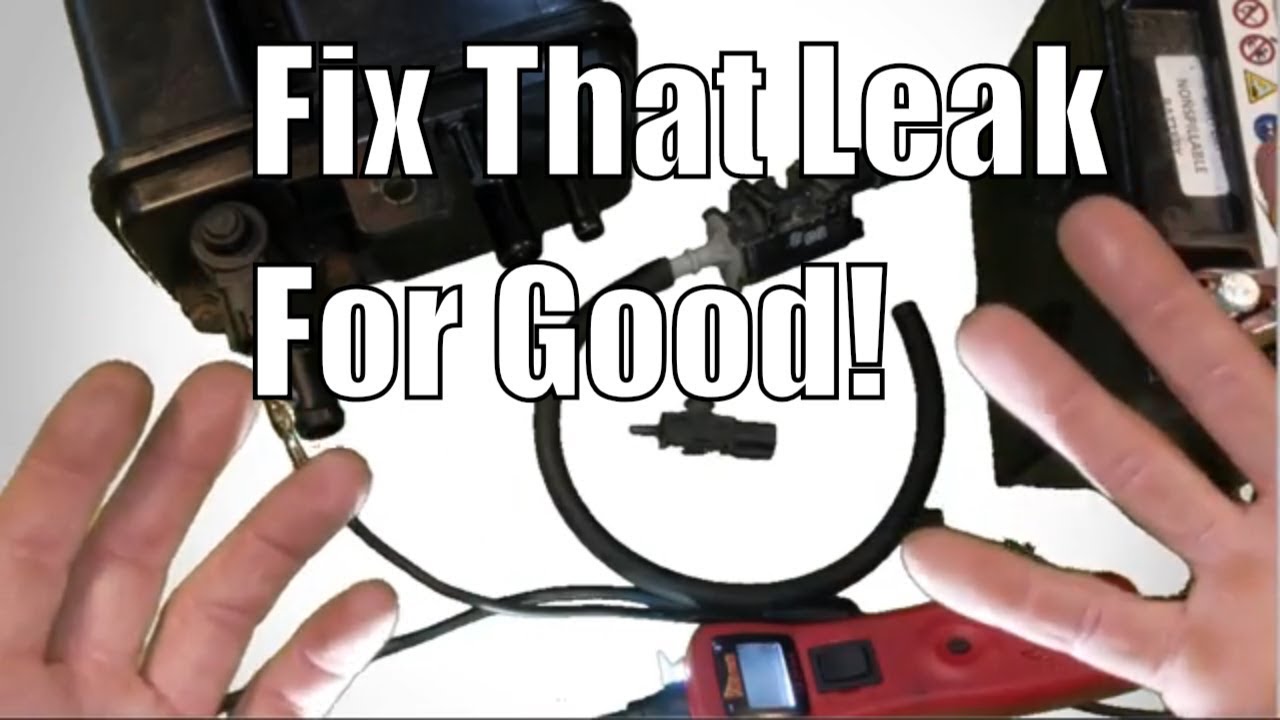
In this video, I’ll show you the most common cause of a small EVAP leak in a 2012 Dodge Grand Caravan. And will also show you where the EVAP system Integrity monitor is located and how to replace it.
I’m noticing a very high failure rate and these evaporative emission systems Integrity monitors. Providing your gas cap is good, and there are no other leaks in the system, that would definitely be the most likely cause of a P0456 in a Dodge Grand Caravan.
Diagnose check engine light sound storage code P0456 small EVAP system leak. Inspected the gas cap, and checked out good. Smoke EVAP system completely for leaks and none were found. also manually tested the purge valve to make sure it was not leaking, and that tested good as well. EVAP system Integrity monitor will need to be replaced.
Vehicle Application: 2012 200 3.6 2010 Town & Country 3.3 2011 Town & Country 3.6 2012 Town & Country 3.6 2010 Town & Country 3.8 2009 Town & Country 4.0 2010 Town & Country 4.0 2010 Grand Caravan 3.3 2011 Grand Caravan 3.6 2012 Grand Caravan 3.6 2010 Grand Caravan 3.8 2010 Grand Caravan 4.0 2010 Wrangler 3.8 2009 Routan 4.0 Customer Concern: Reoccurring check engine light with code P0456 Dodge small EVAP leak. Average Reported Mileage: 82065
Tests/Procedures: 1. Smoke-check the Evaporative Emission System. Remove the Evaporative System Integrity Monitor (ESIM) from the charcoal canister and run the smoke machine into the Evaporative Emission System. Tech Tips: Using a pen laser to shine around the lines and seals while smoke testing may help detect small leaks.
Understanding the P0456 Small EVAP Leak OBD-II Trouble Code: Evaporative Emissions System Small Leak Detected
When the engine control module (ECM) detects a small leak in the evaporative emissions system, it will trigger the P0456 OBD-II trouble code. This code typically indicates a problem with the fuel tank pressure sensor, the evaporative emissions (EVAP) canister, or a damaged or loose fuel cap.
Symptoms of a P0456 Trouble Code
Several symptoms can indicate a P0456 small EVAP leak trouble code, including:
A check engine light appears on the dashboard
Difficulty filling up the fuel tank
A strong fuel smell coming from the vehicle
Reduced fuel efficiency
Fuel leaking
Some Dodges also have a gas cap light
Causes of a P0456 Trouble Code
There are several potential causes of a P0456 trouble code, including:
A faulty fuel tank pressure sensor
A damaged or loose fuel cap
A clogged or damaged vapor canister
A leak in the EVAP system hoses or connections
A bad vapor purge valve
A bad vapor vent valve
The most common problem lies in the mechanical and electrical parts, like the EVAP vent valve and purge valve.
Diagnosing a P0456 Trouble Code
Diagnosing a P0456 trouble code typically involves connecting a diagnostic scanner to the vehicle’s OBD-II port to retrieve the trouble code and any related freeze frame data. This information can then be used to narrow down the potential causes and guide further testing. In most cases, you will need to hook a smoke machine up to the vapor system to check for leaks. It may also be necessary to remove and test the vapor vent valve and purge valve to ensure they are opening and closing and not leaking.
Checking the Fuel Tank Pressure Sensor
One of the first steps in diagnosing a P0456 trouble code is to check the fuel tank pressure sensor. This sensor is responsible for measuring the pressure inside the fuel tank and sending that information to the ECM. If the sensor is faulty or not sending accurate information, it can trigger a P0456 trouble code. An excellent way to check this is by adding pressure to the fuel tank and checking on the scan tool to ensure the pressure sensor changes value.
Inspecting the EVAP Canister and Hoses
Another common cause of a P0456 trouble code is a problem with the EVAP canister or hoses. The EVAP canister is responsible for storing fuel vapor, and if it is clogged or damaged, it can cause problems in the system. It is possible the charcoal inside the canister can come apart and cause debris to contaminate the EVAP system. Similarly, if the EVAP hoses or connections are damaged or loose, they can cause a leak.
Checking the Fuel Cap
A damaged or loose fuel cap can also trigger a P0456 trouble code. If the fuel cap is not sealed correctly, it can allow vapor to escape from the fuel tank, triggering a leak in the EVAP system. Always make sure your gas cap is in good condition and closed tightly.
Repairing a P0456 Trouble Code
Repairing a P0456 trouble code will depend on the specific cause of the code. Some typical repairs include:
Replacing a faulty fuel tank pressure sensor
Tightening or replacing a loose or damaged fuel cap
Replacing a clogged or damaged EVAP canister
Repairing or replacing damaged EVAP hoses or connections
Replaced a leaking or damaged EVAP canister
Replacing a failed EVAP purge or vent valve
Preventing Future P0456 Trouble Codes
To prevent future P0456 trouble codes, it’s important to properly maintain your vehicle and address any issues with the EVAP system as soon as they arise. This includes:
Regularly inspecting the fuel cap for damage or wear
Keeping the EVAP canister and hoses in good condition
Make sure the fuel cap is always securely tightened
Addressing any leaks in the EVAP system as soon as they are detected
By following these guidelines, you can help ensure that your vehicle’s EVAP system is functioning correctly and prevent the P0456 trouble code from appearing again. It’s also important to note that if you are experiencing any symptoms of a P0456 trouble code, you must have your vehicle inspected and diagnosed as soon as possible. Ignoring the problem can lead to further damage to the EVAP system and potentially more costly repairs in the future.
It’s also important to remember that this is only one of the many potential OBD-II trouble codes that can appear on your vehicle. It’s important to be familiar with the different codes and what they mean so that you can address the problem quickly and accurately.
In addition to the steps outlined above, it’s also important to keep an eye on the overall health of your vehicle. Regular maintenance, such as oil changes and tire rotations, can help prevent many problems and maintain your car running smoothly. By following these guidelines and staying vigilant about the health of your vehicle, you can help ensure that your vehicle is always running at its best and minimize the risk of OBD-II trouble codes like P0456.
Overall, the P0456 OBD-II trouble code is an indication that there is a small leak in the evaporative emissions system. By understanding the symptoms, causes, and potential repairs associated with this code, you can properly diagnose and repair the problem and prevent it from happening again. With proper care and attention, you can keep your vehicle running smoothly and minimize the risk of OBD-II trouble codes like P0456 Dodge.
It’s also important to note that while the information and steps outlined in this article can serve as a general guide, it’s always best to consult a mechanic or technician for an accurate diagnosis and repair of your vehicle. They will have the necessary tools and experience to diagnose and repair the problem correctly and can provide you with additional tips and recommendations to keep your vehicle running smoothly.
It’s essential to use quality parts and fluids when repairing your vehicle. Using cheap, low-quality parts can lead to further problems and costly repairs in the future. It’s always best to invest in quality parts to ensure that your vehicle is running at its best and to extend the life of your vehicle.
It’s also important to keep track of your vehicle’s service records and to have regular check-ups to detect and prevent issues from arising. Regular check-ups and service records can also help you identify patterns and trends that may indicate a potential problem, allowing you to address the issue before it becomes a more significant problem.
Understanding and addressing the P0456 OBD-II trouble code is an important step in maintaining your vehicle’s overall health and performance. By being aware of the symptoms, causes, and potential repairs associated with this code and taking steps to diagnose and repair the problem correctly, you can help ensure that your vehicle is always running at its best and minimize the risk of OBD-II trouble codes.
By following these guidelines and staying vigilant about the health of your vehicle, you can help ensure that your vehicle is always running at its best and minimize the risk of OBD-II trouble codes like code P0456 Dodge.
In this video will be diagnosing a cylinder misfire on a Cadillac DeVille 4.6 L Northstar motor. I will show you how to identify which cylinder is misfiring if you have a random cylinder misfire P0300 and once you find out what cylinder is misfiring I will also show you how to find out what’s causing the misfire.
Will be swapping spark plugs will be swapping ignition coils and watching the misfire graph on the scan tool to see if the misfire Falls the ignition coil or spark plugs. Also, show you how to pull fuel injectors with the GM Factory scan tool.
Hope this video was helpful if it was be sure to hit the Thumbs Up Button And subscribe to my channel thanks for watching
In this video, I go into detail on why a p0445 large evap system leak sets and hoe the gas vapor system works and why it will set a p0455.
There are a number of different reasons that could cause a p0455 and the #1 reason being the evap vent valve and they are pretty easy to test. In this video, I will be testing the vent valve and the
evap purge valve with a power probe http://amzn.to/2FN2r70
I will active them with the power probe then blow into them to make sure they are sealing properly. And if they don’t that will be the cause of your large EVAP leak. The vent valve is very common and I hope this video helps a few people save a little money on their auto repair bills. Thanks for watching the Fate Rate Mechanic.
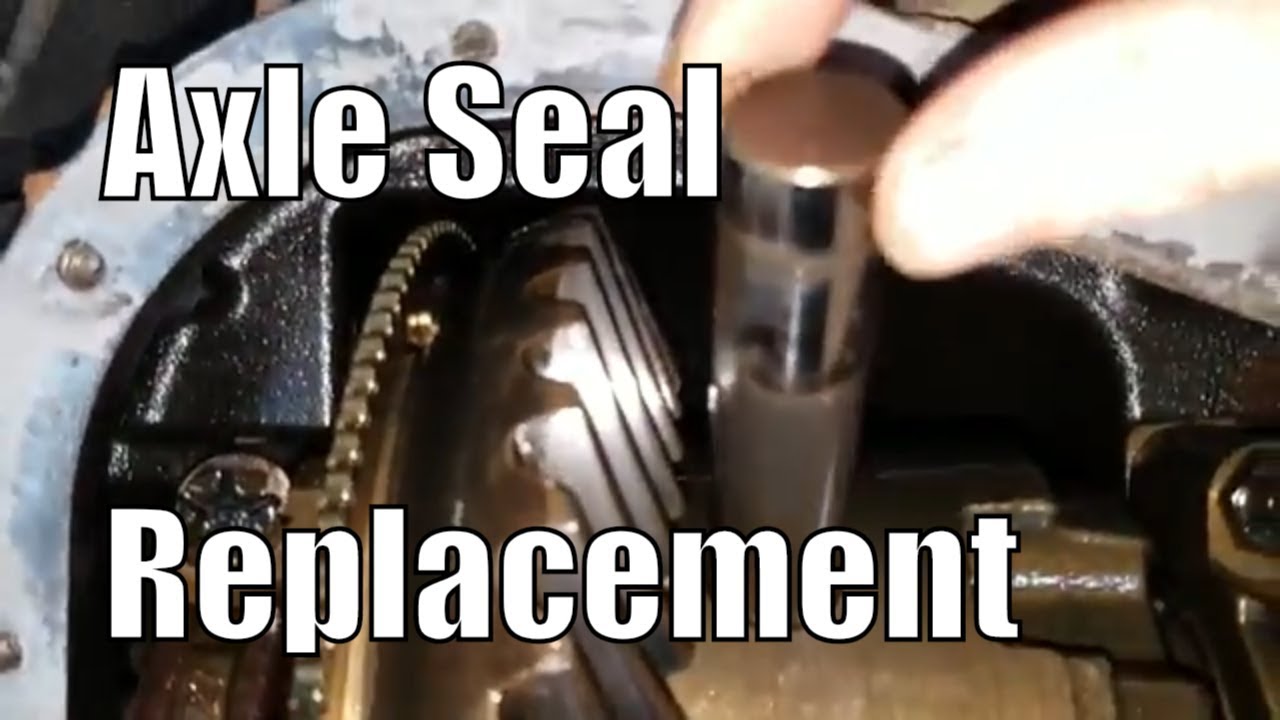
In this video, I will give you a very fast overview on how to remove and replace your rear axles so you can the leaking axle seals can be replaced. There are also a few tools you will need, you can get cheap on Amazon here are the links: