Most common cause of a p0101 “Mass Air Flow (MAF) Circuit/Performance Malfunction”?
Code P0101 Definition
Mass Air Flow (MAF) Circuit/Performance Malfunction
Code P0101 Meaning
The mass air flow (MAF) sensor measures the amount of air entering the engine. Check engine light code P0101 is set when the measurement of air entering the engine by the mass air flow sensor is outside of the manufacturer’s specified range.
Symptoms
Engine stalling
Difficulty starting
Lack of power
Rough idle
Causes
Dirty, obstructed, or faulty mass air flow sensor
Damaged or disconnected air intake boot (snorkel)
Vacuum leak
Clogged or improperly installed the air filter
Clogged catalytic converter / restricted exhaust
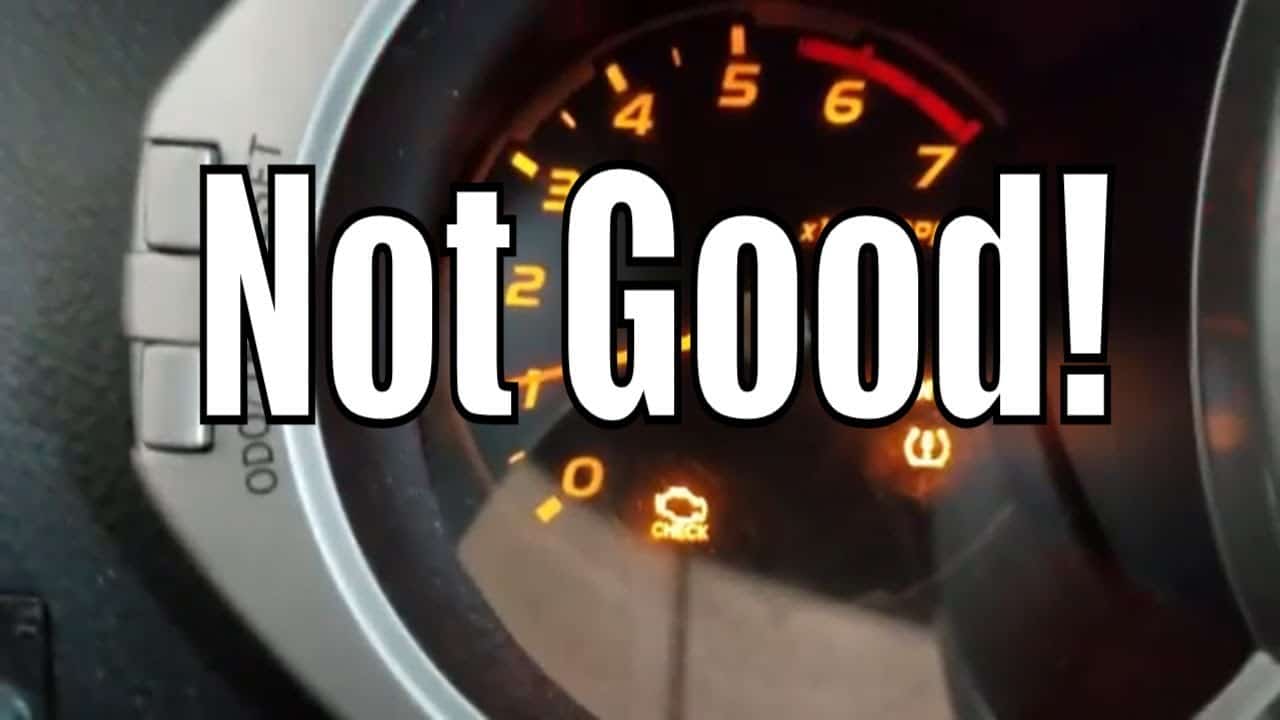
In this video I will go over and what it means if you have a flashing check engine light. And typically with a flashing check engine light, it means you have a catalyst damaging misfire.
I was working on a Toyota 4Runner in this video and removed and inspected the ignition coil. The computer was setting a P0304 for a cylinder 4 misfire. But any cylinder misfire can cause a flashing check engine light.
If you have any tracking flashing check engine light you should definitely get it repaired immediately due to the damage it can cause to your catalytic converter. And that is because the unburnt fuel is going into your exhaust system. Which can cause your catalytic converter to overheat and be ruined or damaged. A flashing check engine light is typically usually relatively inexpensive repair though. Most commonly involving spark plugs and or a bad ignition coil.
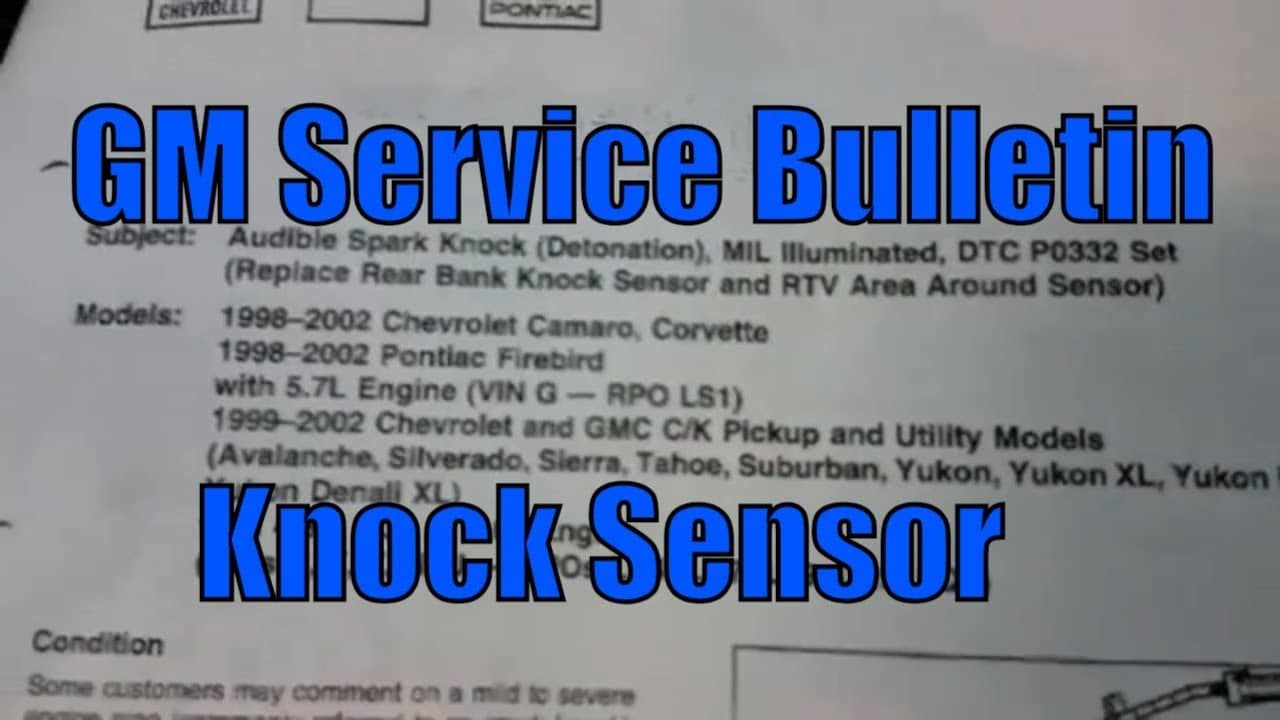
If you’re working on a Chevrolet truck and you’ve encountered diagnostic trouble codes P0332 and P0327, there’s a good chance you’re dealing with a problem related to the knock sensors. These sensors are responsible for detecting engine knock or detonation and sending signals to the engine control module (ECM) so that the ignition timing can be adjusted accordingly. In this article, we’ll explain what can cause these codes to set, what the repair entails, and what the service bulletin is recommending to prevent future failures of the knock sensors.
What Causes Knock Sensor Codes P0332 and P0327 to Set?
There are several reasons why the knock sensors on a Chevrolet truck may fail, but the most common cause is a problem with the wiring or connections. Over time, the wires that connect the knock sensors to the ECM can become corroded or damaged, which can cause the resistance in the circuit to change. This can cause the ECM to receive incorrect signals from the sensors, resulting in the engine running poorly or setting diagnostic trouble codes.
Another common cause of knock sensor failure is a problem with the sensors themselves. The sensors can become damaged or worn out over time, which can cause them to lose their ability to detect engine knock. This can also result in the ECM receiving incorrect signals and setting diagnostic trouble codes.
What Does the Repair Entail?
The repair for knock sensor codes P0332 and P0327 will vary depending on the specific problem you’re dealing with. However, in most cases, the first step will be to disconnect the blue powertrain control module (PCM) connector and check the resistance value on the light blue wire at pin 11 for sensor two and the dark blue wire at pin 51. Both should be on the blue PCM connector, and the value should be between 93K and 107K ohms.
If the resistance is low, the next step will be to check the circuit for a shorted wire or a shorted sensor. This typically involves checking the wires for damage or corrosion and testing the sensors for continuity.
If the resistance is high, the next step will be to check for a corroded wire or a poor connection at the knock sensor. This will typically involve checking the wires for damage or corrosion and inspecting the connections for signs of wear or damage.
The next step is to use an AC voltmeter and check the Hz on each wire listed above while tapping on the engine block. You should be careful not to tap on any plastic engine components. While tapping on the block, the frequency on the meter should go over 125 hz.
Finally, if the problem is a faulty sensor or damaged wiring, the repair will typically involve replacing the knock sensors and/or repairing the damaged wiring.
What Does the Service Bulletin Recommend to Prevent Future Failures?
The service bulletin for knock sensor codes P0332 and P0327 recommends that technicians use a specifically designed harness with the knock sensors. This harness is designed to provide a secure and reliable connection between the sensors and the ECM, which can help to prevent problems with resistance and continuity.
In addition to using the correct harness, the service bulletin recommends that technicians use dielectric grease on the connectors to help prevent corrosion and damage. This grease can help to protect the connectors from the elements and prevent damage from moisture, dust, and other contaminants.
Average Reported Mileage: 338036
Tests/Procedures: 1. Disconnect the Blue Powertrain Control Module (PCM) connector and check the resistance value on the Light Blue wire at pin 11 for sensor two and the Dark Blue wire at pin 51. Both of these should be on the Blue PCM connector. The value should be 93K to 107K ohms.
2. If resistance is low, check the circuit for shorted wire or shorted sensor.
3. If resistance is high, check for corroded wire or poor connection at the knock sensor.
4. Use an AC voltmeter and check the Hz on each wire listed above while tapping on the engine block.
5. While tapping on the block, the frequency on the meter should go over 125 hz.
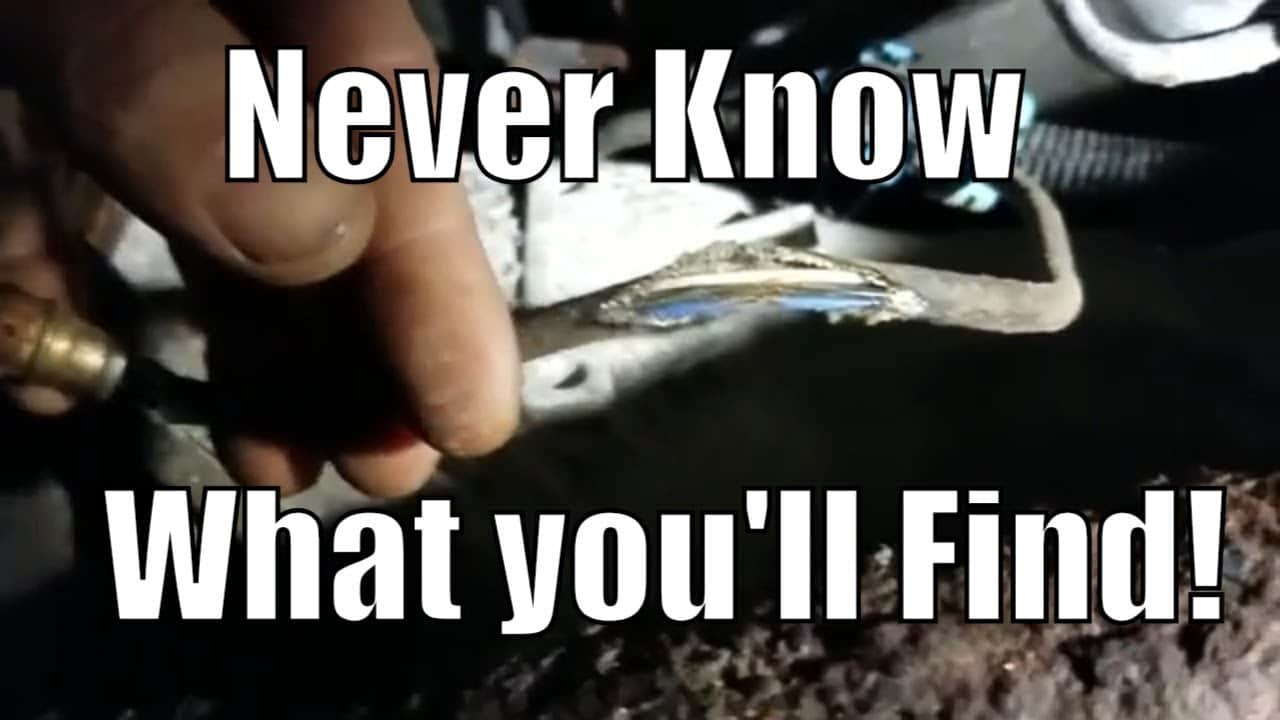
Diagnose check engine. Found light stored code p0141 for O2 sensor heater circuit bank 1 sensor 2. Drivers side after the catalytic converter.
Checked both fuses and the under hood fuse compartment for the O2 sensor heaters and both checked good. Accessed bank 2 O2 sensor after the cat and found 02 sensor wiring had been rubbing on front drive shaft on the O2 sensor side. Checked the vehicle side for power to O2 sensor heater and tested good. O2 sensor will need to be replaced due to wiring damage on this Chevy Silverado.
2004 Express 1500 5.3
2004 Silverado 2500 HD 6.0
2004 Silverado 3500 6.0
2004 Sierra 1500 5.3
2004 Sierra 2500 HD 6.0
Customer Concern: Setting trouble codes P0141 and P0161.
Average Reported Mileage: 106957
Tests/Procedures: 1. With a cold engine, turn the key on engine off and monitor O2 voltage. Within 2 minutes, the voltage should drop to about 150 mV.
2. Verify there is 12 volts on the Pink wires to both O2’s. If no voltage check the O2B fuse for blown.
3. If the fuse is blown check wiring to the sensor for chafing on the transmission or transfer case.
Tech Tips: Heater Current Test
• The PCM detects that the affected HO2S Heater current parameter is more than 1.375 amps or less than 0.25 amps.
• The above condition is met for 10 seconds.
Heater Resistance Test
Vehicle Application:
2001 Accord 2.3
Customer Concern: The check engine light is on with a code P0128 for cooling system performance problem.
Average Reported Mileage: 106000
Tests/Procedures: 1. Verify the thermostat is operating correctly, the Engine Control Module (ECM) determines actual engine coolant temperature by the run time of the engine and is watching the Engine Coolant Temperature (ECT) sensor to determine if the engine is warming up fast enough.
2. If the ECT sensor and thermostat is functioning correctly, then follow Honda TSB # 01-064 for a updated ECM for this code.
Tech Tips: If someone starts the vehicle and has the heat on high on a cold day the engine will take longer to warm up and the code may set. I believe the ECM software was revised so it does not expect the engine to warm up as fast.
Tests/Procedures: 1. Let the vehicle get cold and use a scan tool and verify the initial engine coolant temperature is between 20 and 95 degrees F and the initial intake air temperature is also between 20 and 95 degrees F. The difference between initial engine coolant temperature and initial intake air temperature should be a maximum of 3 degrees. Intake air temperature 2 seconds after starting the engine must be nearly equal to initial intake air temperature. Then start the engine and let it idle. Drive the vehicle at a speed between 25 – 55 mph (40 – 88 km/h) for at least 10 minutes.
. If you have difficulty duplicating the DTC, retest after turning off electrical components such as the audio system and A/C,
and try a different gear position.
. Drive the vehicle in this manner only if the traffic regulations and ambient conditions allow.
2. Verify the engine is getting warmed up (above 158 degrees F) in a reasonable amount of time. Given the drive cycle to see if the code resets, look for the engine temperature to reach the estimated engine coolant temperature of about 172 degrees in about 10 minutes of driving.
3. Feel if the lower radiator hose is getting hot indicating the thermostat opened and that there is circulation in the cooling system.
Tech Tips: If the actual engine coolant temperature is below the estimated engine coolant temperature (as estimated by the ECM), a malfunction in the thermostat valve is detected and a DTC P0128 is stored. Malfunction Threshold
. The ECT sensor output is 158ºF (70ºC) or less, and an estimated engine coolant temperature is 172ºF (78ºC) or more.
. The difference between the estimated engine coolant temperature and the ECT sensor output is 27ºF (15ºC) or more.
The TSB for an updated ECM is for 2000-2001 models only.
Long Crank or Extended crank, Hard start, and how to diagnose properly
In this video, I will show you how to quickly diagnose a long crank, extended crank, or a hard start on a Chevy pickup truck. 5.7l or 6.0l engines
This is just a recap of what you should do first to determine if your long crank is fuel-related.
First, before you try cranking the engine over, turn the ignition key to the run position, then back off without cranking the starter. This will run the fuel pump, and in most cases, you will be able to hear the pump running. Do this 3 to 4 times before you try starting it.
If, after you have circled the key a few times, the engine starts normally, then you now know for sure you have a fuel pressure leak-down problem causing your hard start.
How to Check Fuel Pressure
Once you have determined that your hard start is due to fuel pressure, you are going to need a fuel pressure gauge. You can get them relatively cheaply on Amazon if you don’t all ready have one. Here’s the link: Fuel Pressure Tester
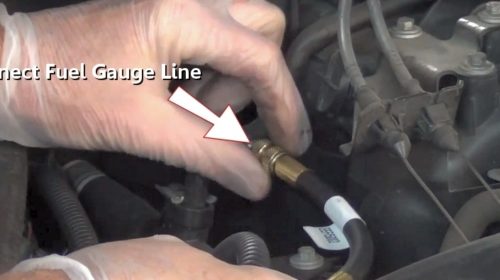
Hook your fuel pressure gauge up to the fuel pressure test port. ” I’ll show you where that is in the video below. Once the fuel pressure gauge is hooked up, cycle the ignition key on and off a few times to build fuel pressure in the system.
connecting fuel pressure gauge
Once the fuel system is pressurized, “it should be about 55 to 60psi” check to see if the fuel pressure starts to drop off. If the fuel pressure drops more than 10psi in ten minutes, then we definitely have a problem. Most fuel systems should maintain pressure for several hours, if not days, and when this fuel pressure bleeds off, you will experience a hard start or extended crank.
How to Isolate a fuel leak down the problem.
OK, so where could this fuel pressure be going? Well, there are several different places. He is a list then after I will show you how to check each one.
I will start from the most likely problem, so start from the top when checking.
Fuel Pump
Fuel pressure regulator
Injector
Line or fittings
OK, so there are four potential problems. Not too bad “right”? So now let’s go into how to check all the components so we can determine what is causing the extended crank or hard starting problem. Also, these diagnostic checks will work on almost all vehicle makes and models, not just chevy trucks.
How does the fuel system work?
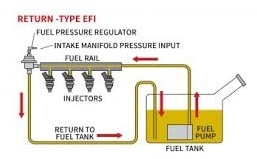
Before we can check these fuel system components, we need to know how an automotive fuel pressure system works. Well, the one we will be testing today is a return-type fuel system. This means the fuel that is not used is returned to the fuel tank, and pressure is held in the system by a check valve on the return side. The check valve on this Chevy truck is part of the fuel pump.
Here is an example of the return-type fuel pump system.
Return EFI Fuel System
How to check leaking fuel injectors for extended crank
OK, here we go. So first, we’ll need to block off or crimp the return fuel line to isolate the fuel injectors. You can use something like this to get the job done “Hose Pinch Pliers Set“.
Once we have the fuel injectors isolated, we want to check our fuel pressure gauge again to see if the fuel pressure is still dropping after blocking off the return line. If it is not, then the fuel injector is not our problem, and we know the return line is where it is going. So if that were the case, the fuel pump would be the culprit.
Now, if after blocking off the return line, we are still losing fuel pressure, it could still be one of our four possible causes. We will start by checking the fuel injectors. To do this correctly we will need to activate each injector individually. The easiest way to do this is with a scan tool capable of activating the fuel injectors. Most people do not have access to a scan tool with this capability. If this is the case, there is an alternative. It is possible to pulse the injectors with a unique hand-held tool.
Then will need to pulse each fuel injector while checking the fuel pressure gauge. After activating each injector, you will need to reenergize the fuel system by cycling the key on and off a few times. Record the pressure drop of each injector. If one drops more fuel pressure than the others, suspect a bad fuel injector.
If all the injectors check out well and dropped the same fuel pressure, then we will move on to checking the fuel pressure regulator.
How to check for a bad fuel pressure regulator?
This is probably the most straightforward check of all. First, remove the vacuum hose from the fuel pressure regulator and check for fuel. I will show you how to do this in the video below. If you have fuel coming out, then you know for sure the fuel pressure regulator is bad and will need to be replaced if the fuel injectors test well, along with the fuel injectors. The only thing left is the fuel pump or a leaking fuel line.
How to check your fuel lines for leaks
Checking for leaking fuel lines is self-explanatory; in most cases, a fuel smell will be very apparent. But you will still want to do a quick visual inspection of the fuel system for leaks and repair it as needed.
Last but not least, let’s check the fuel pump.
How to check the fuel pump for a pressure leak?
Now that we know all of our other components are good. Now we can easily isolate the fuel system.
Once the fuel system is energized, block off or crimp off the feed and return lines using a tool like this “Hose Pinch Pliers Set”. The hose goes to the fuel rail, and the hose goes back to the fuel tank. If the system holds fuel pressure, we know we have a bad fuel pump.
Check out the video below for a few quick, easy checks you can make. Help support my blog by liking or sharing this content if it is helpful to you in any way. Thanks
I’m Reggie Curtis, AKA “The Flat Rate Mechanic” I am a 25yr master certified automotive mechanic. My goal here is to help people repair their cars. Automotive repairs are costly and time-consuming, and over the years, I have learned mean tips and tricks that can save people time and money on their automotive repairs I would like to share with the world. Find out more about me on social sites: Flat Rate Mechanic.