Categories
Automotive Repair Videos Check Engine Light Hybrid Vehicles

P1570 P0A7F Honda Civic Hybrid High Voltage (HV) battery test

OK, we are working on a honda civic hybrid with some high voltage battery codes along with some charging system problems with the accessory battery. This video is packed with some great diagnostic info on these honda civic hybrid system with trouble codes P1570 or P0A7F

Vehicle Application:
2006 Civic 1.3
2007 Civic 1.3
2008 Civic 1.3
2009 Civic 1.3
Customer Concern: The check engine light and IMA light are on with code P0A7F, indicating the High Voltage (HV) battery module has deteriorated.
Average Reported Mileage: 140294
Tests/Procedures: 1. Refer to Honda Technical Service Bulletin (TSB) 09-025. This code indicates the High Voltage (HV) battery is failing and will need to be replaced. Then the vehicle will need to be reflashed. Also, Honda has extended the warranty on the battery, refer to TSB 12-077.

2. Perform AR&D Battery Test to locate the weak battery cell.

Vehicle Application:
2003 Civic 1.3
2004 Civic 1.3
2005 Civic 1.3
2006 Civic 1.3
2007 Civic 1.3
2008 Civic 1.3
Customer Concern: The check engine light is on and there is a code P1570 indicating a code for the HV battery individual voltage problem.
Average Reported Mileage: 110373
Tests/Procedures: 1. To properly test this code you will need the correct scan tool to look at the HV battery blocks and look for a voltage difference. Honda has a High failure rate on the HV battery and has extended the warranty.


Okay, Flat Rate Mechanic here today we’re going to be diagnosing our check engine light and a battery light on this 2006 Honda Civic Hybrid.

We’ve got a couple of stored codes. We have a p1570and a p0a7f which are both pertaining to the high voltage battery pack for this hybrid. So basically we’re gonna go in, I have the factory Honda scan tool hooked up to this right now.

We’re going to go ahead and connect to this vehicle. We’re going to pull codes and take a look at the high voltage battery cells to see If we have a bad cell. If we do we’re going to have to replace it. I’m gonna show you where the high voltage battery pack is, how to turn it on and off.

I also did a little research on this. I’ll give you some diagnostic tips that I found on Identifix. There’s also an updated warranty information I will give you towards the end of this video. They have extended the warranty on high voltage batteries. They’re having a lot of problems with them.

So I’m all into the scan tool here, we’re gonna go ahead and access the electronic powertrain. From here we will go ahead and go to the data list. We’re gonna see if we can look at the voltages in this battery pack and make sure all the cells are functioning properly. This is a pretty easy check to do if you have a scan tool that can read engine data.

Go down to IMA battery module one two three all the way up to 11 and we’re just looking at these voltages. They’re all about 15 volts so that’s actually not looking that bad and that’s all normal at the moment in my opinion. Probably what I’m gonna do next is do a starting and charging system test.

On the test drive, I also had a battery light on on the dash, so I’m gonna go ahead do it starting and charging test make sure to the DC to DC converter is charging the 12-volt accessory battery.

If all that tests well I’m probably gonna come back and revisit this high voltage battery and take a little deeper dive into this and see if I can see any problems with that.

All right um let’s take a look at some of this information that I pulled. Like I said extending the warranty on this. Honda has a high failure rate on HP battery and has extended its warranty. Here is the extended warranty information. It looks like they’ve extended it 11 years 170,000 miles years 162,000 miles.

So pretty good coverage as far as this high voltage battery goes but I’m suspecting this vehicle is not gonna need that. I think we have a charging problem. Well, I guess where this is a hybrid, this car does not have an alternator it just has a DC to DC converter that charges a battery with the high voltage battery.

Where we have a battery light on in the dash I’m definitely suspecting we got a charging problem. I’m going to go underneath the hood here in a minute and test that but I want to show a few pictures of where the battery is located and also where the DC to DC converter is located.

Where is the high voltage battery and the DC to DC converter?
It’s going to be behind the rear seat. You’re going to have your switch and access panel to the right you have to remove the bolt and you can shut it off all power to the rest of the system from the high voltage battery. Witch you will always want to do before any testing or servicing.

To service this module as you can see there’s an access panel behind the rear seat that is gonna be removed to get to the high voltage battery and the DC converter. It’s fairly easy to access.

We’re gonna go under the hood here and see if we’re getting voltage to this accessory battery. As you can see on our battery tester we’re only on 11.6 volts which just means this battery is discharging right now, it’s not charging. So I’m suspecting we have a DC to DC converter issue.

I’m going to access the DC to DC converter and make sure all of the connections are tight and clean. If all that checks out pretty good this car is going to need a DC to DC converter.

Also when I was looking at the service information I was also able to find that they’re having issues too. The is a service bulletin on the wires getting pinched in the rear trunk and there’s is a hundred amp fuse that blows when this happens so we’re gonna check that as well, once we get the rear seat taken out.

I’m suspecting, in this case, but probably not every case this high voltage battery pack is gonna be OK. We’re gonna go after the DC to DC converter.

Okay so I want to take a second look at this voltage and it’s continuing to drop so I’ve determined that this thing definitely needs a DC to DC converter in order to get this axillary battery charging again. We’re also gonna put a new battery in this as it was also testing bad.

I’ll also leave some other diagnostic information and some tips and tricks on how to diagnose these HV or high voltage batteries on this hybrid Honda Civics. Seems like they’re starting to be pretty big issues as these vehicles get of age. Typically 180 to 200 thousand miles.

Until next time Flat Rate Mechanic!

Categories
Automotive Repair Videos Check Engine Light

P0021 P0011 NISSAN INFINITI Intake Valve Timing Control

In this video, I will be going over a few easy checks you can do if your Infiniti or Nissan has a code p0021 or a p0011

Variable Valve Timing Solenoid: https://amzn.to/2N43iQv
Pocket Scan tool I use: https://amzn.to/2IuVqUE

Other related videos:
Exhaust valve timing control learning procedure Infiniti G35 P0014 P0024 (no scan tool needed) 

Variable Valve Timing Code p0011 p0010 p0012 p0013 p0014 p0028 (Don’t Waste Money) 

Vehicle Application:
2008 EX35 3.5
2009 EX35 3.5
2010 EX35 3.5
2004 G35 3.5
2005 G35 3.5
2006 G35 3.5
2007 G35 3.5
2008 G35 3.5
2003 I35 3.5
2004 Altima 3.5
2003 Maxima 3.5
2004 Maxima 3.5
2004 Quest 3.5
Customer Concern: Setting codes P0011 and P0021 for Intake Valve Timing (IVT) control.
Average Reported Mileage: 102846
Tests/Procedures: 1. Check the engine oil level and condition. If the engine oil is low, it could set these codes.

2. If the oil is good, check for power on the Red/Yellow wire bank 1 and an on/off signal at 2000 RPM on the Red wire. On bank 2, check the Red wire for power and the Green wire for the on/off signal when the engine is a revved to 2000 RPM.

3. If the signal is good, then the Engine Control Module (ECM) is trying to control the camshaft timing. Manually ground the signal wires to see if a change in the way the engine idles can be heard. If so, the solenoids are working. If not, the solenoids could be stuck.

4. The resistance of the IVT solenoids is 7.5 ohms at 70°F.
Tech Tips: The Engine Control Module (ECM) sends on/off pulse signals to the camshaft timing control valve, depending on driving status.

https://youtu.be/bK8rjYCJQNI

The one tool every mechanic should have: http://amzn.to/2FN2r70

Subscribe here: https://goo.gl/j1pCfn

Connect with me:
FaceBook: https://goo.gl/rKg2Bv
Twitter: https://goo.gl/mmpqts
Instagram: https://goo.gl/NCjRhM
Google Plus: https://goo.gl/6AyJz3

For Promotional offers, consulting, training, sponsorships or other inquiries contact me at FlatRateMechanic1@gmail.com

The Flat Rate Mechanic. 25 year ASE Master Automotive Technician and Advanced level ASE certified

Categories
Automotive Repair Videos Check Engine Light

P0171 p0174 System Lean bank 1 bank 2 Trailblazer “Fixed with no parts”

Customer Concern: Malfunction Indicator Lamp (MIL) on. Powertrain Control Module (PCM) DTC P0171.
Average Reported Mileage: 100343
P0171 p0174 System Lean Trailblazer “Fixed with no parts”

Mass air flow sensor cleaner: https://amzn.to/2HbyNJm
Air filter and tune up kit for Chevy Trailblazer: https://amzn.to/2vt1pbA

Tests/Procedures: 1. Check for a vacuum leak by spraying water around the engine and see if it reacts.

2. At the Mass Air Flow (MAF) sensor connector locate, backprobe and ground the Yellow wire. Reset fuel trims using the scanner and see if Long Term Fuel Trim (LTFT) stay in single digits.

3. Access the fuel system test port, near the fuel tank and fuel filter.

4. Connect a pressure gauge to the port.

5. Fuel pressure should be steady at all loads, 50-57 PSI.

6. Verify that the fuel pressure value is between the range of 50-57 and not dropping under load.

7. Check fuel filter for restriction.

8. Clean the throttle body assembly.

9. Run cleaner through the injectors.

Vehicle Application:
2006 Rainier 4.2
2006 Trailblazer 4.2
2006 Trailblazer EXT 4.2
2006 Envoy 4.2
2006 Envoy XL 4.2
2006 Ascender 4.2
2006 9-7x 4.2

The one tool every mechanic should have: http://amzn.to/2FN2r70

Categories
Check Engine Light Mercedes

P0171 P0172 P2187 Mercedes PCV Valve Replacement ” Running Lean”

Diagnose check engine light. Stored code p2187, p0171, P0174 for system running lean. Smoked intake for vacuum leaks and none found. Found engine vacuum in crankcase due to failed positive crankcase ventilation valve. Crankcase ventilation valve will need to be replaced.

PCV Valve: https://amzn.to/2IznkiY
Crank Case Breather: https://amzn.to/2IznkiY

Engine light is on with fuel trim fault codes and there is an engine knocking noise at times.
Average Reported Mileage: 69772
Tests Procedures: 1. Check for excess crankcase vacuum. Remove the dipstick and connect a vacuum gauge.

2. If vacuum is found, then the pressure regulator valve for the crankcase has failed. See related documents for a picture of the location. Read bulletin LI01.20-P-046639.

3. If no issues are found, then inspect purge valve for being stuck open per bulletin LI47.30-P-049162.

4. Also check for leaking intake per bulletin T-B-09.20/27b.

5. Read bulletin LI09.20-P-061233 and the attached photos for locations of leaks.

6. Verify all recalls and campaigns have been performed.

7. Inspect for incorrect or blocked air filters.
Tech Tips: The pressure regulator valve prevents a vacuum -50 mbar from building up in the crankcase due to the intake manifold vacuum when the gases are extracted from the crankcase. When the crankcase pressure regulator fails, engine oil can get sucked into the combustion chamber.

Categories
Automotive Repair Videos Check Engine Light

Ford P1450 Fuel Tank Vacuum “Most Common Cause” & How to Test

Customer Concern: Ford P1450 Fuel Tank Vacuum “Most Common Cause” The Check Engine Light (CEL) is on, and the Powertrain Control Module (PCM) sets Diagnostic Trouble Code (DTC) P1450.

The most Concern Cause of a P1450 is the EVAP Purge Valve

An evaporative (EVAP) purge valve is a component of a vehicle’s EVAP system, which is responsible for controlling the flow of fuel vapor from the EVAP canister to the engine. The valve is typically controlled by the engine control module (ECM), which opens and closes it based on various sensor inputs, such as the engine’s vacuum level or the fuel level in the tank. When the valve is open, fuel vapor is allowed to flow from the canister to the engine, where it is burned along with the air/fuel mixture. When the valve is closed, the flow of vapor is stopped, preventing it from entering the engine. The purpose of the EVAP system is to prevent hydrocarbon emissions from escaping into the atmosphere.

Fuel Tank Emissions Vapor Canister Purge Valve Solenoid Assembly w/ Hoses & Bracket Fits 2013-2014 Ford Fusion: https://amzn.to/2EklIHh

Pocket Scan Tool: https://amzn.to/2JmtJ24

Tests/Procedures:

1. Check the canister vent solenoid and related hoses for any restrictions and repair as needed. Be sure the canister vent solenoid is open at rest as it should be.

2. If the solenoid and hoses are OK, access the charcoal canister. Verify the canister is not restricted. Replace as needed if it is, and recheck the operation.

3. The purge valve is a normally closed solenoid. Verify it is not stuck open and apply a vacuum to the fuel tank.

4. If the purge valve checks out OK and the canister appears free of any restriction, remove the fuel vent hoses as close to the fuel tank as possible. Check the hoses from the tank forward for any restrictions. If the hoses are OK and no external restrictions are found, we suspect a possible problem with the fuel tank vent valve(s) at the top of the fuel tank.

Tech Tips: Anything that causes a restriction in the venting of the Evaporative Emission (EVAP) system can cause a code P1450.

The one tool every mechanic should have: http://amzn.to/2FN2r70

One of the most common diagnostic trouble codes (DTCs) encountered on Ford vehicles is the P1450 code. This code indicates that there is a problem with the fuel tank vacuum. The P1450 code is set when the powertrain control module (PCM) detects a malfunction in the vacuum system that is used to control the EVAP system.

What Causes the P1450 Code?

There are several potential causes of the P1450 code, including a vacuum leak in the fuel tank, a malfunctioning vacuum switch, or a malfunctioning vacuum solenoid. The most common cause of this code is a vacuum leak in the fuel tank. This can occur due to a damaged or cracked fuel tank, a loose or missing gas cap, or a malfunctioning fuel tank pressure sensor.

How to Test for the P1450 Code

The first step in diagnosing the P1450 code is to check for any vacuum leaks in the fuel tank. This can be done by performing a vacuum test on the fuel tank. To perform this test, you will need a vacuum pump and a vacuum gauge.

  1. Start by disconnecting the vacuum hose from the fuel tank pressure sensor.
  2. Connect the vacuum pump to the disconnected hose and apply a vacuum to the fuel tank.
  3. Use the vacuum gauge to measure the amount of vacuum in the fuel tank.
  4. If the vacuum gauge reads less than the specified amount, there is a vacuum leak in the fuel tank.
  5. Check for any visible leaks or damage to the fuel tank.
  6. If the fuel tank is damaged or leaking, it will need to be replaced.
  7. If the fuel tank is not damaged or leaking, the next step is to check the vacuum switch and solenoid.
  8. Check the vacuum switch and solenoid for proper operation and replace them if necessary.
  9. Clear the DTCs and test drive the vehicle to see if the P1450 code returns.

The P1450 code is a common issue faced by many car owners, but what exactly does it mean? We will explore the causes, symptoms, and solutions for the P1450 code, as well as provide tips on how to prevent it from happening in the future.

II. What is the P1450 Code? A. Definition: The P1450 code refers to a problem with the evaporative emission control system (EVAP) in a vehicle. B. Explanation of the EVAP system and its role in a vehicle’s emissions control

III. Causes of the P1450 Code A. Faulty EVAP canister purge valve B. Leaking fuel tank or fuel filler neck C. Clogged EVAP canister D. Wiring or electrical issues E. Failed vacuum switching valve F. Failed EVAP canister vent control valve

IV. Symptoms of the P1450 Code A. Check Engine Light illumination B. Failed emissions test C. Reduced fuel efficiency D. Difficulty starting the engine E. Sulfur-like odor from the fuel system

V. Solutions for the P1450 Code A. Diagnosing the problem: Using a OBD-II scanner to diagnose the specific cause of the P1450 code. B. Repairs: Fixing the specific problem identified during diagnosis, such as replacing a faulty purge valve or cleaning a clogged EVAP canister. C. Cost: The cost of repairs can vary depending on the specific cause of the P1450 code, but it is important to address the issue as soon as possible to prevent further damage.

VI. Prevention Tips A. Regularly scheduled maintenance: Having regular check-ups on your vehicle can help identify potential issues before they turn into bigger problems. B. Proper fueling: Using the correct type of fuel and avoiding overfilling the fuel tank can help prevent leaks and other issues related to the EVAP system. C. Avoiding extreme temperatures: Extreme hot or cold temperatures can damage EVAP system components, so it is best to avoid leaving your car in extreme conditions.

VII. Conclusion A. Recap of key points B. Emphasizing the importance of addressing the P1450 code as soon as possible C. Encourage readers to share their own experiences with the P1450 code and any tips they have for addressing it.

Categories
Automotive Repair Videos Check Engine Light

Code P0410 P0411 P0412 Secondary Air Injection “Test this First”

A common issue with GM, VW and Audi vehicles are air injection flow codes like p0410, p0411, and p0412.
If you check engine light is on with any of these engine codes then in this video I will show you one of the most common faults when it comes to air injection codes and how to check if your air pump is working. I have personally seen my fair share.

Pocket Scan Tool: https://amzn.to/2GDzc2z
VW Air Injection Pump: https://amzn.to/2uRuaym

The one tool every mechanic should have: http://amzn.to/2FN2r70

Categories
Automotive Repair Videos Check Engine Light Diagnostic Tools

BMW P0014 P0015 Intake Exhaust valve timing “Try This First”

2007 BMW X3 3.0SI 3.0L, L6
Customer Concern: Check engine light is on.
Tests/Procedures: 1. Check for sludging of oil and lack of oil changes during the vehicle history.

VVT Solenoid: https://amzn.to/2IczM7N
Pocket Code Reader: https://amzn.to/2DZpdCM
Power Probe tester: http://amzn.to/2FN2r70

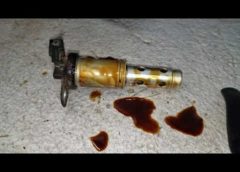
Sludging of the oil and burnt oil can lead to the camshafts not being able to adjust as commanded by the engine control module. Oil pressure is controlled by solenoids mounted on the engine near the camshafts. Poor flow and lack of oil pressure will cause slow or no movement of the camshaft timing mechanism.

2. Check the solenoids themselves for power at one of the wires to the solenoid. Ground the other wire at the solenoid and the solenoid should click. If not, the solenoid is faulty. Different codes should be set for faulty solenoids, but it should be verified anyway.

3. Remove the solenoids and look at the oil or lack of oil, that comes out of the solenoids when removed. If gummed up and burnt, oil supply could be an issue.

4. Incorrect timing of the engine can also lead to this code being set. If the engine was recently disassembled and the proper tools were not used for camshaft timing, the engine will need to be set up properly.
Tech Tips: Both fault codes relate to incorrect camshaft timing or camshaft timing control problems.

Categories
Check Engine Light

P0420 HONDA Catalyst System Efficiency (Bad Cat??)

Repair Information for P0420 Honda code. Learn what does P0420 Honda Catalyst System Efficiency Below Threshold Bank 1 means and how to diagnose p0420 code


Diagnosing a P0420

Tests/Procedures: 1. Verify that the fuel trims on both banks are good at idle and when driving the vehicle. It is possible to have the fuel trim at 20% and not set a fuel trim code and cause the catalytic converter to not function properly.

2. If the fuel trim is only off on one bank, look for a faulty Air/Fuel (A/F) Ratio sensor, a vacuum leak or a fuel delivery problem on the bank the fuel trim is off on.

3. If the fuel trim is good and within 10% plus or minus, drive the vehicle at a steady throttle, steady cruise and monitor the rear O2 sensor operation. If the rear O2 sensor is switching rich to lean, the catalytic converter is not storing oxygen correctly. When the catalytic converter functions correctly, the rear O2 sensor should not switch. If the rear O2 sensor switches at a steady cruise while driving, the catalytic converters are failing.

4. Since this vehicle uses Air/Fuel (A/F) Ratio sensors instead of front O2 sensors, if the vehicle has high mileage, it is always wise to replace the front A/F Ratio sensors if the catalytic converters are faulty and need to be replaced. In some cases, the A/F Ratio sensors can cause a false code P0420.


On the vehicle in the video, The only reason the cat was replaced on this car was due to rust and it set the p0420 the day after. And here is the follow-up video to the first on. A complete guide to diagnosing a p0420 on a Honda CRV

Below are some very useful comments left on my subreddit post. That could definitely be useful in diagnosing a p0420 code.

 Using Fuel Trim Data to Diagnose a P0420 code (Rich or Lean Condition)

Response:

So, this is your original content? I did not realize you created the video; That’s awesome!

I was looking at your scan PIDs in the video and noticed that one was front O2 and it was hanging at 600mv; that must be a calculated value in the scan tool itself then. It might be interesting to look at the fuel trims to see if the PCM is commanding a lean correction in response to a rich mixture. If your trims are centered then there probably is not a mixture problem, but if fuel trims are maxed out lean I think I would investigate a little to find out why.

Air/fuel sensors are sent a bias voltage from the PCM; I believe the exact voltage is different for different manufacturers. The output voltage from the sensor varies above and below that median (lambda). Lambda goes negative when the mixture is rich, and positive when the mixture is lean. It is supposedly a much more precise measurement of fuel mixture than a traditional O2 sensor can provide.

I read somewhere that you can convert lambda value (if it shows on your scan tool) to actual air/fuel ratio measurement by multiplying lambda by 14.1

o2 sensor graph good converter

o2 sensor graph bad converter

Yeah, aftermarket CATS scare me also. I have learned the hard way to never use aftermarket CATS on a Subaru, for example. The expensive OE cats on Subarus seem to have barely enough catalyst material for them to pass the cat monitor, so what do you think a cheaper aftermarket one will do? The last time I tried an aftermarket CAT on a Subaru it was from a US manufacturer called Eastern Catalytic, which was supposed to be a top quality brand according to my sales rep. I spent hours on the phone with their tech support and even had several long phone conversations with one of their engineers when the second CAT they sent was setting P0420 faults. They never did figure out what the problem was, but after I installed an OE Subaru one the fault was gone and never returned. Of course, I never got paid for any of those hours I had to spend chasing the problem after I installed their product. If sell an aftermarket cat because the customer insists on one, I have them sign a disclaimer on the RO that states converter related fault codes will NOT be covered under our repair warranty if the MIL should come on afterward.

P0420 codes and Exhaust Leaks

By the way, you didn’t say where it was rusted, but if the original CAT you replaced was rusted through and leaking, should there not have been a Catalyst fault stored because of the air entering the exhaust stream before the repair? If not the customer may have cleared the fault code before you got the car; the first thing many people do if their MIL pops on is stop in at Autozone and have their memory wiped. Maybe this is a pre-existing condition they never bothered to tell you about. Of course, that never happens, right?