# Hybrid Battery Inverter Removal on Chevy GMC Truck
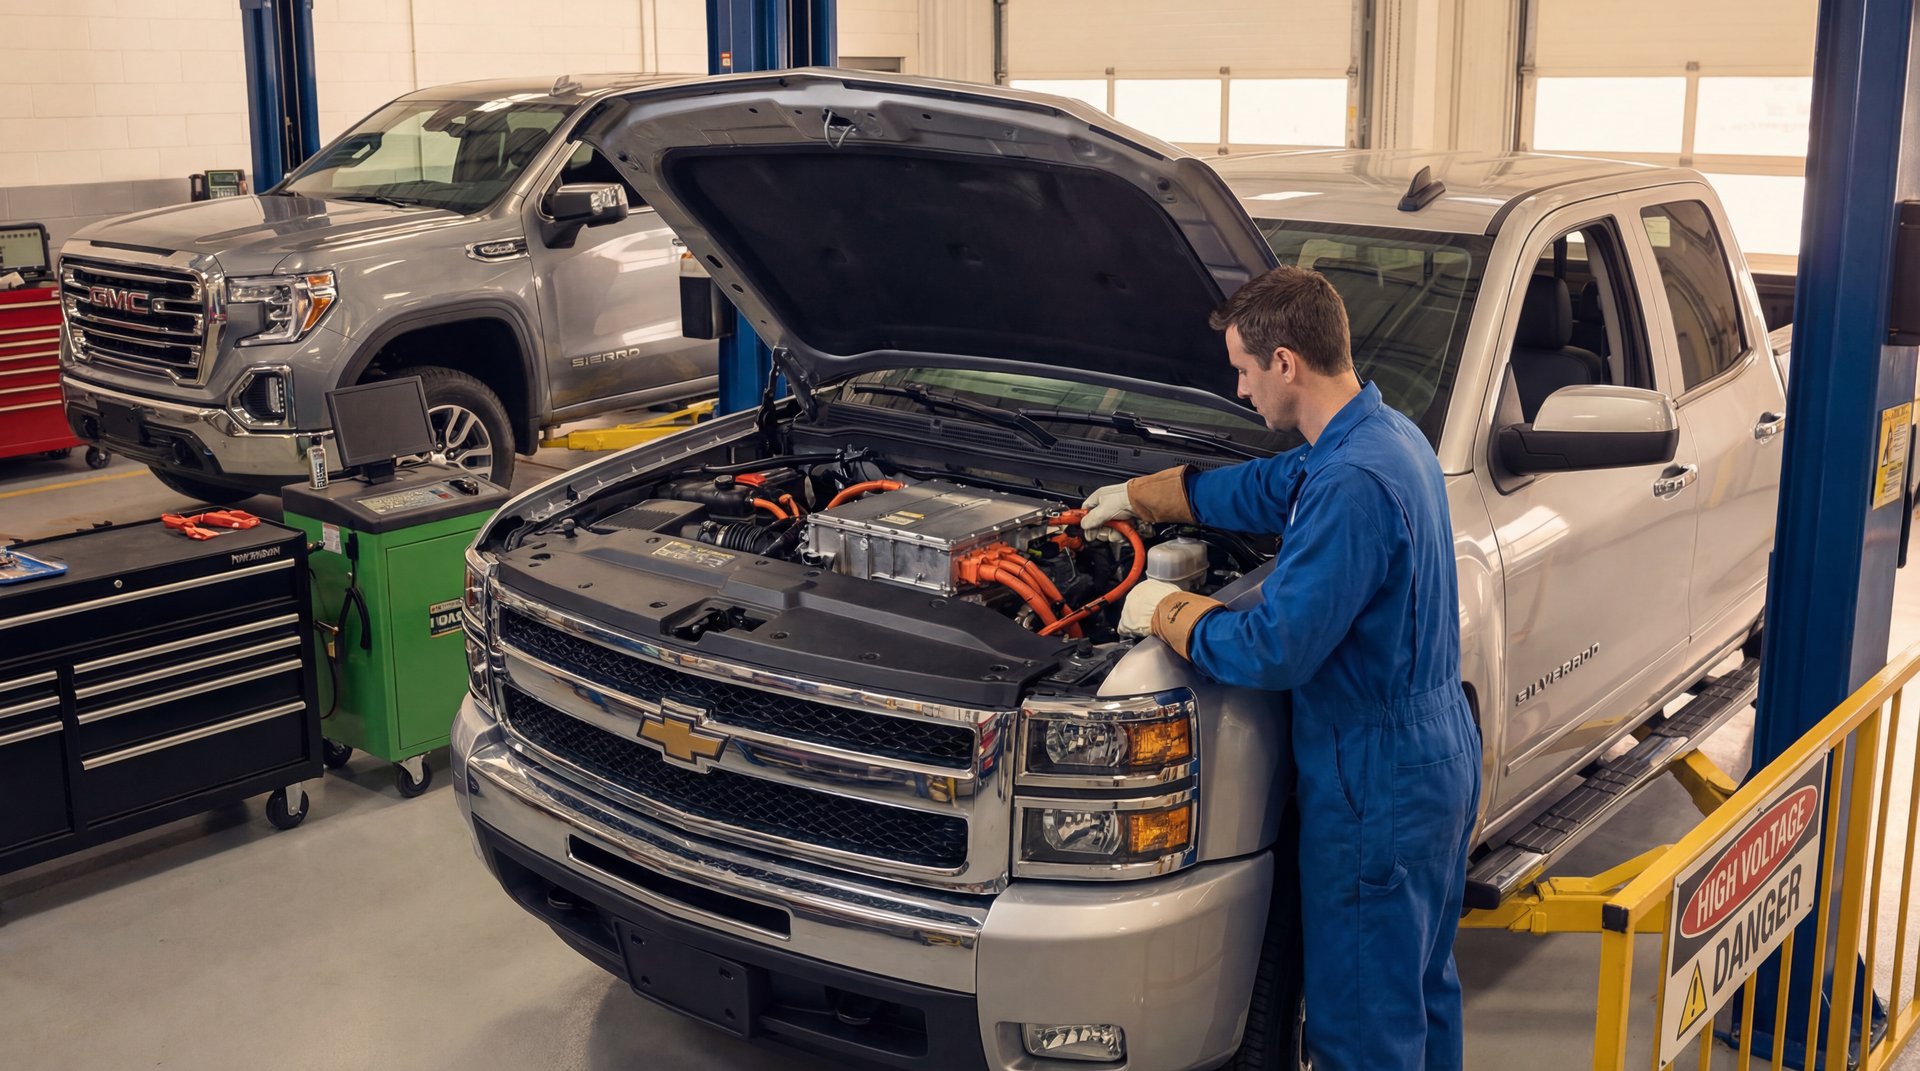
Alright guys, today we’re gonna walk through removing the power inverter on a Chevy hybrid truck. I actually needed to get to the power steering control module on this one, which sits right underneath the inverter, so we had to pull the whole thing out to access it. This job might seem intimidating because you’re dealing with high voltage, but if you follow the proper procedures and disable everything correctly, it’s really not that bad. I’m gonna show you exactly how to safely disconnect the high voltage system and get that inverter out of the way.
⚠️ Warning
We’re dealing with high voltage here – up to 300 volts DC. You need proper safety equipment including Class 0 insulating gloves and a multimeter rated for at least 1,000V. If you don’t have the right equipment or training, seek professional help. I didn’t go over all the safety precautions in detail in my video, so make sure you understand high voltage safety before attempting this yourself.
🔧 Tools Needed
10mm socket and ratchet
Tamper Torx bit set
High voltage rated multimeter (CAT III 1,000V)
Class 0 rubber insulating gloves with leather protectors
Safety glasses rated for electrical work
Basic hand tools for battery disconnect
Disabling the High Voltage System
The first thing you gotta do – and this is critical – is disable the high voltage battery. On these Chevy and GMC hybrid trucks from 2009 to 2013, the hybrid battery sits right under the rear seat. So what we’re gonna do is push that rear seat up and you’ll see there’s a plastic cover that just clips in place over the battery. Just pull that cover straight up and it’ll pop right off.
Once you get that cover off, you’re gonna see the service disconnect plug sitting right there in the battery pack. This thing basically just sits in there and disconnects all the power going to that inverter up front. The way it works is you pull up on the handle and then pull it straight out. Don’t yank on it sideways or anything – just straight up and then straight out.
What that’s going to do is disconnect power to the power inverter up top, cutting off the high voltage to the system.
Flat Rate Mechanic
Now here’s the thing – just because you pulled that disconnect doesn’t mean you should assume everything’s dead. You’re gonna want to test across the terminals with your multimeter to make sure you actually have no voltage. Usually it is disabled once you pull that plug, but you always want to verify. Better safe than sorry when you’re dealing with this kind of voltage.
The service disconnect handle is GM part number 19399162 if you ever need to replace it. These don’t usually go bad, but it’s good to know the part number just in case.
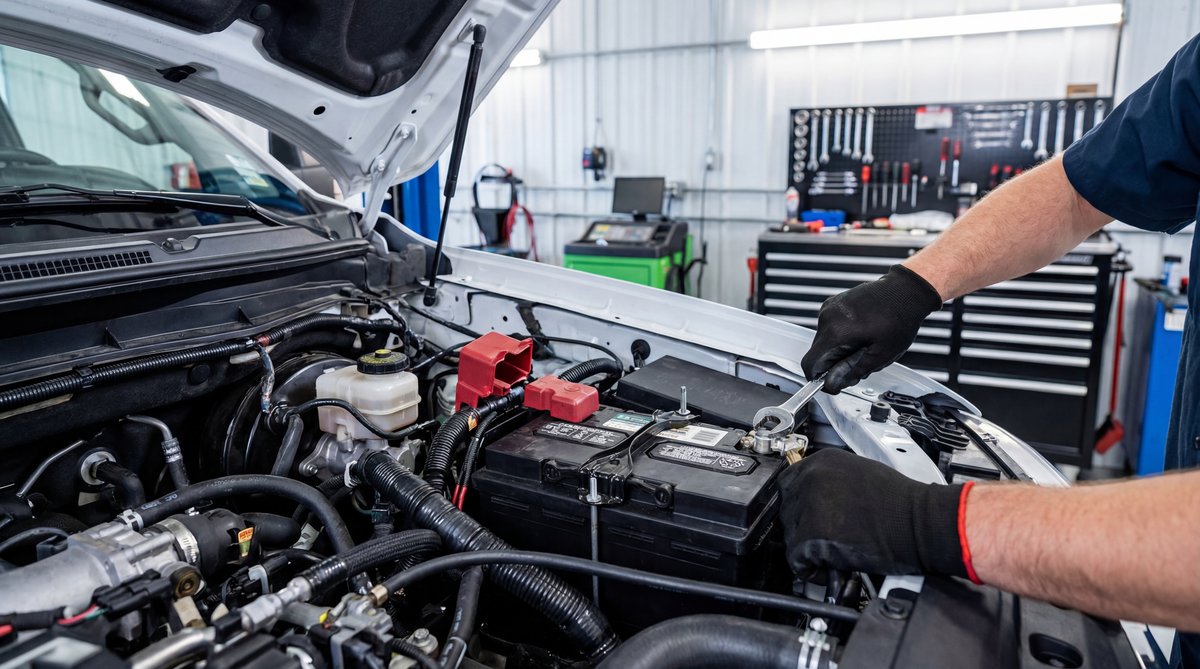
Disconnecting the 12-Volt System
After we got the high voltage battery disabled, we went ahead and disabled the 12-volt battery system too. Pretty straightforward – just disconnect both the positive and negative cables. Some guys will tell you just disconnect the negative, but I like to pull both on hybrid vehicles just to be absolutely sure nothing’s getting power while I’m working on it.
This is also a good time to mention – if you’re having issues with your battery light coming on, that’s a whole different issue you’ll want to address separately.
🔧 Pro Tip
Before you disconnect anything, take some pictures with your phone. I know it seems simple, but when you’re putting everything back together, those pictures can save you a ton of time trying to remember where everything goes.
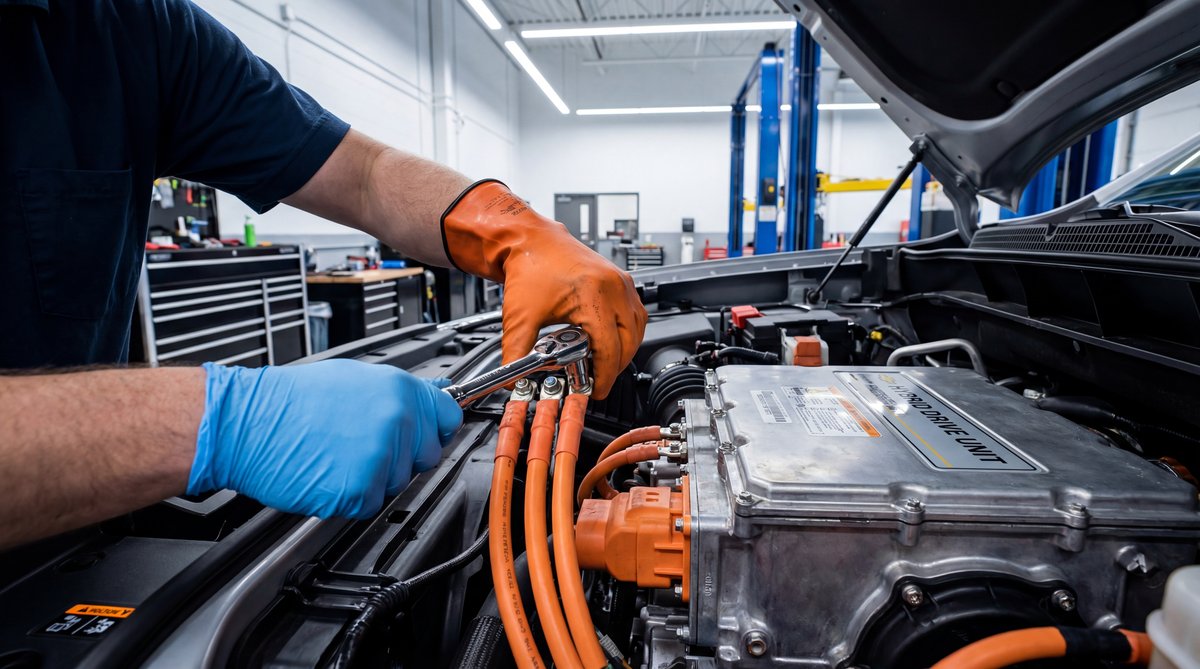
Removing the Three-Phase Cables
As you can see in the video, I already had the power inverter tipped forward by the time I started filming. What you gotta do is disconnect those three-phase cables that run down to the generator motor inside the transmission. There’s one three-phase harness on one side and another three-phase harness on the other side.
Each of these connections is held in with 10mm bolts – three bolts on one side and two bolts on the other. Real quick, just take those bolts out and those cables will separate right out. The torque spec on these when you put them back together is 10 N·m, which is about 89 inch-pounds or 7.4 foot-pounds. Not real tight – you don’t wanna strip anything.
❌ Common Mistake
Don’t let those three-phase cables bend too sharply when you’re moving the inverter around. They need at least a 4-inch bend radius. If you kink those cables, you can damage the internal conductors and then you’re looking at replacing expensive cables.
These three-phase cables connect the inverter to the motor/generator unit that’s built right into the transmission. That’s how the hybrid system works – the motor can assist the engine or generate electricity to charge the battery, all through those three-phase connections.
Removing the Power Inverter
Basically, this inverter sits in there kind of like a battery. It clips underneath on these clips on both sides, and then there’s just two hold-downs that keep it secured – one hold-down on this side and another hold-down on the other side.
For this particular job, I didn’t actually have to completely disconnect and remove the inverter itself because we’re not replacing it. What we’re doing is replacing the power steering control module that sits underneath it. But if you needed to fully remove the inverter, you’d just take out those hold-down bolts and lift it straight up once all the electrical connections are disconnected.
The power inverter module is GM part number 19399166 for most of these 2009-2013 Silverado and Sierra hybrids. If you’re working on a Tahoe, Yukon, or Suburban hybrid from the same years, they use the same system.
300V
HIGH VOLTAGE DC
Maximum voltage in the hybrid battery system
The thing is, even with the service disconnect pulled, there can still be voltage stored in capacitors inside this inverter. That’s why you always test with a multimeter before touching anything. These systems are designed to discharge pretty quickly after you pull the disconnect, but you never assume.
Accessing the Power Steering Control Module
Once we got that inverter tipped up out of the way, we could get to what we actually came here for – the power steering control module. This truck lost power steering and was setting some codes. We diagnosed it down to this power steering control module being the problem.
There’s three 10mm bolts holding it in – one, two, three right there. Once you get those bolts out and unplug the electrical connector, you can remove it. We did most of our diagnostic testing right at that plug before we ever pulled anything apart. That’s the proper way to diagnose these things – test at the connector first to make sure you’re actually fixing the right problem.
💰 Money Saver
The power steering control module (GM part 19399171) costs about $400-600 from the dealer. If you take it to the shop, you’re looking at probably $800-1200 total with labor. Doing it yourself saves you several hundred bucks, even though it takes some time to access.
This is the new power steering control unit right here. Once we get this installed and everything buttoned back up, we’re gonna have to reprogram this module with factory GM software. That’s a requirement – you can’t just plug in a new module and expect it to work. It needs to be programmed to communicate with the rest of the vehicle’s systems properly.
The power steering control module affects how your electric power steering functions. On these hybrids, the power steering is electric rather than hydraulic, which helps with fuel economy. When this module goes bad, you lose power steering assist, which makes the truck really hard to steer, especially at low speeds. If you’re dealing with other electrical gremlins, sometimes it can be related to starting or stalling issues too, though that’s more common on the Cruze than these trucks.
🔧 Pro Tip
There’s a safety switch on the hybrid battery cover itself that requires a tamper Torx bit to remove. Don’t forget about that when you’re putting everything back together. It’s there to make sure the cover is properly installed before the system will operate.
Once we get everything installed and reconnected, the reassembly process is basically the reverse of what we did here. Reconnect the power steering module with those three 10mm bolts, lower the inverter back into place and secure the hold-downs, reconnect those three-phase cables with the proper torque specs, reinstall the service disconnect plug in the hybrid battery, put the plastic cover back over the battery, and then finally reconnect the 12-volt battery.
Real quick reminder – do not reconnect that 12-volt battery until after you’ve got the high voltage service disconnect fully reinstalled and seated properly. You want the high voltage system completely buttoned up before you restore 12-volt power.
DIY Cost
Shop Cost
You Save
$400-600
$800-1200
$400+
According to Chevrolet’s current lineup, the newer Silverado EV is a completely different animal – it’s fully electric rather than hybrid. But for those of you with these 2009-2013 hybrid trucks, they’re still solid vehicles. The hybrid system can be intimidating, but once you understand how it’s laid out, it’s not too bad to work on.
Frequently Asked Questions
What are the key differences between the 2025 Chevrolet Silverado EV and the GMC hybrid truck?
The 2025 Silverado EV is a completely different platform – it’s fully electric with no internal combustion engine at all. The hybrid trucks we’re talking about here (2009-2013 Silverado and Sierra hybrids) have both a regular gasoline engine and an electric motor/generator built into the transmission. The hybrid system assists the engine and can capture energy during braking. The new EV runs purely on battery power. Basically, the hybrid gives you better fuel economy while still having a regular engine, whereas the EV is all-electric.
How does the power steering control module affect the overall performance of the vehicle?
The power steering control module manages the electric power steering system. When it goes bad, you’ll lose power steering assist, which makes the truck extremely difficult to steer – especially at parking lot speeds. You’ll also usually get a warning light on the dash and stored trouble codes. The truck will still drive and the steering won’t lock up or anything, but it’ll feel like you’re trying to steer an old truck without power steering. Real heavy and hard to turn. Getting it replaced restores the power assist and makes the truck normal to drive again.
What safety precautions should be taken when working with high-voltage batteries?
You need proper high voltage safety equipment – Class 0 rubber insulating gloves with leather protectors, safety glasses rated for electrical work, and a multimeter rated for at least 1,000V. Always remove the service disconnect plug from the hybrid battery before working on any high voltage components. Then test with your multimeter to verify there’s no voltage present. Even after pulling the disconnect, capacitors can hold a charge, so never assume the system is dead. If you don’t have proper training or equipment, don’t mess with it – take it to someone who does. This isn’t the kind of thing where you wing it and hope for the best.
Are there any common issues with the power inverter in these trucks?
The inverters themselves are actually pretty reliable. The most common issues I see are with the cooling system for the inverter – there’s coolant that runs through it, and if those hoses or connections leak, you can get coolant inside the inverter which will damage it. Also, the connections on those three-phase cables can corrode over time, especially in salt belt states. If you’re getting hybrid system fault codes, sometimes it’s just a connection issue rather than the inverter itself being bad. Always diagnose properly before replacing parts – that inverter is expensive.
How can I ensure the 12-volt battery system is properly disabled?
Real simple – disconnect both the positive and negative cables from the 12-volt battery. Some people just pull the negative, but I like to disconnect both on hybrid vehicles for extra safety. Make sure the cables can’t accidentally touch the terminals while you’re working. You can wrap them with a shop towel or move them out of the way. The key thing is to disable the high voltage system first by removing the service disconnect plug from the hybrid battery, and then disable the 12-volt system. Do it in that order, and when you’re putting it back together, reconnect the 12-volt battery last after everything else is buttoned up.
Thanks for reading, guys. If this article was helpful in any way, be sure to check out more of my repair guides. I’ve got 26 years as an ASE Master Automotive Technician, and I’m here to help you save money on your automotive repairs. If you want to see the video version of this repair, head over to my YouTube channel. And remember – if you’re not comfortable working with high voltage systems, there’s no shame in taking it to a professional. Safety first, always.
Listen to this article
Flat Rate Mechanic
Hybrid Battery Inverter Removal on Chevy GMC Truck