# How to Fix Chevy P0172 P0175 Code Fuel System Running Rich
Alright guys, Flat Rate Mechanic here. Today we’re going to be diagnosing and fixing P0172 and P0175 codes on a Chevy Suburban with the 5.3L engine. These codes mean your system is running rich on bank one and bank two. Now usually with these 5.3L Chevy engines, you get a lot of the lean codes like P0171 and P0174, but we got the rich codes here which is a little less common. The thing is, there’s a couple things on this motor that can fail and cause these rich conditions, and I’m going to show you how to diagnose it properly and fix it without just throwing parts at it. We actually fixed this one without replacing anything or spending any money, just using a good scan tool.
Understanding P0172 and P0175 Rich Codes
So real quick, let me explain what these codes actually mean. P0172 is system too rich on bank one, and P0175 is system too rich on bank two. Basically, your engine computer is detecting that there’s too much fuel in the air-fuel mixture on both sides of the engine.
The 5.3L Chevy engine is a real common motor – you’ll find it in Suburbans, Silverados, Tahoes, all those GM trucks and SUVs. Usually these motors are pretty reliable, but like I said, you typically see the lean codes more often than rich codes on these.
🔧 Pro Tip
Don’t just start replacing parts when you get these codes. A lot of times you can fix rich conditions without spending any money, just by doing proper diagnostics and resets with your scan tool.
Now there’s a few things that can cause a rich condition on these motors. On some of your older GM models, you’d have an external fuel pressure regulator that would usually be located on the fuel rail with a little vacuum line going to it. That was a real common problem – you’d pop the vacuum line off and you’d have fuel squirting out of there. But the thing is, the newer 5.3L engines don’t have that external regulator, so you don’t have to worry about checking that on this particular model.
Using a Scan Tool to Diagnose Rich Conditions
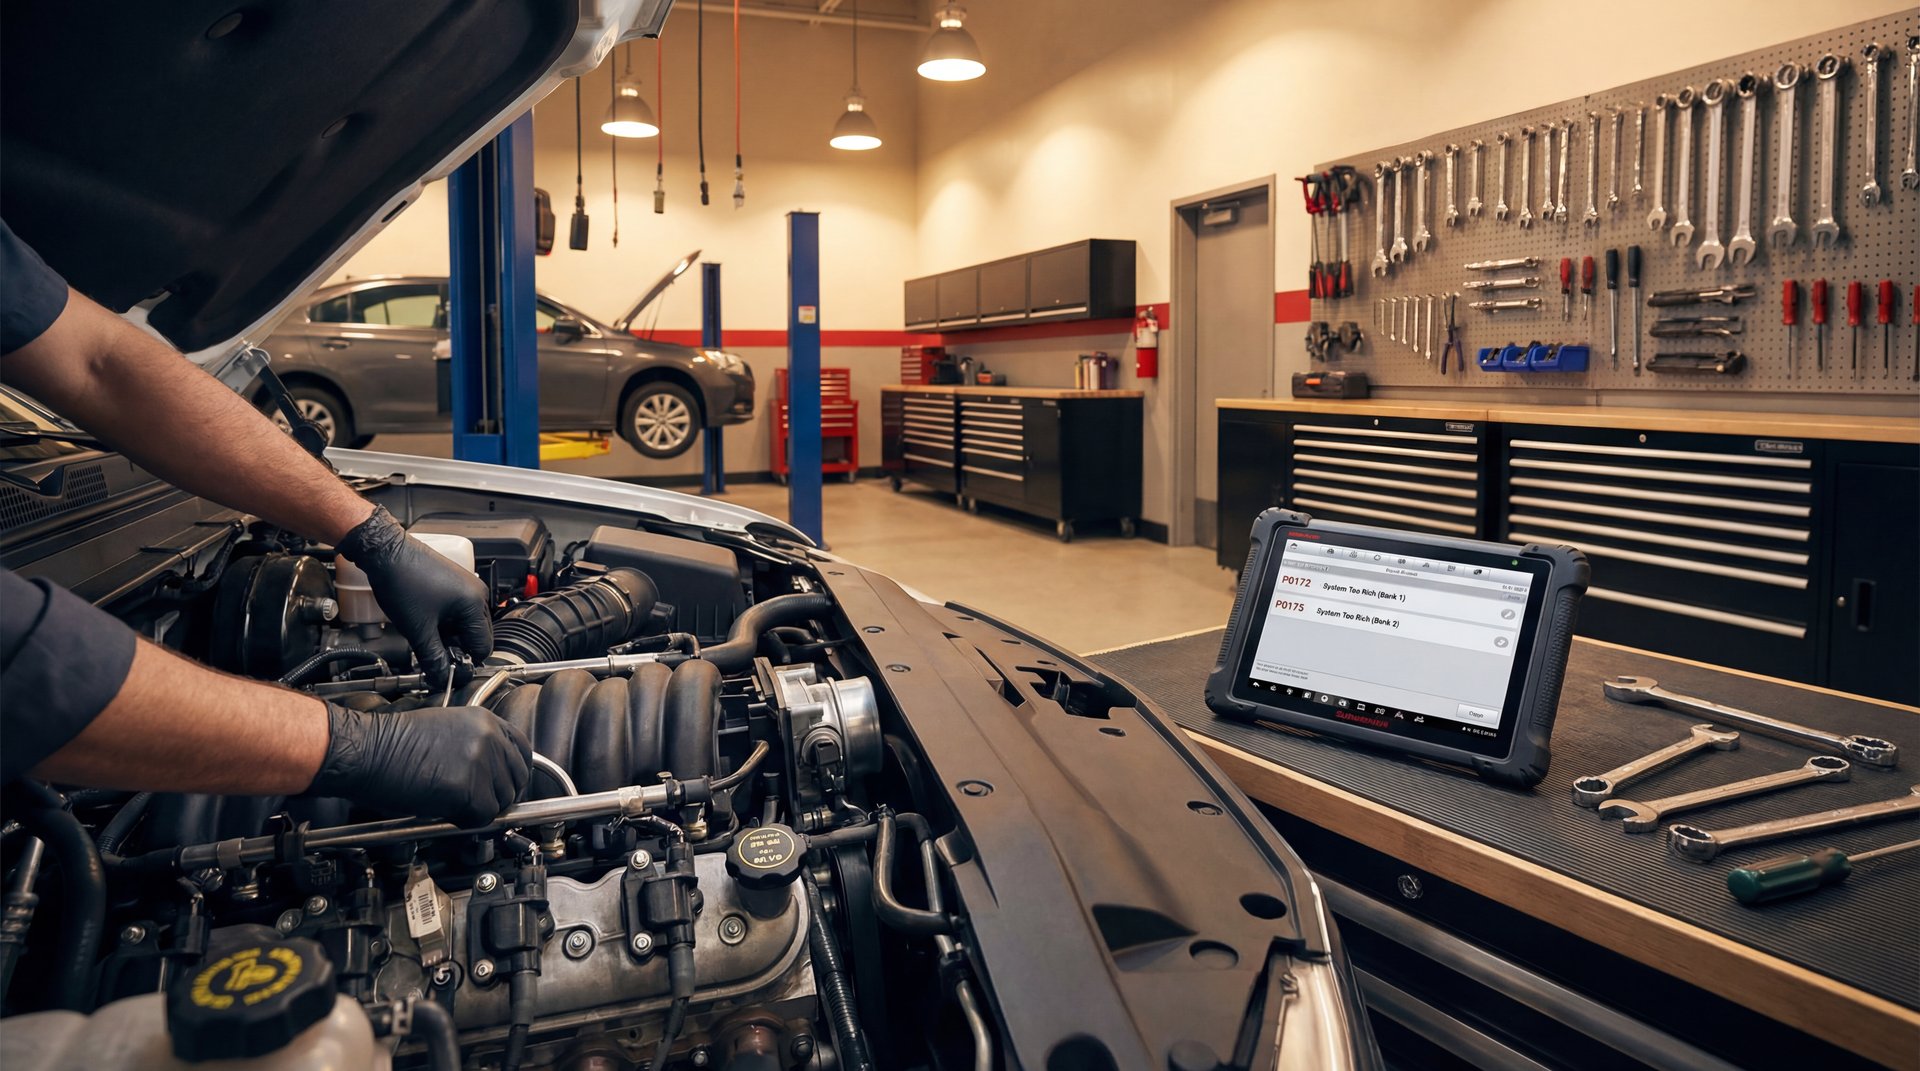
Alright, so for this diagnosis I’m using the Launch Scan Tool Elite 2.0. This is a vehicle-dedicated scan tool specifically for GM vehicles, and it’s a pretty neat little tool. Launch is a very popular brand – they sell a whole line of different scan tools from multi-thousand dollar professional units that work on all makes and models, down to these dedicated ones.
🔧 Tools Needed for Diagnosis
OBD2 scan tool with live data capability (Launch Elite 2.0 or similar)
Fuel pressure gauge (if testing fuel pressure)
Basic hand tools for inspection
Safety glasses and gloves
This particular scan tool is made just for GM, so it does Chevy, GMC, Cadillac, all that stuff. But here’s the cool thing – it does everything a big professional scan tool will do, but you can buy it for a fraction of the price. It’s a great option for you do-it-yourselfers that own a Chevy or GM vehicle and want to be able to do diagnostics yourself with bidirectional controls. That means you can actually command stuff on and off with the scan tool.
So what we’re gonna do is plug this into the OBD2 port. Once you plug it in, it automatically pulls up the VIN and all your vehicle information. Then it runs what’s called a Health Report, and it’s going to scan all the modules in the vehicle – engine control module, airbag module, body control module. These trucks nowadays have tons and tons of modules, and this handy tool goes right through and scans them all.
$300-$450
SHOP DIAGNOSTIC FEE
vs doing it yourself with your own scan tool
When the scan finishes, it gives you a full report on what it found. You get the VIN, the year, make, model, all that stuff. If you’re a repair shop, you can actually print this out and give it right to your customer. In our case, we got two codes in the engine control module – the P0172 and P0175 we’re looking for.
Checking Fuel Trim Data on Your Scanner
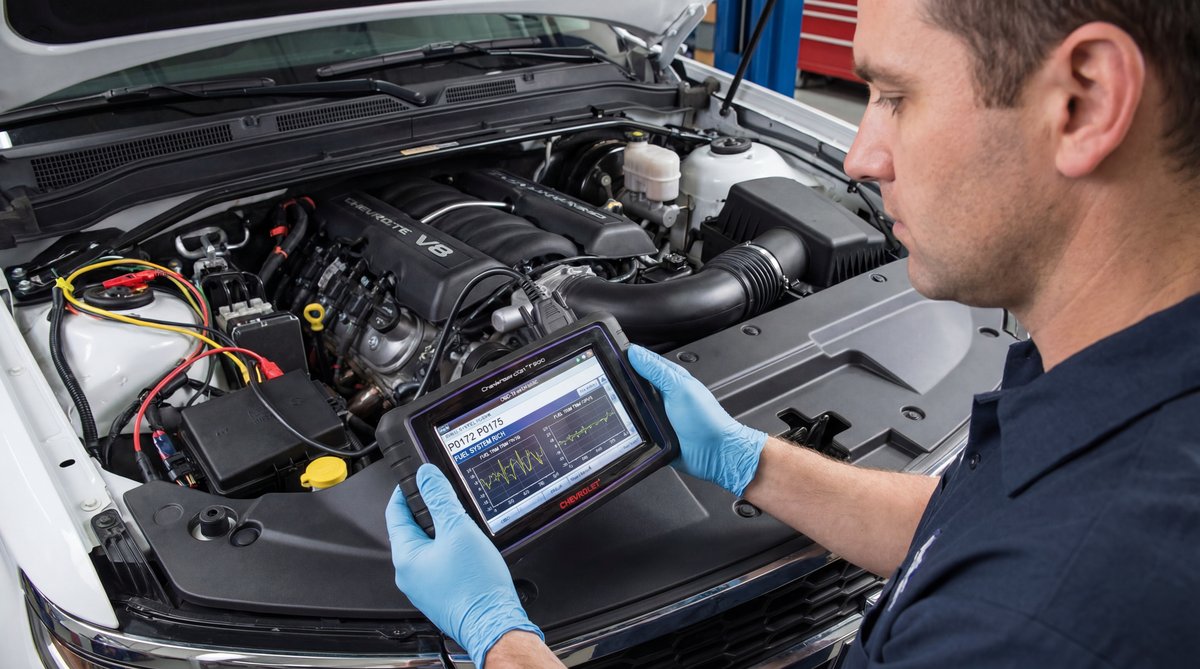
Alright, so now we’re going to go into the engine data and actually see if this motor is running rich. From the module selection, we’re going to go into the engine computer. You’ll see options for read data, special functions, activation tests – this does everything your big scan tools do that all the repair facilities use.
We’re going to go ahead and read data, and then we’re going to look at the fuel trim to see if this car is actually running rich right now. We’re going to select fuel trim data and go down through and select what we want to see.
🔧 Pro Tip
Look at both long-term and short-term fuel trims. The long-term fuel trim is what the computer has learned over time, while short-term adjusts on the fly. If you see big negative numbers, that means the computer is pulling fuel out because it’s running rich.
Now here’s something interesting – you’ll see fuel alcohol content as well. In some cases, you can actually go in and reset that, and a lot of times that will get rid of the rich condition. We’re going to select:
– Long-term fuel trim
– Short-term fuel trim
– Fuel alcohol content
Let’s go ahead and look at these parameters and see what we got. The alcohol content is showing 67%, but that’s not unusual. What we’re really looking at is our fuel trim numbers, and man, look at that – we’re seeing -30% for our long-term fuel trim. That’s a huge number. Our short terms are near zero because the long-term has basically compensated for it.
The computer is taking away 30% of what the fuel ratio should be because of whatever is going on with this motor. That’s a pretty big number.
Flat Rate Mechanic
What this means is the engine computer is trying to pull out 30% of the fuel because it thinks the engine is getting too much. That confirms we actually do have a rich running condition happening right now, not just something that happened once in the past.
Under the Hood Inspection for Common Issues
Alright, let’s go under the hood and see what we can find. Now there’s really not a ton of things that can cause a rich condition on these motors. Let me walk you through what to check.
First thing – like I mentioned earlier, on your older GM models you’d have that external fuel pressure regulator located right on the fuel rail with a vacuum line. You’d pop the vacuum line off and if you had fuel squirting out, that was your problem. Real common issue on the older 5.3s. But this one does not have an external regulator, so we don’t have to worry about that.
❌ Common Mistake
A lot of people start replacing oxygen sensors or the MAF sensor right away without doing proper diagnostics. Don’t throw parts at it – use your scan tool data to actually confirm what’s going on first.
Another thing to check is your purge valve – that’s your evaporative emissions purge valve. If you’re sucking in gas vapors when you shouldn’t be, sometimes that can cause it to run a little rich. It’s usually not going to add 30% fuel though. I did block this one off on our Suburban and it didn’t make a difference. You can also check these with a vacuum gauge just to make sure they’re not leaking by.
Now if you got a sticky fuel injector or a fuel injector that’s flowing too much fuel, that can cause a rich condition, but that’s also very uncommon. Usually you’d see this on just one bank, not both banks at the same time.
The mass air flow sensor is another possibility. If your MAF sensor is not reading correctly, that could set some rich conditions. Not very common at all though – usually when these go bad, you’re going to get lean codes, not rich codes. I can say I have seen them cause rich conditions, it just does not happen very often.
⚠️ Warning
Before disconnecting any fuel lines or components, make sure to relieve the fuel system pressure. These systems run at 55-62 psi and can spray fuel everywhere if you’re not careful. Remove the fuel pump fuse and crank the engine to relieve pressure.
On this particular vehicle, I’m not seeing anything jumping out at me. No vacuum leaks, no obvious problems. So we’re going to go back in with the scan tool and do the alcohol content reset and see if that changes anything.
Performing a Fuel Alcohol Content Reset
Alright, so we’re back in the truck now. We got the car off, key on, and we’re going to go ahead and go back to our special functions and see if we can reset that fuel alcohol content. This is something a lot of people don’t know about, but it can fix rich running conditions without replacing any parts.
Let’s go into special functions, then down to fuel system, and there’s fuel trim reset. Let’s go ahead and reset that. It says it’s reset, so that’s done. Now we’re going to look for the fuel compensation reset.
🔧 Pro Tip
You’ll see other functions in here too like cylinder power balance and injector balance. If you suspected you had a fuel injector leaking down, you can use the injector balance test. It will turn the fuel pump on and pulse each injector individually, but you’d need a fuel gauge hooked up to the fuel rail to see the pressure drop on each one.
Okay, here it is – fuel compensation reset. This procedure will reset the fuel alcohol content value. Now it gives you a warning that says resetting this fuel alcohol content under some conditions may cause DTCs and drivability problems. But we’re going to go ahead and do this just so we can set a baseline as to if this vehicle’s really running rich or not.
The scan tool also has other features like oil light reset, idle learn, and crank position learn. All the stuff you need to do proper GM diagnostics and resets.
After doing the fuel alcohol content reset, we cleared the codes and took it for a test drive. The long-term fuel trims came back to normal – we’re talking like -5% to -8% now instead of -30%. The codes didn’t come back, and the truck was running perfect.
DIY Cost
Shop Cost
You Save
$0
$150-$300
$150-$300
$0
PARTS REPLACED
Fixed with just a scan tool reset
The thing is, sometimes these GM vehicles get confused with the fuel alcohol content level, especially if you’ve been using different gas stations or different fuel grades. The computer tries to compensate for what it thinks is E85 or higher ethanol content, and it ends up running rich. By resetting that value, you’re basically giving the computer a fresh start to relearn the actual fuel composition.
💰 Money Saver
Before spending $120-$220 on a new MAF sensor or $100-$240 on oxygen sensors, try the fuel alcohol content reset first. This fix costs you nothing but 10 minutes of your time with a scan tool.
Now, if the reset doesn’t fix your problem and the codes come back, then you’ll want to look at other possibilities:
– Check fuel pressure with a gauge (should be 55-62 psi)
– Inspect fuel injectors for leaks or stuck-open condition
– Test oxygen sensor wiring harness for shorts or corrosion
– Clean or replace the MAF sensor if readings look off
– Check for vacuum leaks at the intake manifold
– Verify there are no ECM software updates or recalls
But like I showed you here, a lot of times you can fix these rich codes without replacing anything. You just need the right diagnostic approach and a good scan tool that can do these special functions.
Frequently Asked Questions
What are the most common causes of P0172 and P0175 codes on a Chevy Suburban?
On the 5.3L Chevy engines, the most common causes are actually software-related like the fuel alcohol content being off. Other possibilities include a faulty MAF sensor, leaking fuel injectors, bad oxygen sensors, or vacuum leaks. On older models, the external fuel pressure regulator was a real common problem, but newer models don’t have that external regulator so you don’t need to check for it.
How can I use a scan tool to diagnose rich fuel conditions in my Chevy?
You need a scan tool that can read live data, not just pull codes. Go into the engine data and look at your fuel trim values – both long-term and short-term. If you’re seeing big negative numbers like -20% to -30%, that means the computer is pulling fuel out because it’s running rich. You can also look at the fuel alcohol content value. A good scan tool with special functions will let you reset the fuel compensation, which often fixes the problem.
What specific tools are essential for fixing P0172 and P0175 codes?
At minimum, you need an OBD2 scan tool that can read live data and do special functions like fuel trim resets. I use the Launch Elite 2.0 for GM vehicles – it does everything a big professional scan tool does but costs way less. You might also want a fuel pressure gauge if you need to test fuel pressure, and basic hand tools for any inspections under the hood. Don’t forget safety glasses and gloves when working around fuel systems.
Are there any safety precautions I should take when diagnosing rich fuel conditions?
Yeah, definitely. The fuel system is under high pressure – 55 to 62 psi on these GM trucks. Before you disconnect any fuel lines, you need to relieve that pressure by pulling the fuel pump fuse and cranking the engine. Always wear safety glasses because fuel can spray everywhere. Keep a fire extinguisher nearby, and don’t smoke or have any open flames around when you’re working on fuel system stuff. And disconnect the battery negative terminal before messing with any electrical sensors.
How do I know if my Chevy’s fuel system is running rich or lean?
You’ve got to look at the fuel trim data with your scan tool. If the long-term fuel trim is a big negative number like -20% or -30%, the computer is taking fuel away, which means it’s running rich. If it’s a big positive number like +20% or +30%, the computer is adding fuel, which means it’s running lean. Normal fuel trims should be within about -10% to +10%. The codes will also tell you – P0172 and P0175 are rich codes, while P0171 and P0174 are lean codes.
Flat Rate Mechanic
How to Fix Chevy P0172 P0175 Code Fuel System Running Rich