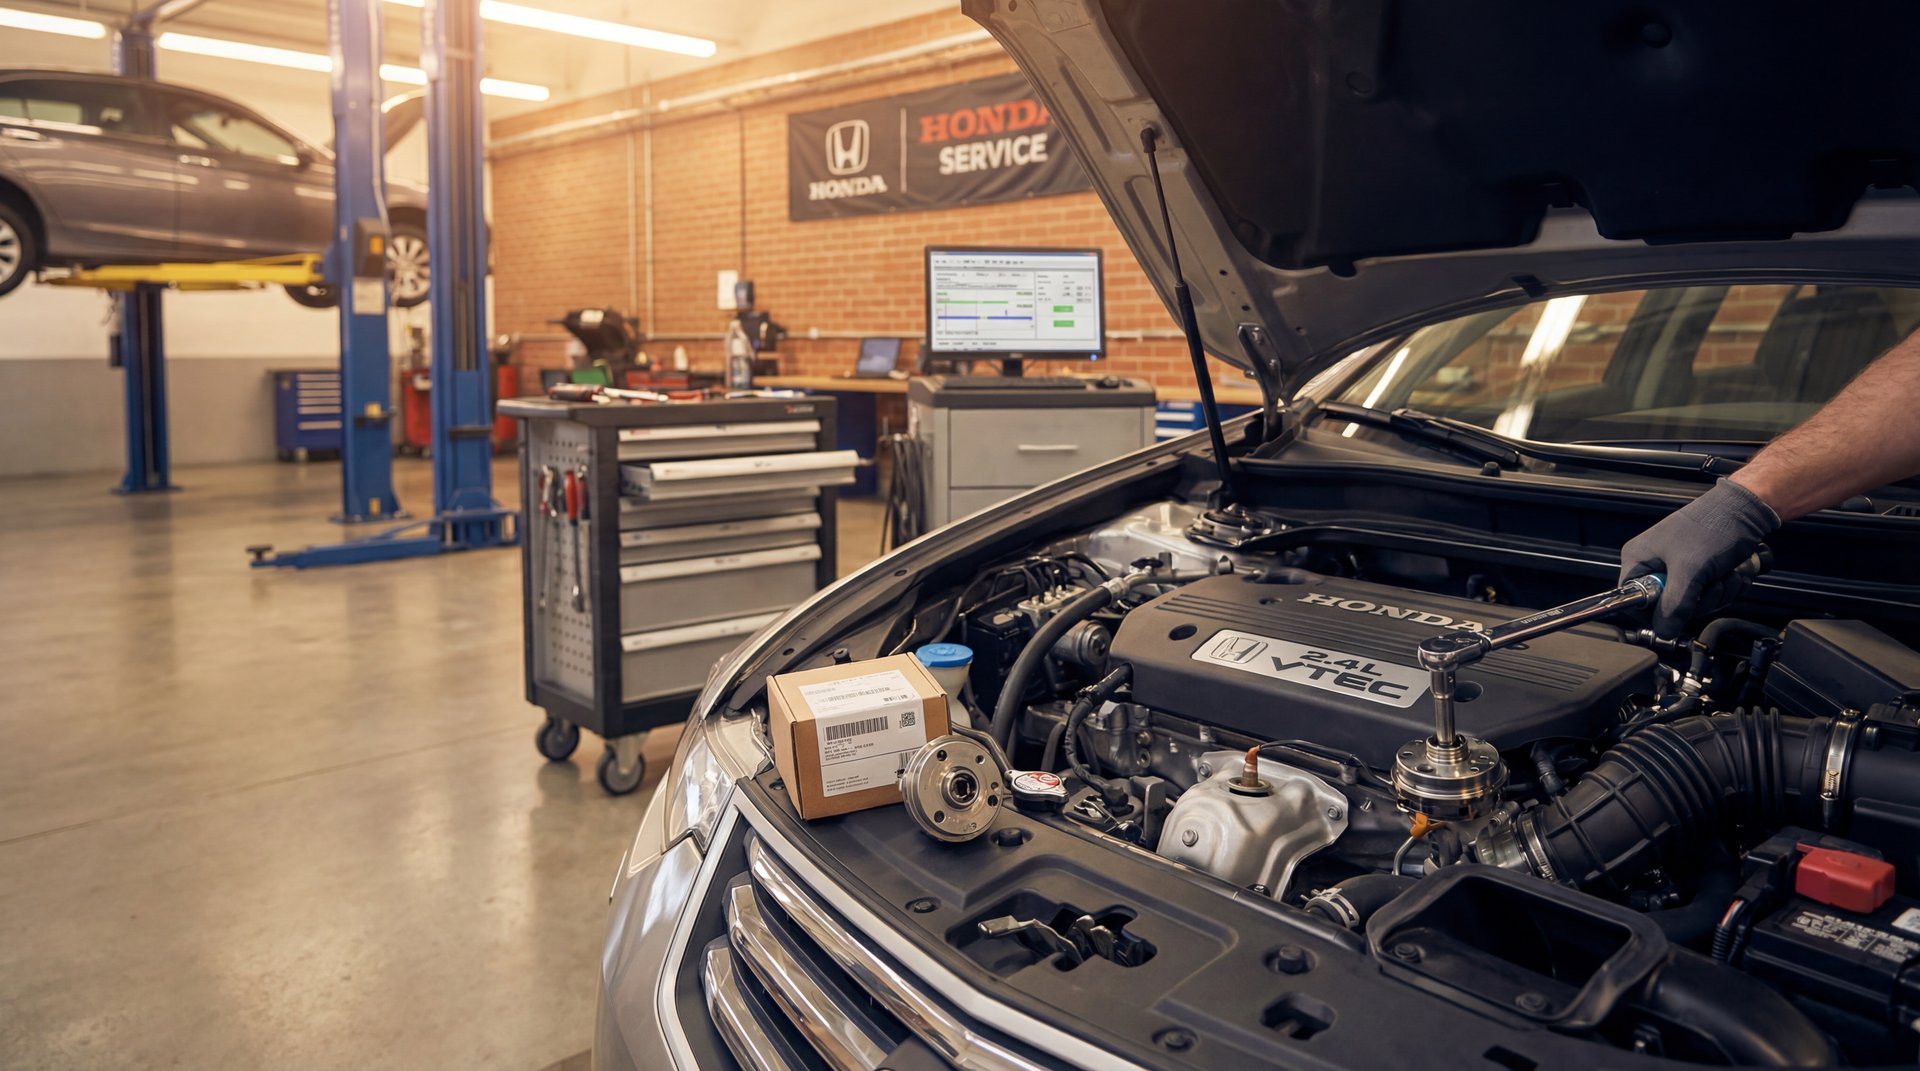
Alright guys, so you’re getting that annoying clattering noise for about two seconds when you first start up your Honda Accord, and then it just goes away? Yeah, I know exactly what that is. It only happens after the car sits for a couple hours, right? That’s your VVT actuator telling you it’s had enough. The thing is, this is actually a pretty common problem on these Honda 2.4L engines, and Honda even put out a service bulletin on it. In this guide, I’m gonna walk you through exactly how to fix this yourself. Warranty time on this job is like two hours, so I think a lot of you do-it-yourselfers can definitely pull this off. We’re basically just pulling the timing cover and an access plate to get to the actuator – it’s not as scary as it sounds.
What Causes the Cold Start Rattle
So here’s what’s happening inside your engine. The VVT actuator – some people call it a cam phaser or VTC actuator – basically controls the timing of your camshaft. When these things start to wear out, usually around 80,000 to 120,000 miles, the internal oil passages get gunked up or the locking mechanism starts to fail.
When you first start your car after it’s been sitting, there’s no oil pressure built up yet in the actuator. That causes it to rattle around for those first couple seconds until the oil pressure builds up and locks everything in place. That’s why you only hear it on cold starts and why it goes away so quick.
⚠️ Warning
Don’t ignore this rattle. Yeah, you can drive with it short-term, but you’re risking the timing chain slipping or worse – bent valves. That’s a $3,000+ engine rebuild you don’t want to deal with. Get it fixed as soon as you can.
This problem is super common on 2013-2017 Honda Accords and 2013-2020 CR-Vs with the 2.4L Earth Dreams engine. The OEM VTC actuator part number is 14310-R5A-305 for the CR-V, and it’s basically the same setup on the Accord.
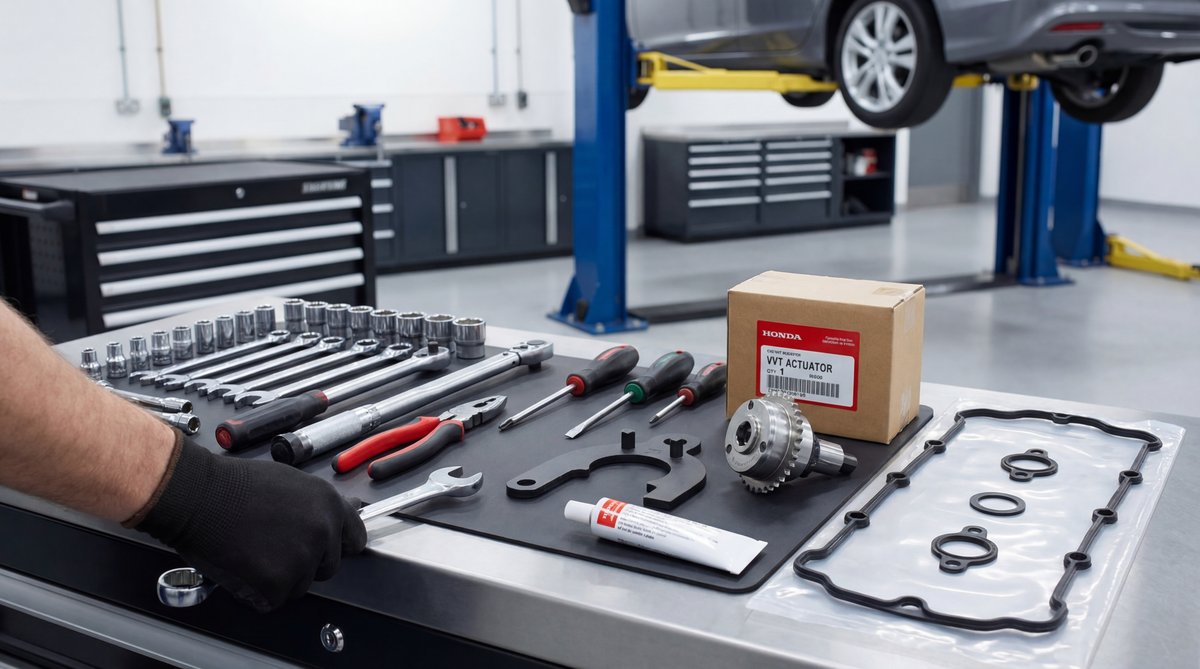
Tools and Parts You’ll Need
🔧 Tools Needed
10mm socket and wrench (for most bolts)
12mm and 14mm sockets for covers
Torque wrench (both inch-pounds and foot-pounds)
Safety pin or 1.5mm wire for tensioner lock
White-out marker or paint pen
Wrench for holding the camshaft
Zip ties (for securing the chain)
Compressed air and parts cleaner
Jack stands and safety glasses
For parts, you’re gonna need the VVT actuator itself – that’s gonna run you about $180-220 if you go with the OEM Honda part. You’ll also want to grab new gaskets and seals, which is usually another $25-30 for the kit. While you’re in there, I’d recommend replacing the timing chain tensioner too, especially if you’ve got over 100k miles. That’s part number 14520-RCA-A01 and it’s only about 45 bucks.
🔧 Pro Tip
Stick with OEM parts on this one, guys. I’ve seen aftermarket VTC actuators from Gates or Cloyes work okay, but the failure rate is way higher – like 70% within two years compared to only 5% with genuine Honda parts. This isn’t the place to cheap out.
You’re also gonna need fresh oil since you’ll be draining some during this job. Use Honda’s recommended 0W-20 synthetic – you’ll need about 4 quarts to top it off after you’re done.
Removing the Valve Cover
Alright, so first we’re gonna get the valve cover pulled off. This is pretty straightforward – you’ve got your 10mm bolts all around the perimeter of the cover. Just work your way around and get them all out. Keep track of them because some might be different lengths depending on where they came from.
Before you yank the cover off, make sure you’ve got a catch pan ready because there’s gonna be some oil in there. Once you get the cover off, set it aside on a clean work surface. This is a good time to inspect your valve cover gasket – if it’s all crusty or hard, grab a new one while you’re doing this job. The valve cover bolts torque back down to 8.7 foot-pounds when you reinstall everything.
❌ Common Mistake
Don’t overtighten those valve cover bolts when you put it back together. I’ve seen so many DIYers crank these down and crack the gasket. Use a torque wrench set to 8.7 ft-lbs and go in the proper sequence from the center outward.
Now you’ve got access to see your camshafts and the timing chain. Before we go any further, we need to set everything to top dead center.
Setting the Timing Marks to TDC
Okay guys, this is the critical part – getting your timing marks lined up. We’re gonna bring it to top dead center so all our timing marks are visible and properly aligned. This is super important because if you mess this up, you’re gonna have a bad time.
First, you need to remove the access cover for the timing chain tensioner. Then we’re gonna rotate the crankshaft – and I mean rotate it clockwise looking at it from the front of the engine – until all your marks line up at TDC.
Here’s what you’re looking for: your crankshaft sprocket will have a mark, your exhaust cam sprocket will have a dot, and your VVT actuator will have alignment marks. Everything needs to line up perfectly. The service bulletin shows you exactly where these marks should be.
🔧 Pro Tip
Use some white-out or a paint pen to mark your timing alignment points. I’m talking mark the chain, mark the sprockets, mark everything. You can see in the video where I did this. When you put it back together, you want to make absolutely sure everything’s in the same spot. This is cheap insurance against a costly mistake.
Once you’ve got everything lined up, take pictures with your phone from multiple angles. Seriously, you can’t have too many reference photos for this.
Now here’s the trick for locking the tensioner: we’re gonna go backwards on the crank. By rotating the crankshaft counterclockwise just a bit, you’re taking the pressure off the timing chain tensioner. You’ll see a hole in the tensioner body – that’s where you’re gonna stick your safety pin or 1.5mm wire to lock it in place.
Replacing the VVT Actuator
Alright, so now we’ve got everything lined up and our tensioner is locked. The next step is securing that rear cam sprocket. What we’re gonna do is use some zip ties to secure the timing chain to the rear sprocket. This keeps everything from moving around when we take the front actuator off.
Now we need to put a wrench on the camshaft to hold it still. You can see in the video where you put the wrench – there’s a flat spot on the cam designed for this. Hold that cam steady so we can get the front VVT actuator bolts out.
The actuator is held on with bolts that you’ll need to remove. Once those are out, the old actuator should pull right off. Take a look at it – you’ll probably see some wear on the internal mechanism. That’s what was causing your rattle.
2-3 Hours
TIME TO COMPLETE
Honda’s warranty time is 2 hours
Before you install the new actuator, make sure the mounting surface on the camshaft is clean. Use some brake clean and compressed air to get any debris off there. The new actuator needs to go on with the sprocket in the locked position – it should have a pin or lock mechanism that you’ll remove after installation.
When you’re installing the new actuator, line up that dot on the sprocket with your white mark from earlier. Thread in the bolts and torque them down to spec – that’s 36 foot-pounds for the actuator bolts. Don’t just guess on this, use your torque wrench.
Resetting the Timing Chain Tensioner
Okay, so if for some reason you took the tensioner completely out – maybe you lost tension on the chain or whatever – here’s how you reset it. You’re gonna need a vice for this.
Put the tensioner in the vice and you’re gonna compress it until the holes line up. You can see this clearly in the video. Just slowly squeeze it down until that hole in the plunger lines up with the hole in the body. Then stick your safety pin in there to lock it, just like we did before.
Once it’s locked, you can release the pressure from the vice and reinstall the tensioner through that same access hole. The tensioner bolts torque down to 14 foot-pounds.
After everything’s back together and torqued down, you’re gonna remove that safety pin from the tensioner. But before you do that, double-check all your timing marks one more time. Everything should still line up with your white marks.
🔧 Pro Tip
After you get everything buttoned up, rotate the crankshaft two complete revolutions by hand and check that all your timing marks come back to TDC in the right spots. If something’s off, stop right there and figure out what went wrong before you start the engine. You’ll thank me later.
Remove your zip ties from the rear sprocket, pull out the tensioner pin, and you’re basically done. Reinstall the timing cover access plate and the valve cover with new gaskets. Fill up your oil to the proper level – you’ll need about 3.8 quarts to top it off after this job.
If you’re dealing with other engine codes or sensor issues along with this rattle, check out our guide on how to figure out what engine sensor to replace – that’ll help you diagnose what’s actually going on.
What You’ll Save Doing It Yourself
Let’s talk money real quick because this is where doing it yourself really pays off. If you take this to a shop, you’re looking at anywhere from $800 to $1,400 depending on where you live and what the local labor rates are. Most shops are gonna charge you for about 2 to 2.5 hours of labor at $120 per hour, plus they mark up the parts by 30-50%.
DIY Cost
Shop Cost
You Save
$200-$350
$900-$1,400
$600-$1,050
💰 Money Saver
Even if you’ve never done timing work before, this job is totally doable in an afternoon. You’re saving yourself at least $600, probably closer to a grand. That’s a lot of money to keep in your pocket just for following along with this guide and taking your time.
Your parts cost breaks down like this: the VVT actuator is about $180-220 for OEM, gaskets are around $30, and you’ll need about $40 worth of oil. If you grab the timing chain tensioner while you’re at it, add another $45. So you’re looking at $200-350 total for parts, depending on what all you replace.
The time investment is about 2-4 hours if you’ve done some engine work before. If this is your first time messing with timing components, give yourself 5-7 hours and don’t rush it. Better to take your time and do it right than to rush and end up with bent valves.
Frequently Asked Questions
What are the common symptoms of a failing VVT actuator?
The most common symptom is that rattling or clattering noise on cold starts that lasts about 1-3 seconds and then goes away once oil pressure builds up. You might also get a check engine light with codes P0341 or P1009. Some people notice a slight loss of power or rough idle, but honestly the rattle is the dead giveaway. It only happens after the car sits for a couple hours because that’s when all the oil drains out of the actuator.
How can I tell if the VVT actuator is the source of the engine rattle?
The timing of the rattle is the big clue – if it’s only happening for those first couple seconds on a cold start and then disappears, that’s your VVT actuator. It won’t rattle when the engine’s already warm or if you restart it right after shutting it off. If you’re getting a rattle that lasts longer than 3-5 seconds or happens while driving, you might be looking at timing chain stretch instead, which is a different problem. A lot of guys misdiagnose this and replace the VVT solenoid first – that’s the electrical part on the passenger side near the timing cover. Save yourself the hassle and check for that cold-start rattle pattern first.
Are there any specific tools needed for replacing the VVT actuator?
You don’t need any crazy specialty tools for this job, which is nice. Your basic socket set with 10mm, 12mm, and 14mm sockets will handle most of it. The important stuff is having a good torque wrench – both inch-pounds and foot-pounds – because you’ve got specific torque specs you need to hit. You’ll need something to lock the timing chain tensioner, which can just be a regular safety pin or a piece of 1.5mm wire. A wrench to hold the camshaft steady while you’re taking the actuator bolts out, some zip ties to secure the chain, and white-out to mark your timing. That’s really it. Way simpler tool-wise than a lot of timing jobs.
What are the steps to properly align the timing marks after replacing the VVT actuator?
Alright, so before you even take the old actuator off, you need to rotate your crankshaft clockwise until you hit top dead center. You’ll see marks on the crankshaft sprocket, the exhaust cam sprocket, and the VVT actuator itself – they all need to line up. Use white-out or a paint pen to mark everything so you know exactly where it was. When you install the new actuator, that dot on the sprocket needs to line up with your white mark. After everything’s torqued down and you’ve removed the tensioner pin, rotate the crankshaft two complete revolutions by hand. Check that all your marks come back to TDC in the same spots. If they don’t line up perfectly, something’s wrong and you need to redo it before starting the engine.
How long does it typically take to replace the VVT actuator on a Honda engine?
Honda’s warranty time on this job is 2 hours, which is what they expect a trained tech to do it in. For you do-it-yourselfers, I’d say plan on 2-4 hours if you’ve got some experience working on engines. If this is your first time dealing with timing components, give yourself a full afternoon – maybe 5-7 hours – and don’t rush it. The actual work isn’t that complicated, but you want to take your time marking everything, double-checking your alignment, and making sure all your torque specs are right. It’s way better to spend an extra hour being careful than to rush through it and end up with engine damage.
Flat Rate Mechanic
Honda Engine Rattle at cold Start "VVT Actuator Replacement"