Alright guys, let’s talk about something that way too many people brush off – water pump issues and cooling system problems. You hear someone say “don’t worry, it’s only water” and basically what they’re telling you is they don’t understand how dangerous this stuff actually is. The thing is, when your cooling system fails, you’re not just dealing with a little puddle under your car. You’re looking at potential engine meltdown, toxic coolant leaks, and repair bills that’ll make your wallet cry. So yeah, it’s “only water” – until it turns into a complete disaster.
Why Water Pumps Are Actually Dangerous
Real quick, let me explain why this isn’t something you want to ignore. When your water pump starts failing, you’re basically looking at a ticking time bomb under your hood. That pump is what keeps coolant circulating through your engine, and without it, temperatures spike faster than you’d think.
⚠️ Warning
Coolant is seriously toxic stuff. Like, lethal if ingested. The thing is, it smells sweet, so pets and wildlife are attracted to it. If you spill any while working, clean it up immediately. This isn’t something to mess around with.
What we’re gonna see when a water pump goes bad is coolant leaking, the engine overheating, and sometimes this whining noise coming from the pump area. You might notice steam coming from your radiator or see that temperature gauge climbing into the danger zone. Basically, your engine is telling you it’s cooking itself to death.
A failing water pump can destroy your entire engine in minutes if you keep driving. That “only water” mindset has cost people thousands in engine rebuilds.
Flat Rate Mechanic
Tools and Parts You’ll Need
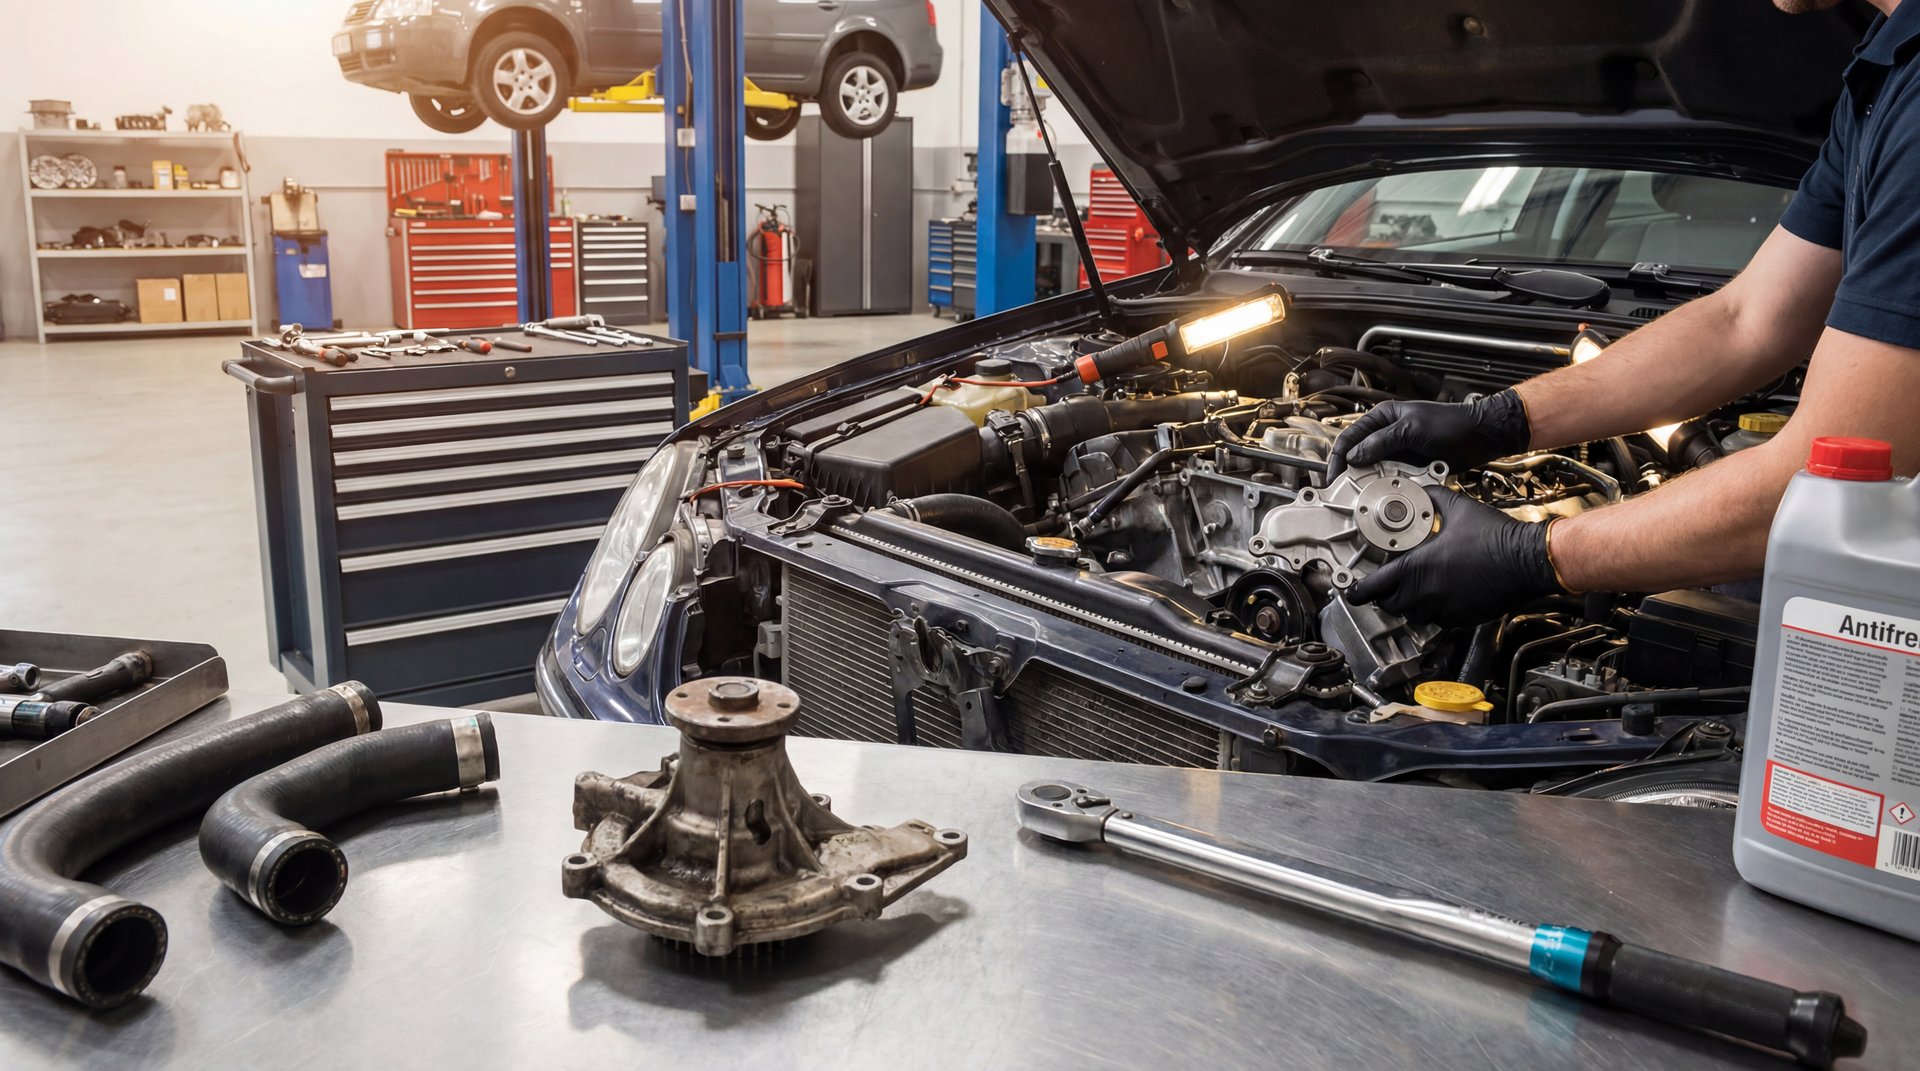
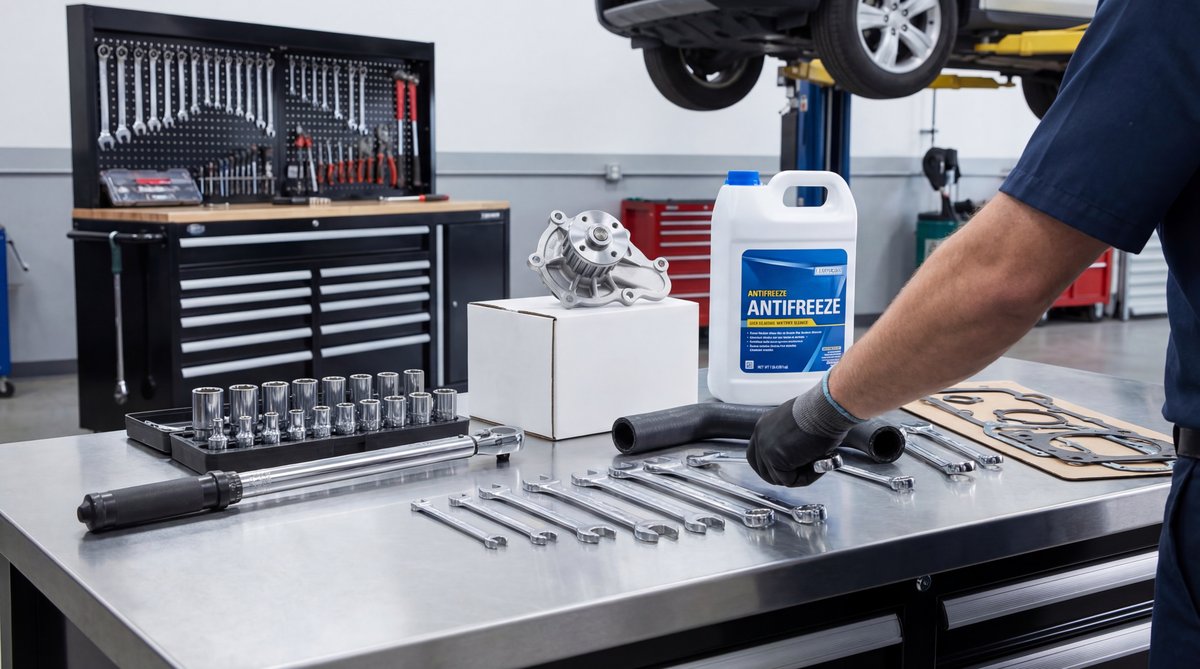
Alright, let’s talk about what you actually need to do this job right. You can’t just wing it with whatever’s in your toolbox. Here’s what we’re working with:
🔧 Tools Needed
Ratchet and socket set (metric or standard depending on your vehicle)
Torque wrench – and it needs to be calibrated
Plastic gasket scraper or razor blade
Brake cleaner
Large drain pan
Belt tensioner tool
Pulley holding tool (this is specialty but necessary)
Safety goggles and chemical-resistant gloves
For parts, you’re looking at the water pump itself, a new gasket (never reuse the old one, guys), and fresh coolant. Water pump prices range from about $30 for budget aftermarket stuff up to $150 for OEM parts. I always recommend going with OEM or quality brands like Aisin, Gates, or Bosch. That cheap water pump might save you twenty bucks today, but when it fails in six months, you’ll be doing this whole job again.
🔧 Pro Tip
When you buy your new water pump, compare it side-by-side with the old one before you start the job. Make sure bolt holes line up, the pulley mount is identical, and all the ports match. Nothing worse than getting everything torn apart and realizing you’ve got the wrong part.
Critical Safety Equipment
The thing is, most people don’t take this seriously enough. You’re working with toxic chemicals, hot metal, and potentially pressurized systems. Here’s what you absolutely need:
Safety goggles are non-negotiable. One splash of coolant in your eyes and you’re having a really bad day. Get gloves that are actually resistant to coolant chemicals – not just your old gardening gloves. Wear long sleeves and pants because coolant on your skin isn’t great either.
⚠️ Warning
Never, and I mean never, remove the radiator cap or start working on the cooling system while the engine is hot. That pressurized coolant will spray everywhere and can cause serious burns. Let the engine cool completely – we’re talking at least an hour after it was running.
What we’re gonna do is make sure the engine is cold before we even think about draining coolant. And when you do drain it, catch everything in a proper drain pan. Don’t let it run all over your driveway or into storm drains. That stuff is toxic to the environment and illegal to dump.
Common Mistakes That’ll Ruin Your Day
Alright guys, let me tell you about the mistakes I see all the time. These are what separate a smooth repair from a complete nightmare.
❌ Common Mistake
Not securing the pulley before removing the water pump bolts. Basically what happens is the pulley spins when you try to loosen the bolts, and you end up damaging threads or stripping bolt heads. Use a pulley holding tool or have someone hold the pulley with a strap wrench.
The biggest thing I see is people not cleaning the mounting surface properly. You need that surface absolutely clean – no old gasket material, no dirt, no oil. Use a plastic scraper so you don’t gouge the metal, and finish with brake cleaner. If you leave crud on there, your new gasket won’t seal and you’ll have leaks immediately.
Over-tightening the bolts is another huge one. According to proper installation procedures, water pump bolts typically need about 14 Newton-meters of torque – that’s roughly 10.3 ft-lbs. If you crank them down too hard, you’ll warp the pump housing or crush the gasket, and then you’ve got leaks or pump failure. Use your torque wrench and follow the specs for your specific vehicle.
🔧 Pro Tip
Always check your vehicle’s service manual for exact torque specs. What works on a Subaru might be different on a Honda. Don’t guess – look it up. Most auto parts stores can print out spec sheets if you don’t have a manual.
Another thing – not bleeding the cooling system after you’re done. Air pockets in the system will cause overheating just like a bad water pump would. Make sure you follow the proper bleeding procedure for your vehicle. Some have bleeder valves, others require a specific process.
What This Really Costs
Let’s talk money, because this is where doing it yourself really pays off.
DIY Cost
Shop Cost
You Save
$80-$200
$300-$550
$220-$350
$300+
POTENTIAL SAVINGS
by doing the repair yourself
Here’s the breakdown: Parts will run you anywhere from $30 to $150 for the pump, another $15-$25 for coolant, and maybe $10 for a gasket if it’s not included. Real quick, that’s $55 to $185 in parts. A shop is gonna charge you $150 to $300 in labor on top of that, and they’ll mark up the parts too.
Time-wise, you’re looking at 2 to 4 hours depending on how accessible your water pump is and your experience level. Some vehicles have the pump right there – easy access. Others, you’re pulling half the engine accessories just to get to it.
💰 Money Saver
If your vehicle has a timing belt-driven water pump, consider replacing both at the same time. Yeah, it costs more upfront, but you’re already doing 90% of the labor anyway. Doing them separately means paying for that labor twice.
The thing is, shops will typically quote you 1.5 to 3 hours of labor at $100-$150 per hour. That’s where your money goes. By doing it yourself, you pocket that labor cost. Just make sure you have the right tools and knowledge – messing this up can cost way more than just paying the shop in the first place.
Frequently Asked Questions
What are the most common mistakes people make when replacing a water pump?
Alright, the big ones are not cleaning the mounting surface properly, over-tightening the bolts, and forgetting to secure the pulley when removing bolts. Basically what happens is people rush through the prep work and end up with leaks. Also, reusing the old gasket is a huge mistake – always use a new one. And not bleeding the cooling system after installation will cause overheating issues that’ll make you think you messed up the install.
How can I ensure I’m using the correct torque specifications for the water pump?
Real quick, check your vehicle’s service manual – that’s always your best source. Most water pumps need around 14 Nm or about 10 ft-lbs, but this varies by vehicle. You can also get spec sheets from auto parts stores, or look up factory service information online. The thing is, don’t just guess or go by feel. Use an actual torque wrench that’s been calibrated. Over-tightening will warp the housing or crush the gasket, and under-tightening means leaks.
What safety equipment is essential for replacing a water pump?
You need safety goggles and chemical-resistant gloves at minimum. Coolant is toxic and you don’t want it in your eyes or on your skin. Wear long sleeves and pants too. Make sure you’ve got a proper drain pan to catch all the coolant – this stuff is lethal to animals and can’t just be dumped anywhere. And work in a well-ventilated area because coolant fumes aren’t something you want to be breathing all day.
How do I properly clean the mounting surface before installing a new water pump?
What we’re gonna do is use a plastic scraper or razor blade to remove all the old gasket material. Metal scrapers can gouge the surface, so stick with plastic. Get every bit of old gasket off – if you leave chunks, your new gasket won’t seal. After scraping, spray the surface with brake cleaner and wipe it down with a clean rag. The surface needs to be completely clean and dry before you put the new gasket on. Check for any warping or damage too – if the surface isn’t flat, you’re gonna have problems.
What are the signs that the water pump installation was not done correctly?
Coolant leaks are the obvious one – check around the pump after you run the engine. If you see drips or puddles, something’s not sealed right. Engine overheating even with a new pump usually means air in the system that needs bleeding. Unusual noises like grinding or squealing from the pump area means the belt tension is wrong or the pump itself is binding. Also, if the belt keeps coming off, the pump pulley alignment is probably off. Basically, if anything seems off after the install, don’t ignore it – that’s your car telling you something needs another look.