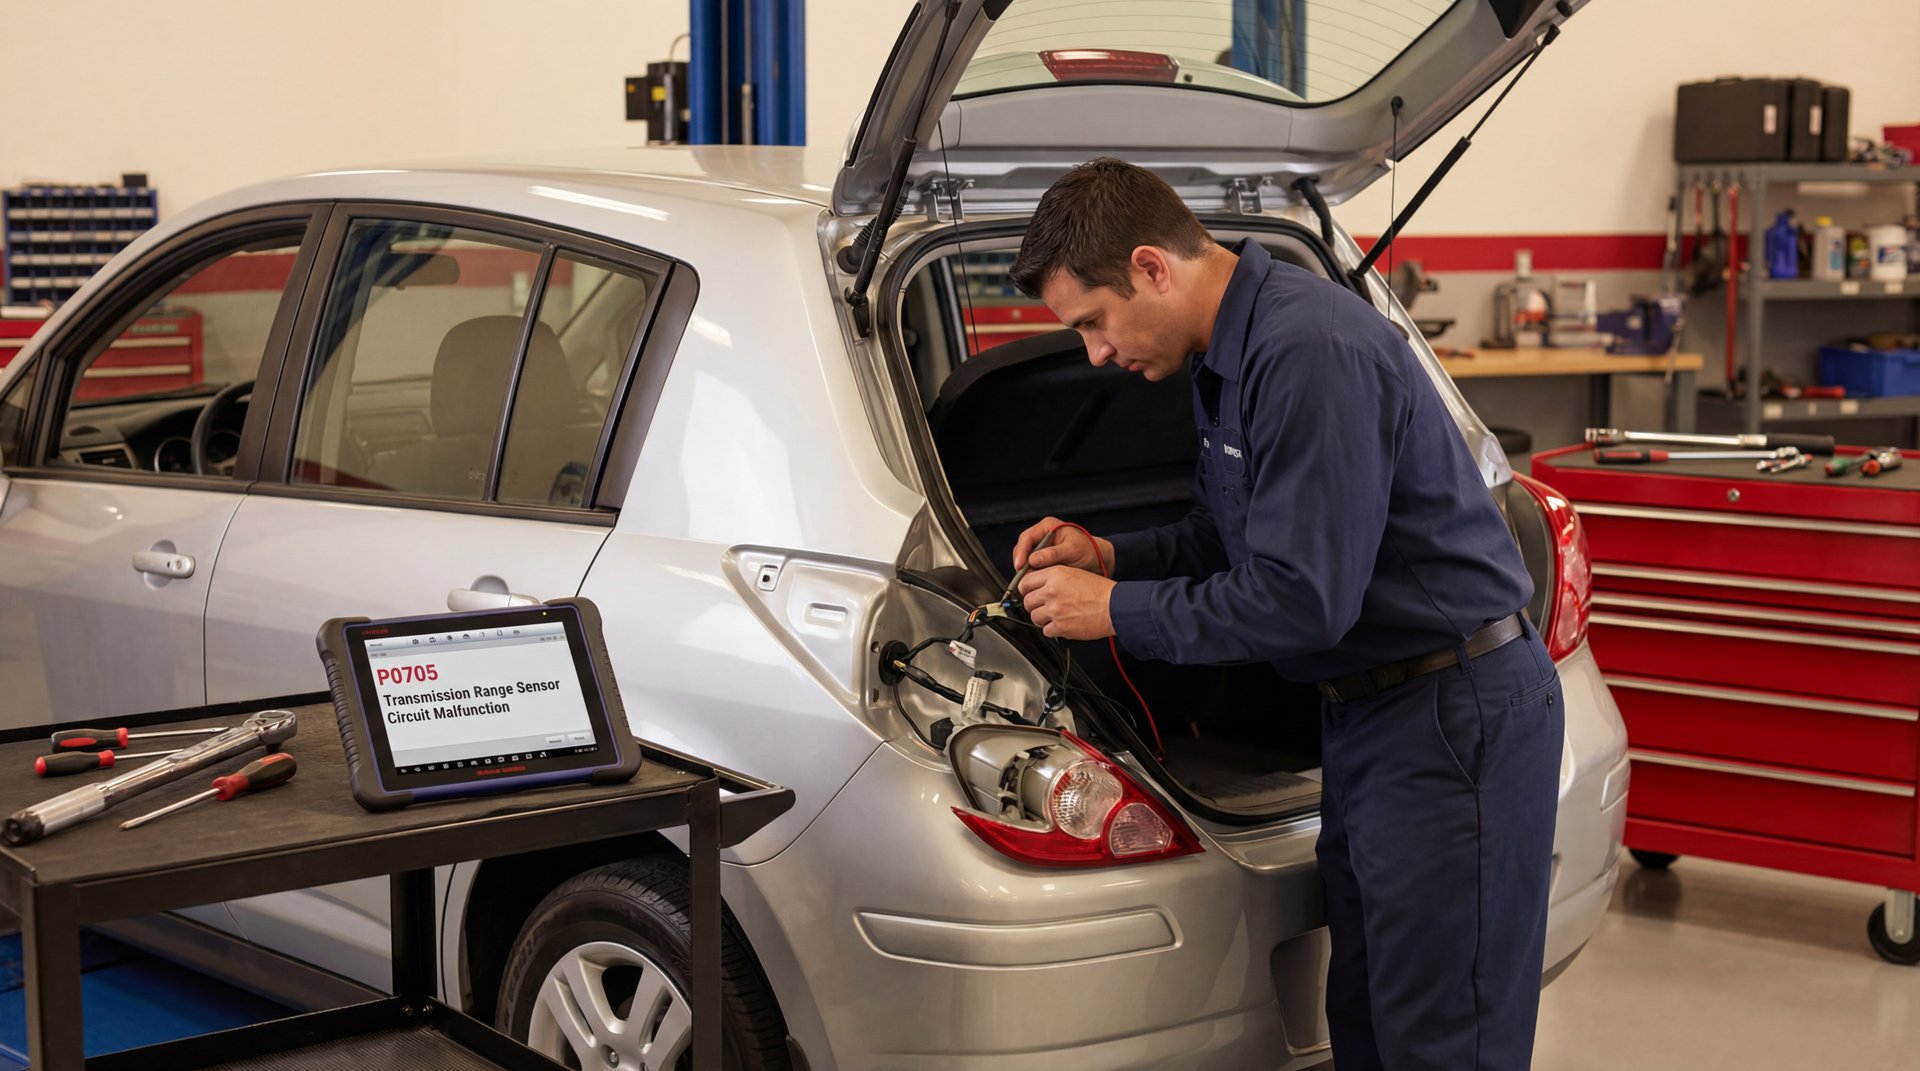
Alright guys, so you’ve got a P0705 code on your Nissan Versa and you’re probably thinking you need to replace the transmission range sensor, right? Well, here’s the thing – this is one of those codes that’s not what you’d expect at all. I’m working on a 2016 Nissan Versa that needs to pass smog, and the check engine light is on with a stored P0705 code for transmission range sensor performance. Now, under first glance, you would think you’d have to start testing the transmission range sensor, but after doing a little research, I found out there’s actually a service bulletin for this. The real cause? Your reverse lights or water getting into your rear taillight assemblies. Yeah, I know – sounds crazy, but let me walk you through exactly what’s going on and how to fix it for way less money than you’d think.
Understanding the P0705 Code on Your Nissan Versa
So what exactly is a P0705 code? Basically, it’s telling you there’s a problem with your transmission range sensor circuit, which is also called the auto inhibitor switch or neutral safety switch. This sensor tells your car’s computer what gear you’re in – park, reverse, neutral, drive, all that stuff.
Now here’s where it gets interesting. When most people see this code, they immediately start thinking they need to replace the transmission range sensor itself, which runs anywhere from $50 to $120 for the part, plus you’re looking at another $100 to $150 in labor if you take it to a shop. That’s easily $200+ you could be wasting.
❌ Common Mistake
Don’t just replace the transmission range sensor without checking your reverse lights first! This is the number one mistake people make with this code, and it’ll cost you money for a part you probably don’t even need.
The thing is, Nissan actually released a service bulletin – number NTB15-082 – that specifically addresses this issue. What they found was that the P0705 code on Versa models from 2012 to 2019 is usually caused by either reverse light bulbs being out or water getting into the rear taillight assemblies. The moisture gets in there, corrodes that little circuit board behind the taillights, and boom – your car thinks there’s a problem with the transmission range sensor.
The Real Culprit: Your Taillight Assembly
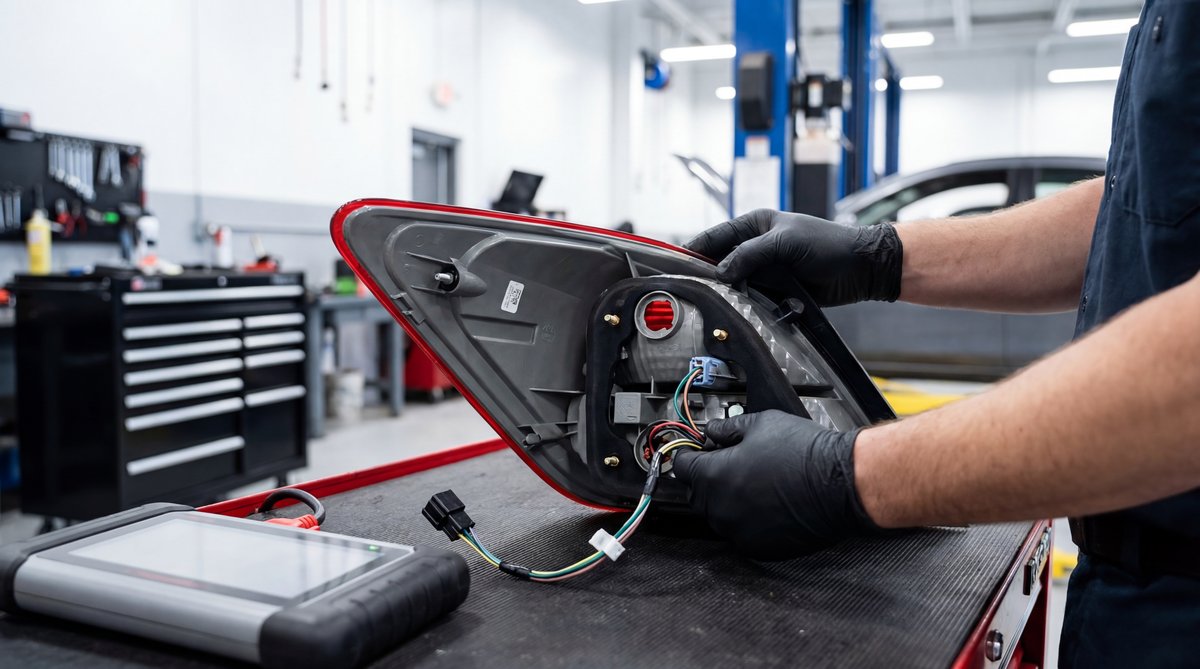
So here’s what we’re actually dealing with. Behind your taillight assembly, there’s a small circuit board – it’s all integrated into the lens assembly. When water gets in there or the reverse light bulbs fail, it messes with the electrical signals that go to your transmission control module. Your car’s computer sees this wonky signal and throws a P0705 code, thinking something’s wrong with the transmission range sensor.
The good news? This is actually super easy to check. First thing you want to do is just test your reverse lights. Put your car in reverse and see if those lights are working. If they’re out or acting funny, that’s probably your problem right there.
The service bulletin number is NTB15-082. The cause of this problem is due to either the reverse lights being out or water getting into the rear taillight assemblies.
The second thing to check is moisture. When you pull those taillight assemblies out (which I’ll show you how to do in a minute), look for any signs of water damage, corrosion, or condensation inside the housing. That moisture is what kills the circuit board and causes all these electrical gremlins.
🔧 Pro Tip
Before you order any parts, pop your trunk and do a quick visual inspection of the taillight assemblies. Look for condensation or moisture inside the lens. If you see it, you’ve found your problem without even taking anything apart.
Removing the Taillight Assembly
Alright, so let’s get into how to actually access these taillight assemblies. It’s way easier than you’d think – we’re talking maybe 30 minutes to an hour tops, even if you’re taking your time.
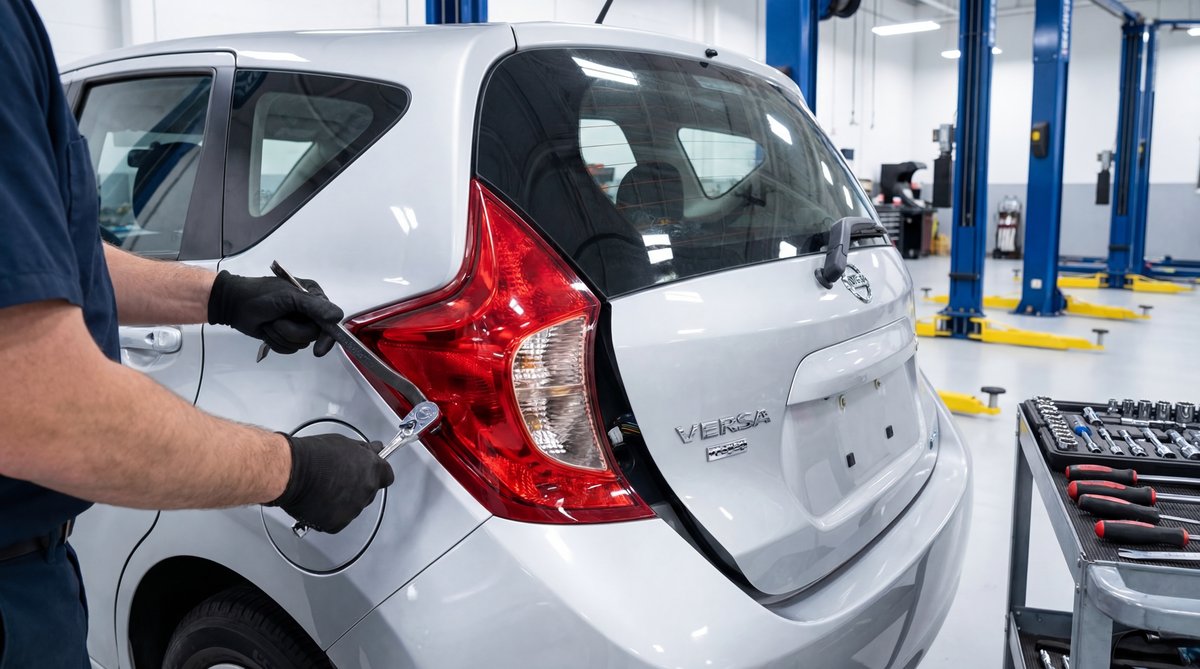
First thing you’re gonna do is pop open your trunk. Once you’re in there, you’ll see the back of the taillight assemblies. What we’re looking for are two 10mm bolts – one at the top and one at the bottom. There’s also a little clip, but no bolt there. So really, it’s just these two 10mm bolts holding the whole assembly in place.
🔧 Tools Needed
- 10mm socket and ratchet
- Flathead screwdriver or trim removal tool (optional)
- OBD-II scanner to read and clear codes
- Safety glasses
- Work gloves
Real quick here – before you start pulling things apart, disconnect your battery. I know some of you guys are gonna skip this step, but seriously, anytime you’re working with electrical stuff, just disconnect that negative terminal. Takes two seconds and prevents you from shorting something out or getting shocked.
⚠️ Warning
Always disconnect your battery before working on electrical components. You don’t want to short out any circuits or risk getting shocked. And wear safety glasses – there can be sharp edges inside the trunk area when you’re working around these assemblies.
Once you’ve got those two bolts out, the whole lens assembly just pops right out. You might need to wiggle it a little bit to get it free from that clip, but it comes out pretty easy. And here’s what you’re gonna find – in behind where those bolts go in, there’s that circuit board I was talking about. This is the part that causes all the problems when it gets corroded or wet.
Getting Replacement Parts and Installation
So here’s where it gets even better – you can get both taillight assemblies on Amazon for about $106 for the pair. I’ll leave the link below in the description, but basically, you’re getting the complete assembly with the circuit board, the bulbs, everything. It all comes as one piece, which makes the job super straightforward.
| DIY Cost | Shop Cost | You Save |
|---|---|---|
| $40-$106 | $150-$250 | $100-$150+ |
Now, if you want to check out other options, you can also grab these from eBay or go to your Nissan dealership for OEM parts. The dealership parts are gonna run you a bit more – probably around $80 per assembly – but some people prefer to stick with OEM. The thing is, the aftermarket assemblies work just fine and come with a decent warranty.
💰 Money Saver
You can get cheap replacement taillight assemblies on Amazon for way less than dealer prices. The quality is solid and they come with everything you need – bulbs, circuit board, the whole nine yards. For the price difference, it’s a no-brainer.
Installation is basically the reverse of removal. You’re gonna line up that new assembly with the mounting holes, make sure that little clip seats properly, and then thread in your two 10mm bolts. Now, you don’t want to gorilla these bolts – they’re going into plastic, so hand-tight plus a little snug is all you need. If you want to get technical about it, the torque spec is about 40 to 53 inch-pounds, but honestly, just don’t crank on them and you’ll be fine.
One thing to watch out for – when you’re pushing that assembly back into place, make sure all the electrical connectors are properly seated. Give them a little tug to make sure they’re locked in. The last thing you want is to button everything up and find out your lights aren’t working because a connector wasn’t fully clicked in.
Testing Your Repair and Clearing the Code
Alright, so you’ve got your new taillight assemblies installed. Now we need to test everything and clear that code. First thing – reconnect your battery and fire up your car. Put it in reverse and check those reverse lights. They should be nice and bright now with the new assemblies.
Next, grab your OBD-II scanner and clear that P0705 code. Now here’s what I tell everybody – just because the code clears doesn’t mean you’re done. You need to take the car for a drive, cycle through all the gears a few times, back up a couple times, and basically just drive it normally for a bit. Then rescan it and make sure that code doesn’t come back.
🔧 Pro Tip
After clearing the code, drive the vehicle through several complete drive cycles before you head to the smog station. You want to make sure all the readiness monitors are set and that code doesn’t pop back up. Usually takes about 50-100 miles of mixed driving to get everything ready for emissions testing.
Now, what if you do all this and the code comes back? Well, then you need to do a little more digging. Check that wiring harness that runs to the taillights – sometimes those wires can get corroded or damaged. You can use a multimeter to test continuity and make sure you’re getting proper voltage where you should be.
If the wiring checks out fine and you’re still getting the code, then – and only then – you might actually need to look at the transmission range sensor itself. But honestly guys, in my 26 years as an ASE Master Technician, I’ve seen this code dozens of times on these Versas, and it’s almost always the taillight assembly. The actual sensor failing is pretty rare.
If you have that stored code P0706 for transmission range sensor performance, it is not what you would probably think and I would start by checking these lenses.
If you’re dealing with other check engine light codes and want to avoid wasting money on unnecessary repairs, you might want to check out our guide on variable valve timing codes – another common situation where the fix isn’t what you’d expect.
The bottom line here is that this P0705 code on Nissan Versas is usually a cheap, easy fix that anybody can do in their driveway. You don’t need special tools, you don’t need to drop the transmission, and you definitely don’t need to spend hundreds of dollars at a shop. Just grab those taillight assemblies, spend 30 minutes swapping them out, and you’re good to go.
Frequently Asked Questions
What are the most common causes of the P0705 code in a Nissan Versa?
How can water damage affect the transmission range sensor?
What steps should I take to test the reverse lights for the P0705 code?
Are there any specific tools needed to replace the taillight assemblies?
How can I find the service bulletin number NTB15-082 for my Nissan Versa?
