Alright guys, so here’s the deal – you took your car in for service and they’re telling you that you need new brake pads. But do you really? Or are they trying to sell you something you don’t actually need yet? That’s what we’re gonna talk about today. I’m gonna show you exactly what brake pads look like when they actually need to be replaced versus when they still have plenty of life left. The thing is, a lot of people get talked into replacing perfectly good brake pads because they don’t know what to look for. Let me break it down for you.
Understanding Brake Pad Measurements
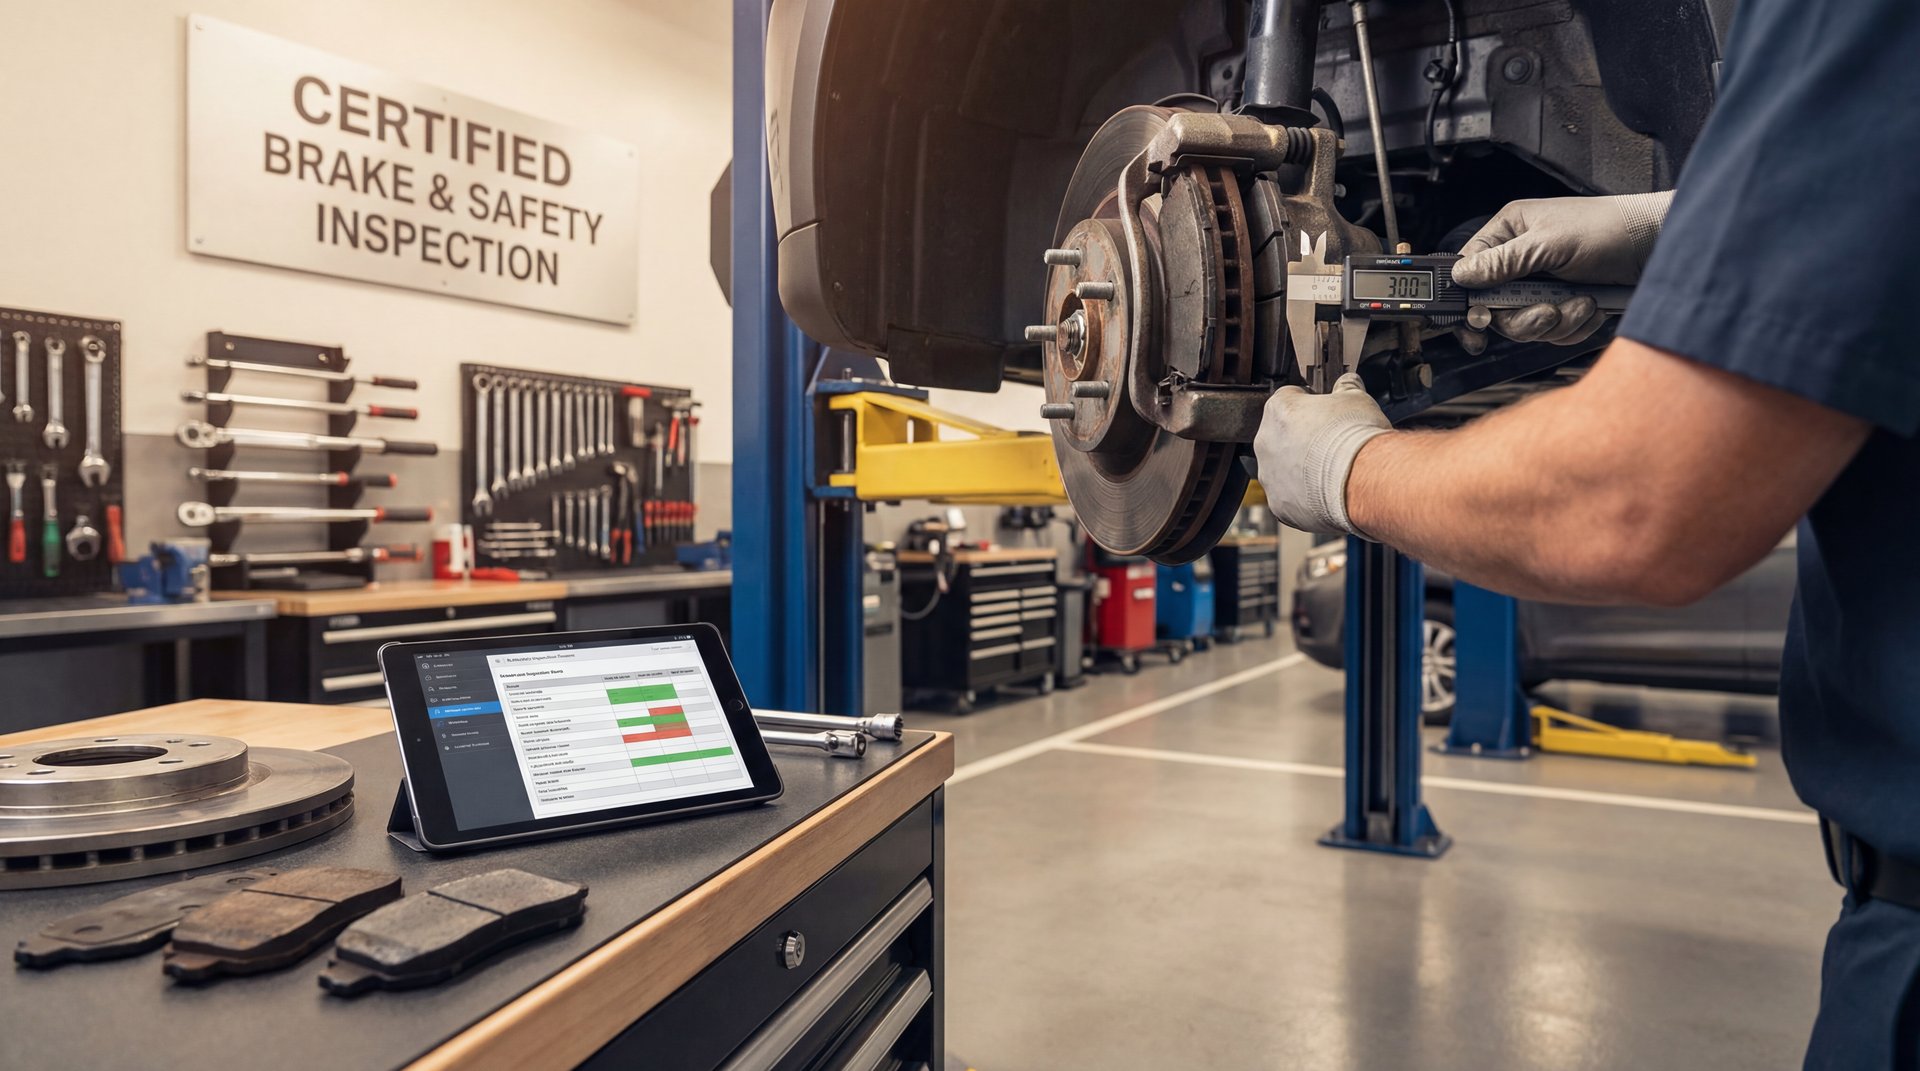
So in the video, I showed you three brake pads – the customer’s worn pad, a pad at replacement time, and a brand new pad. What we’re gonna do is measure that friction material thickness because that’s what really matters here. When I measured the customer’s brake pad, we’re sitting at about 6mm of friction material left. That’s actually more than 6mm to be honest.
Now here’s the thing – a brand new brake pad is typically about 1/4 inch thick, which is roughly 6.35mm. So basically, this customer still has almost a full brake pad’s worth of material left. You see what I’m saying? They came in and somebody probably told them they needed brakes, but these pads have plenty of life remaining.
The key measurement you need to know is the friction material thickness – that’s the actual pad material that contacts your brake rotor. Over time, this material wears down from the heat and pressure of braking. What we’re measuring is how much of that friction material is left before you hit the metal backing plate.
When Brake Pads Actually Need Replacement
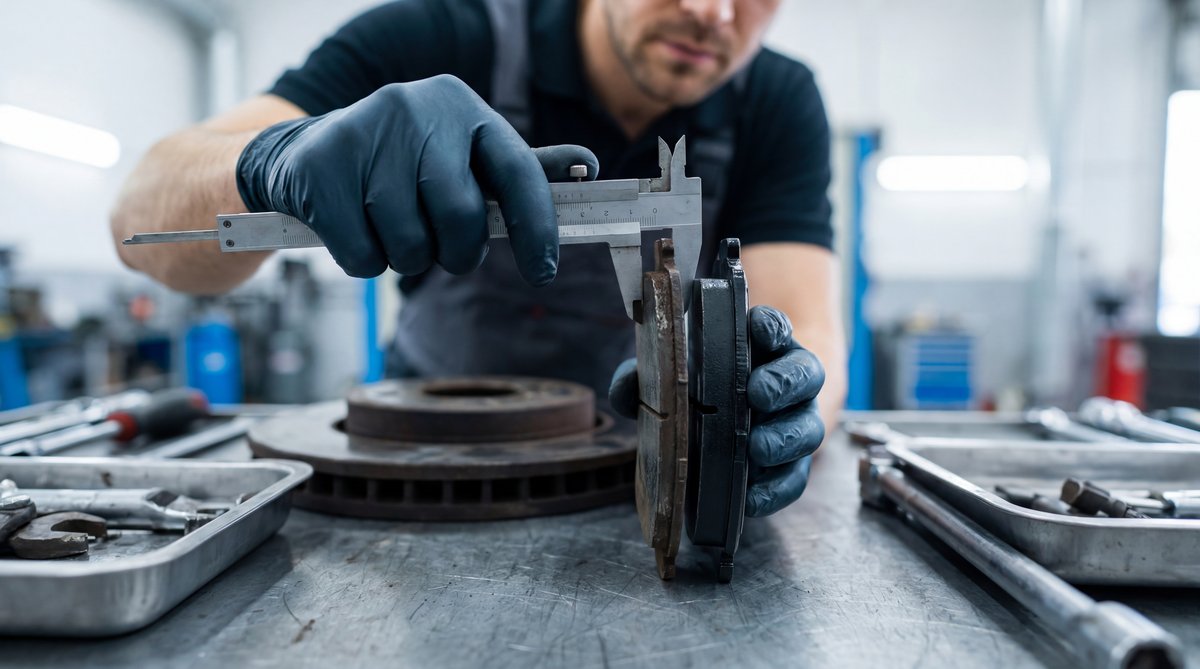
Alright, so when should brake pads actually be replaced? According to industry standards, you should replace your brake pads when they reach 3mm of friction material thickness. Some mechanics will tell you 2mm is the absolute minimum, but I wouldn’t let them get that low personally.
🔧 Pro Tip
Don’t wait until you hear grinding noises to replace your brake pads. By that point, you’ve gone metal-on-metal and you’re damaging your rotors. That turns a simple brake pad replacement into a much more expensive brake pad AND rotor replacement.
So let me put this in perspective for you guys. If a new pad is around 6.35mm and you should replace at 3mm, that means the customer’s pad at 6mm is basically right in the middle of its service life. They’ve got another good chunk of miles left on those pads before they actually need replacement.
| Measurement | Status | Action Needed |
|---|---|---|
| 6mm+ | Good condition | No replacement needed |
| 3-6mm | Wearing normally | Monitor condition |
| 3mm or less | Replace soon | Schedule replacement |
| 2mm or less | Critical | Replace immediately |
The thing is, shops make money on brake jobs. It’s one of the most common services they perform. So sometimes – not always, but sometimes – you might get told you need brakes when you really don’t. That’s why it’s important to know these numbers yourself.
Signs Your Brake Pads Are Worn Out
Now, you can’t always get in there with calipers and measure your brake pads yourself. So what are the signs that tell you your pads are actually worn out and need attention? Let me walk you through what to look for.
First thing – you’ll hear a high-pitched squealing or squeaking when you apply the brakes. A lot of brake pads have what’s called a wear indicator – basically a little metal tab that starts making contact with your rotor when the pad gets too thin. That’s your early warning system right there.
⚠️ Warning
If you hear grinding or metal-on-metal sounds when braking, you’ve gone way too long without replacement. At this point, you’re damaging your rotors and the repair just got a lot more expensive. Don’t ignore brake noises, guys.
Other signs to watch for:
- Your car pulls to one side when braking – This could mean uneven pad wear or a stuck caliper
- The brake pedal feels different – If it’s softer than usual or you have to press harder to stop, that’s a red flag
- Vibration or pulsing in the brake pedal – Usually means warped rotors, but severely worn pads can cause this too
- Your car takes longer to stop – Reduced braking performance is a serious safety issue
- Visual inspection shows thin pads – You can often see your brake pads through the wheel spokes
Basically, your car will tell you when something’s wrong with the brakes. You just gotta pay attention to what it’s saying.
DIY vs Shop Replacement Costs
Alright, so let’s talk money. What’s it gonna cost you to replace brake pads, and should you do it yourself or take it to a shop?
If you’re doing it yourself, you’re looking at parts costs of around $50 to $200 depending on the quality of pads you buy. Budget pads run about $30-$75 per axle – that’s for all four pads on the front or rear. Quality OEM or premium aftermarket pads will set you back $75-$150 or more per axle. You’ll also need some brake cleaner, grease for the caliper pins and backing plates, and maybe some brake fluid to top off the system.
Now, if you take it to a shop, you’re gonna pay for labor on top of those parts. A typical brake pad replacement at a shop can run you anywhere from $150 to $400 per axle depending on where you go and what kind of car you’ve got. Dealerships are gonna be on the higher end of that range, while independent shops might be a bit cheaper.
💰 Money Saver
If you’ve got basic mechanical skills and the right tools, doing your own brake pad replacement can save you $100-$300 in labor costs. The job typically takes 1.5 to 3 hours for someone with experience. Just make sure you know what you’re doing – brakes are a critical safety system.
The thing is, brake pad replacement isn’t like dealing with electronic emergency brakes or other complex systems. It’s a pretty straightforward job if you’ve got mechanical knowledge. But – and this is important – you need a good level of mechanical knowledge to do this safely. This isn’t like checking your tire pressure or topping up oil.
How to Check Brake Pads Yourself
So what we’re gonna do now is talk about how you can check your own brake pads without taking them apart. The easiest way is to look through the spokes of your wheel – most modern wheels have openings that let you see the brake caliper and pads.
When you’re looking at the brake assembly, you’ll see the brake caliper (that’s the part that squeezes the pads against the rotor) and you should be able to see the outer brake pad. Look at the thickness of the friction material – that dark-colored pad material between the metal backing plate and the rotor. If it looks less than 1/4 inch thick, you’re getting close to replacement time.
🔧 What You Need to Check Brake Pads
- Flashlight or headlamp for visibility
- Ruler or measuring tape (optional but helpful)
- Your eyeballs and common sense
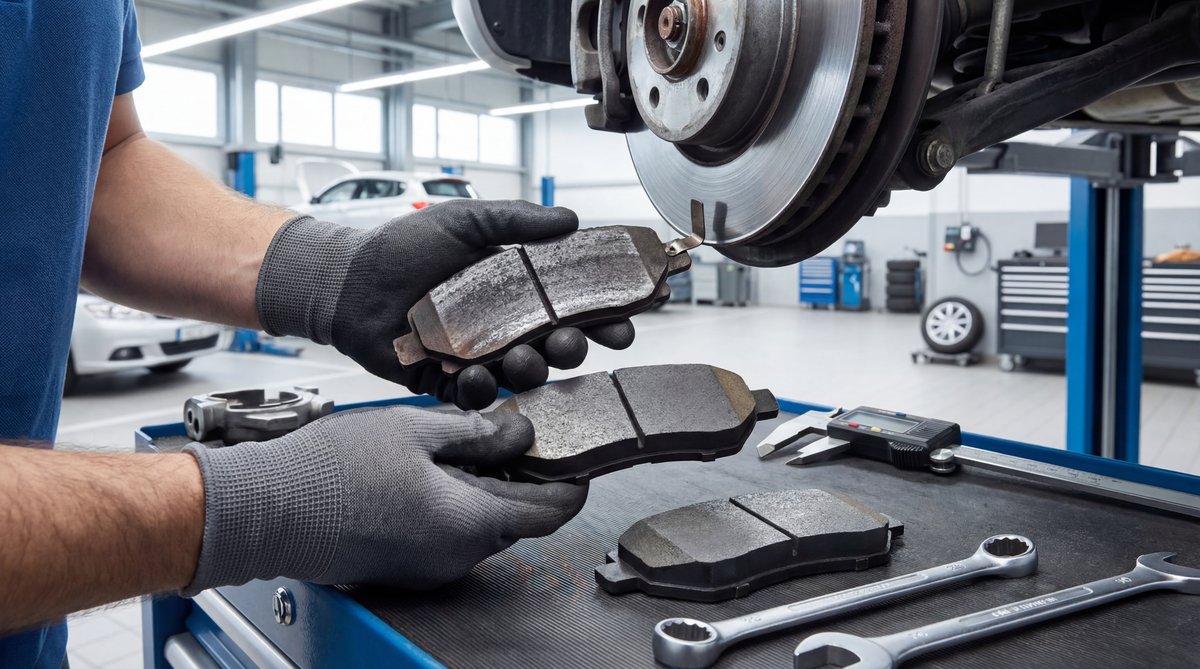
Now, here’s the reality – you can only see the outer pad this way. The inner pad might be wearing differently, especially if you’ve got a sticking caliper. That’s why if one pad looks worn, you really should get both sides checked out properly.
❌ Common Mistake
A lot of people only replace brake pads on one side or assume both sides are wearing evenly. Always replace pads in complete axle sets – all four pads on the front or all four on the rear. Uneven pad wear causes unbalanced braking, which is dangerous.
If you want to do a more thorough inspection, you’ll need to remove the wheel. Make sure you’re using proper jack stands – never work under a car supported only by a jack. Safety first, guys. With the wheel off, you can see both pads clearly and measure them with calipers if you want to be precise.
At 6mm of pad thickness, you’ve still got plenty of life left. Don’t let anyone tell you different.
The bottom line is this – if your pads measure 6mm like the customer’s in my video, you don’t need brakes yet. You’ve got thousands of miles left on those pads. If someone’s telling you otherwise, they’re either measuring wrong or they’re trying to sell you something you don’t need. Know your numbers, trust your measurements, and don’t get scammed.
Frequently Asked Questions
What are the signs that my brake pads need replacing?
How do I know if my brake pads are worn out?
What tools do I need to replace my brake pads?
How do I safely jack up my car for brake pad replacement?
What are the common mistakes to avoid when replacing brake pads?
