Alright guys, so today we’re gonna walk through how to replace a headlight bulb in a Tesla Model S. Now, the thing is, this is actually more accessible than a lot of people think. You’re not gonna need to take the whole front bumper off or anything crazy like that. Basically, you’re gonna go in through the wheel well, pop out a few clips, and you’re good to go. I’ll show you exactly how to do it, what tools you need, and how to avoid the common mistakes that can cost you a hundred bucks or more if you mess up that HID bulb.
Removing the Wheel and Accessing the Inner Fender
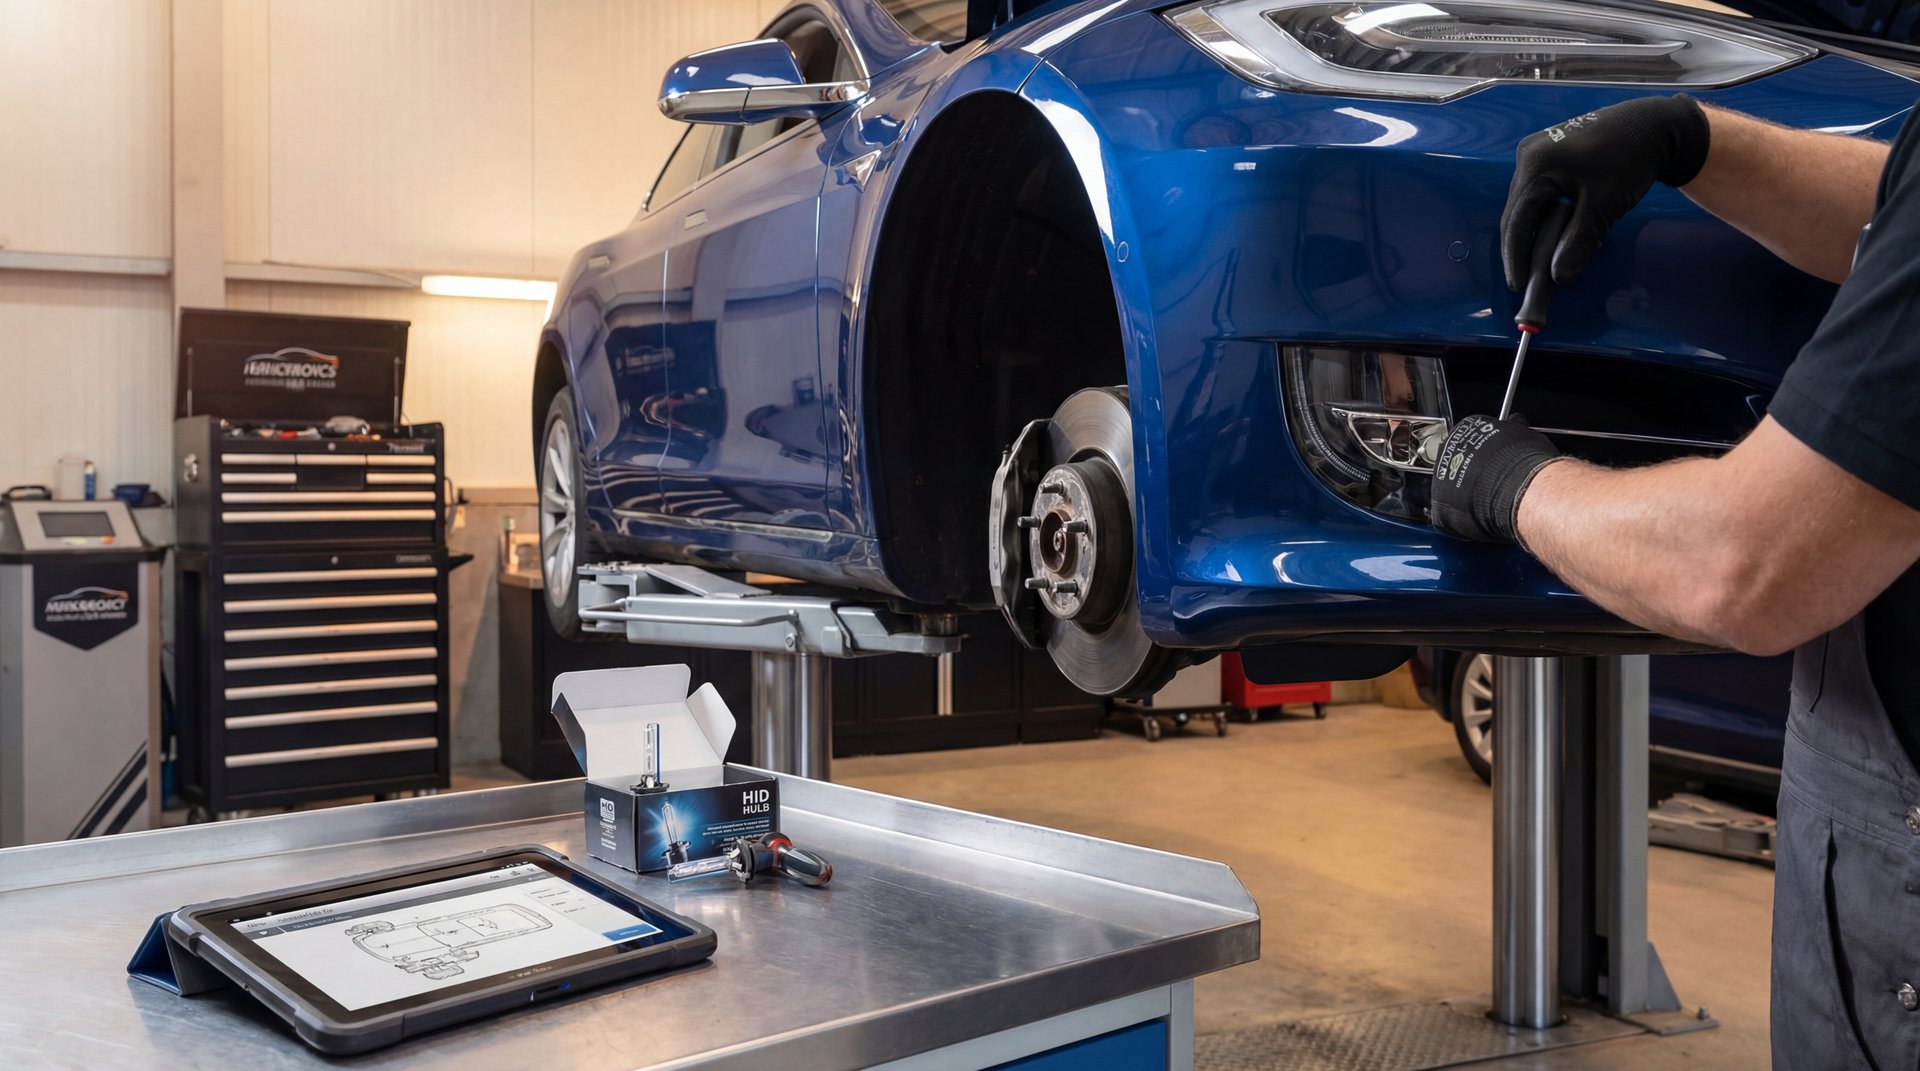
First thing you’re gonna do is pull the wheel off. Now, before you do that, make sure you’re following proper safety procedures. You want to get the car up on rated jack stands on the correct Tesla lift points – don’t just throw a jack under there anywhere or you risk damaging the battery pack or body. Set your parking brake and chock the opposite wheels, just like you would with any other car.
⚠️ Warning
Always use proper jack stands on Tesla’s designated lift points. The battery pack runs under the car, and putting a jack in the wrong spot can cause serious damage. Check your owner’s manual for the exact locations.
Once you’ve got the wheel off, you’re gonna see this plastic inner fender skirt. It’s held in with a bunch of plastic clips – probably six to eight of them depending on your year. You can use one of those plastic clip removal tools to pop these out real quick. What we’re gonna do is just work your way around that inner fender liner, popping out all these clips. They’re not torqued down or anything, they’re just push-clips, so they come out pretty easy if you use the right tool.
🔧 Tools Needed
- Floor jack and jack stands (rated for your Model S)
- Lug wrench or impact gun
- Plastic clip removal tool (trim tool set)
- Clean nitrile gloves (for handling HID bulb)
- Flashlight or work light
Once you get those clips out, you can pull back that inner fender skirt and tuck it out of the way. You don’t need to completely remove it – just pull it back enough to access the back of the headlight assembly.
Locating the Headlight Assembly Behind the Wheel Well
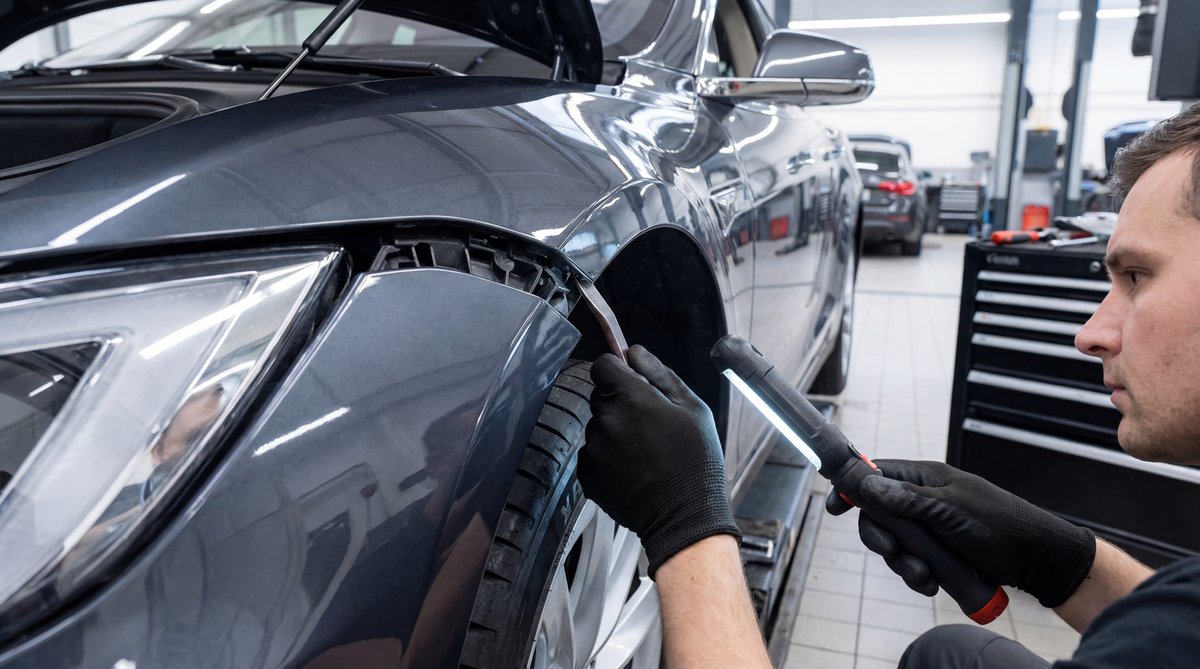
Alright, so now you can access the headlight, which is right in behind here. You’re gonna see you got a hole right there – there’s just a little plastic cover over it. This is the service access for the bulb. Pull that little plastic cover off and set it aside somewhere you won’t lose it.
Now, the Model S – at least the 2012 through 2018 models – these have HID bulbs. High intensity discharge. We’re talking about a D3S or D3R HID capsule, and the thing is, these aren’t cheap. You’re looking at probably about a hundred dollar bulb right there. So you definitely don’t want to mess this up.
The later Model S variants – we’re talking refresh models after 2018 – some of these switched to full LED projector assemblies where the light source isn’t really a replaceable “bulb” anymore. It’s an internal LED module, and if that goes out, you’re basically replacing the whole headlight assembly. That’s a different job altogether. But if you’ve got the HID setup like I’m showing you here, you’re in luck because this is actually a pretty straightforward bulb replacement.
Removing the Old HID Bulb
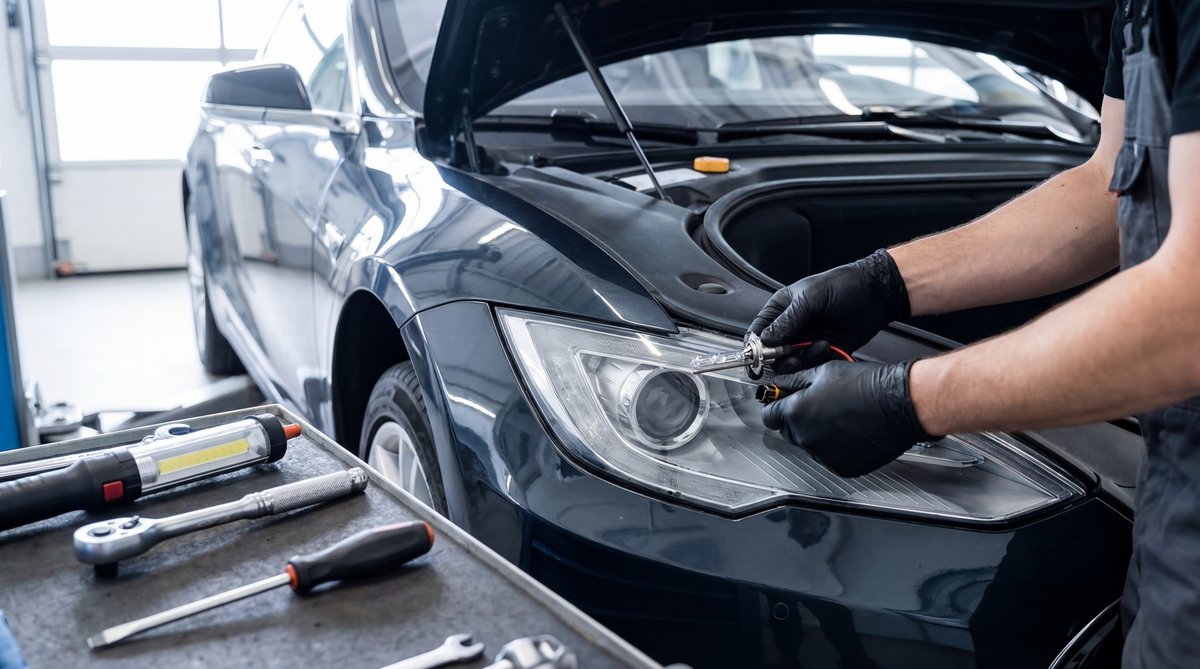
So once you’ve got that plastic cover off, you’re gonna see the back of the HID bulb sticking out. There’s a collar on there – this collar locks the bulb into the housing. What you’re gonna do is spin this collar. Righty tighty, lefty loosey, just like anything else. Turn it counterclockwise to unlock it.
The collar’s gonna spin free, and then you can pull the whole bulb assembly straight back out of the hole. Real quick before you yank it out – disconnect the electrical connector first. There’s a plug on the back of the bulb. Usually there’s a little tab or clip you squeeze, and then you can wiggle it off. Don’t force it or you might break the connector tabs.
🔧 Pro Tip
Power down the car completely through the touchscreen and wait a couple minutes before unplugging the headlight connector. You want to make sure there’s no residual voltage that could arc when you disconnect. HID systems run at high voltage and you don’t want to damage the ballast or bulb.
Now here’s the thing – HID bulbs are pressurized and they’ve got mercury or metal halides in them. You do NOT want to touch the glass part of the bulb with your bare fingers. The oils from your skin will create hot spots on that glass, and when the bulb fires up, those hot spots can cause the bulb to fail early or even crack. Always handle HID bulbs with clean gloves or by the base only.
❌ Common Mistake
Touching the HID bulb glass with your bare hands. The oils from your fingers will cause premature failure and you’ll be doing this job again in six months. Use clean nitrile gloves or hold the bulb by the plastic base only.
Once you’ve got the old bulb out, take a look at it and confirm what type you’ve got. It should say D3S or D3R right on the base. That’s what you need to order for the replacement. And by the way, when you dispose of that old HID bulb, don’t just throw it in the regular trash – these are considered hazardous waste because of the mercury content. Take it to a recycling center or an auto parts store that accepts old bulbs.
Installing the New Bulb and Locking It In
Alright, so now we’re gonna install the new bulb. Grab your new HID capsule – again, don’t touch the glass – and this just slides into the hole like that. There’s a little alignment tab on the bulb base that matches up with a slot in the housing, so it only goes in one way. Slide it straight in until it seats.
Then you take that collar we removed earlier, slide it back over the bulb base, and spin it clockwise to lock it into place. You’ll feel it tighten up and lock. Righty tighty. That collar is what holds the bulb firmly in the housing and keeps it from bouncing around or coming loose.
This collar locks it in. You just spin this collar. Righty tighty, lefty loosey, and it locks it into place.
Once the collar’s locked down, plug the electrical connector back in. You should hear or feel it click into place. Give it a gentle tug to make sure it’s seated properly – you don’t want it vibrating loose while you’re driving down the road.
Now, before you button everything back up, turn the car on and test the headlight. Make sure the new bulb fires up and you’ve got a good beam. If it doesn’t come on, power down, wait a minute, and double-check your connector. Sometimes those plugs don’t seat fully on the first try.
Once you’ve confirmed the light works, put that little plastic access cover back on. Then tuck the inner fender liner back into place and push all those plastic clips back in to secure it. Basically you’re just reversing what you did to get in there. Put your wheel back on, torque the lug nuts to spec, and you’re done.
💰 Money Saver
If you take this to a Tesla service center or even an independent shop, you’re looking at an hour of labor plus the bulb cost. Tesla’s flat-rate time for headlamp work is about 0.96 hours, so you’re paying for a full hour at shop rates – probably $150 to $200 in labor alone, plus that $100 bulb. Do it yourself and you’re only out the cost of the bulb.
| DIY Cost | Shop Cost | You Save |
|---|---|---|
| $100-120 | $250-350 | $150-230 |
Bulb Compatibility and Safety Notes
Real quick, let’s talk about making sure you get the right bulb. For the 2012 through 2018 Model S with HID low beams, you need a D3S or D3R capsule. Bulb finder charts confirm D3S/D3R for these years. The later refresh models from 2016 to 2018 can also use D3S/D3R in the low beam position, depending on the exact headlamp assembly you’ve got.
Now, some people ask about upgrading to LED bulbs in place of the HID. You can find LED “replacement” bulbs that fit the D3S socket, but the thing is, Tesla’s headlamp assemblies are designed and calibrated for HID output and beam pattern. If you swap in LEDs, you might get weird beam patterns, glare for oncoming traffic, or the bulbs might not fit right and overheat. Stick with OEM-spec HID bulbs unless you really know what you’re doing with aftermarket LED conversions.
🔧 Pro Tip
Always double-check your actual bulb type before ordering. Pop out the old bulb and look at the markings on the base. Bulb charts are great, but production changes and different trim levels can sometimes mean your car has a different setup than expected. Confirm first, order second.
And one more safety thing – if you’re doing a full headlight assembly replacement (not just the bulb), Tesla service procedures call for reinstalling vehicle software and then adjusting headlamp aim using the wall method. That’s beyond the scope of a simple bulb swap, but if you ever need to replace the whole assembly, just know that you’ll probably need to get the aim dialed in afterward or your lights will be pointing at the sky or into oncoming drivers’ eyes.
If you’re working on other electrical stuff on your Tesla, you might want to check out our guide on what happens if you hook a battery up backwards – it’s a whole different system than a regular car, but the principles of not shorting stuff out still apply.
Bottom line: this is no different than a regular HID headlight bulb replacement on any other car. Tesla just makes you go through the wheel well instead of popping the hood. It’s a little extra work pulling those clips and moving the fender liner, but once you’re in there, it’s the same collar-lock HID system you’d find on a BMW, Audi, or any other car with factory HIDs.
Frequently Asked Questions
What are the most common mistakes when replacing the headlight in a Tesla Model S?
How can I ensure the new headlight bulb is compatible with my Tesla Model S?
What safety precautions should I take when replacing the headlight in a Tesla Model S?
Are there any specific tools required for replacing the headlight in a Tesla Model S?
How long does it typically take to replace the headlight in a Tesla Model S?
