Alright guys, so I had a customer come in who’s been dealing with one of those really frustrating AC problems – he keeps filling up his system and within a week, all the refrigerant just leaks right back out. If you’ve been dealing with the same thing, I’m gonna show you exactly where to look for those leaks, because the thing is, there are some really common spots where AC systems leak and you can check most of them yourself.
Now, the customer’s system was supposed to have about 1.25 pounds of refrigerant, but when I recovered it, we only got 0.18 pounds back. That’s significantly low, which tells us we’ve got a pretty good-sized leak somewhere. Let me walk you through checking all the most common leak points so you can track down your own AC problem.
Checking for Dye in the System
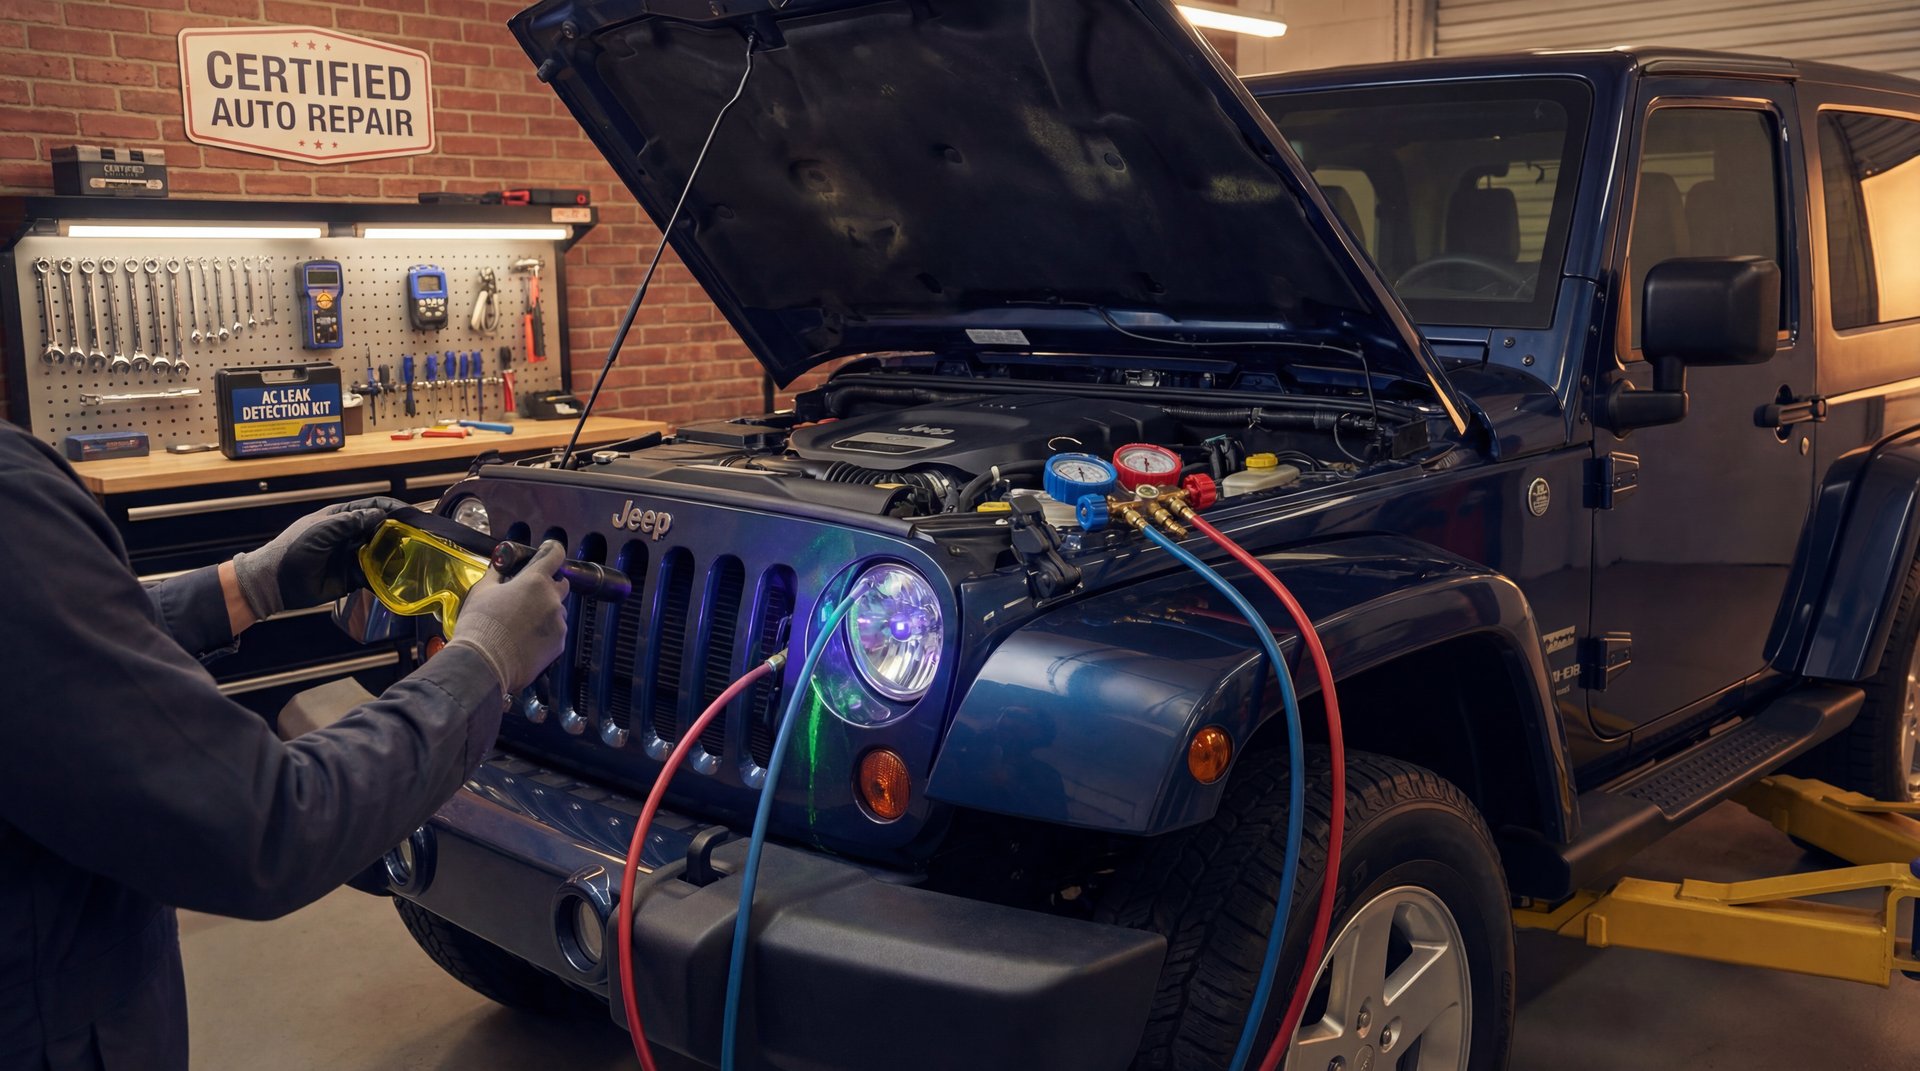
First thing we’re gonna do is check if there’s already UV dye in the system. Most shops will add dye when they recharge your AC, and it makes finding leaks way easier. On this Jeep, I checked the low side service port first – and right away you could see some dye there, which tells us we’re definitely working with a system that’s got a leak.
When you’re checking for dye, you’ll need a UV light – you can pick one up for around $20 to $50 depending on what you get. The dye will glow bright yellow or green under UV light wherever refrigerant has been leaking out. If your system doesn’t have dye yet, you’ll need to add some (about 0.25 oz), run the AC for 10-30 minutes to circulate it, then come back and check with your UV light after about 24 hours for slower leaks.
🔧 Tools Needed for Leak Detection
- UV leak detection kit ($25-50)
- Manifold gauge set ($50-150)
- UV flashlight (365nm wavelength)
- Safety glasses and nitrile gloves
- Recovery machine (if evacuating system)
⚠️ Warning
Never vent refrigerant to atmosphere – it’s illegal and the EPA can fine you over $44,000. You need to properly recover refrigerant using an approved recovery machine. If you don’t have EPA 609 certification, this is where you’ll want to take it to a shop or get certified first.
The Evaporator Drain: Third Most Common Leak
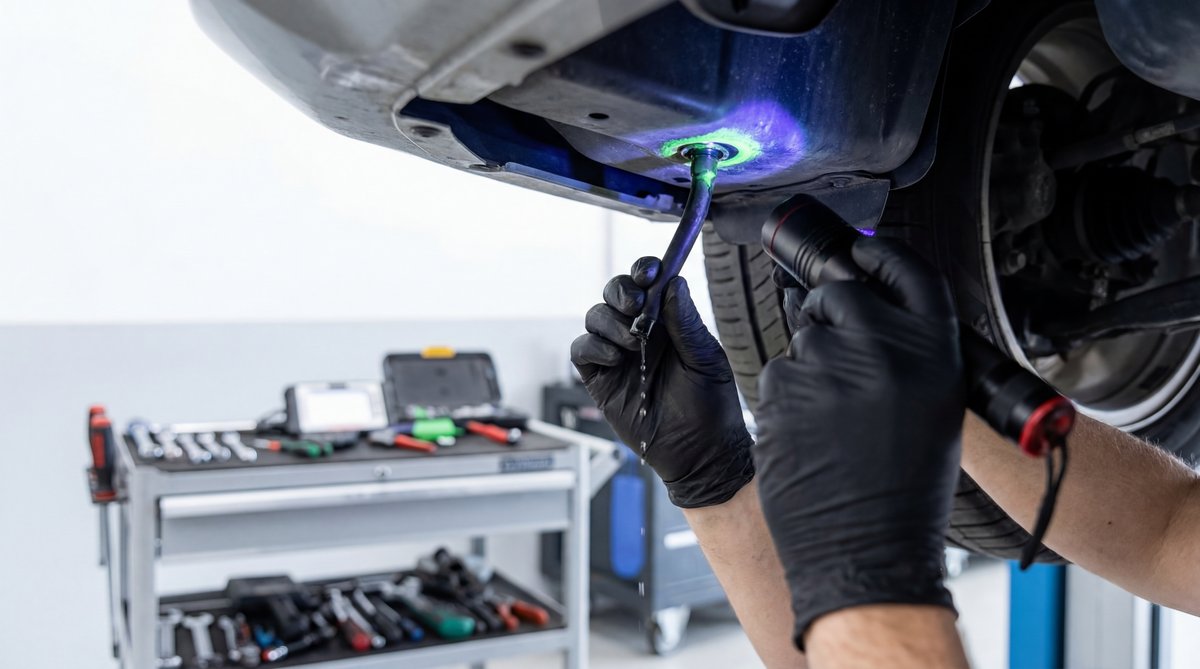
Alright, so one thing we’re definitely gonna want to check is your evaporator drain. On this Jeep, it’s located on the firewall on the driver’s side. This is probably the third most common place you’ll find an AC leak, and it’s one people miss all the time because they’re not thinking to check there.
The evaporator is the part that’s inside your dashboard, and it’s got a drain tube that lets condensation drip out underneath the car. What happens is, if there’s a leak at the evaporator itself or where the lines connect to it, you’ll see dye coming out of that drain tube. It’s a dead giveaway that your evaporator has a problem.
Now here’s the thing – if your evaporator is actually leaking, that’s not a fun repair. You’re looking at 8-12 hours of labor because the whole dash has to come apart to get to it. According to automotive AC repair specialists, evaporator replacement at a shop can run you $800 to $1,500 total. That’s basically why we check all the easier stuff first.
🔧 Pro Tip
Check for oily residue or dye at the evaporator drain tube on the firewall. If you’re losing refrigerant weekly and this drain shows dye, you’ve likely got an evaporator leak. This is especially common on Jeep Wranglers from 2007-2018.
Steel-to-Rubber Line Connections
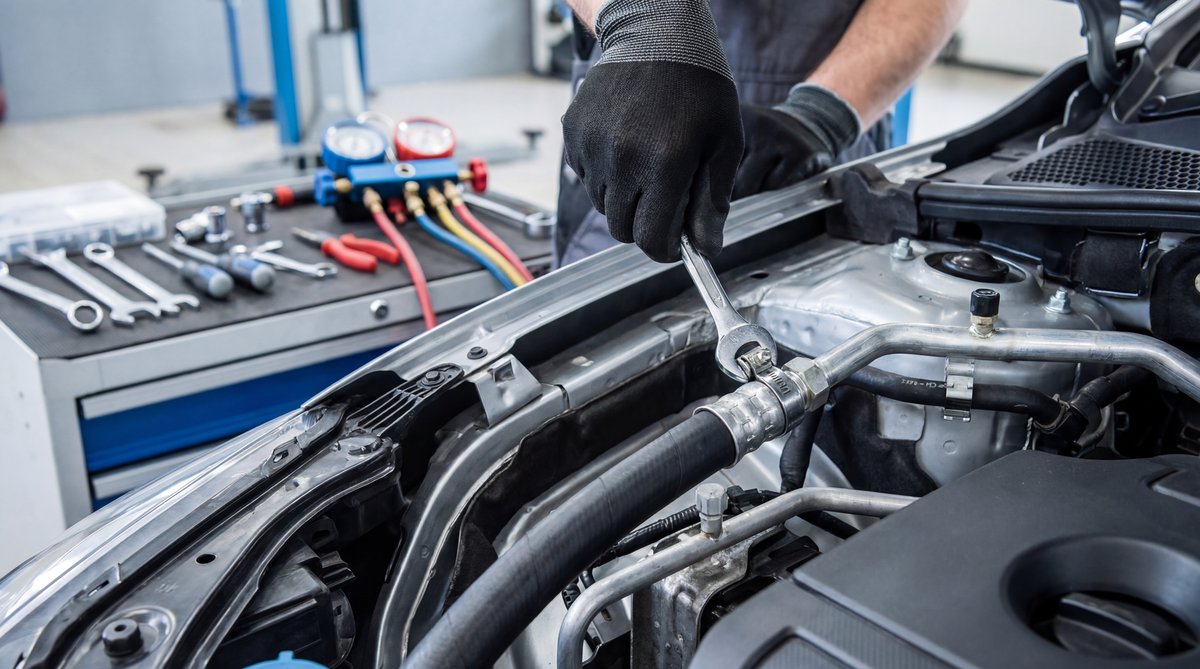
The second most common leak point – and this is a big one – is where your AC lines connect, especially where steel lines meet rubber hoses. Basically what happens is you’ve got different materials that expand and contract at different rates, plus there’s vibration from the engine, and over time those connection points start to leak.
You’re gonna want to check all the connections where the hard lines connect to rubber hoses. Run your UV light along each connection point and look for that telltale yellow glow. Pay special attention to any connections near the engine where there’s more heat and vibration – that’s where they fail first.
If you find a leak at one of these connections, the repair is actually pretty straightforward. You can usually replace just that section of hose. For example, an AC hose that runs from the condenser to the evaporator might cost you $40-80 for an aftermarket part, or $100-150 if you go with an OEM replacement. Just make sure when you reconnect everything, you’re using the right O-rings and torquing the fittings properly – we’re talking 10-15 ft-lbs for R134a fittings, and 5-8 ft-lbs for O-ring style connections.
| DIY Cost | Shop Cost | You Save |
|---|---|---|
| $50-150 | $400-600 | $300-450 |
❌ Common Mistake
A lot of people skip evacuating the system properly before refilling it. You need to vacuum the system down to about 500 microns for at least 30 minutes. If you don’t, moisture stays in the lines, turns to ice, and causes blockages or acid that eats your compressor from the inside.
Inspecting Your AC Condenser
Your condenser sits right up front behind the grille – it looks like a radiator because basically that’s what it is, just for your AC system. This is another really common leak spot, and the thing is, it gets damaged pretty easily from road debris, rocks, salt in winter, all that stuff.
What we’re gonna do is take your UV light and go up and down each side of the condenser. You’re looking for any signs of yellow dye on the fins or tubes. Check the inlet and outlet connections too. The condenser takes a beating being right up front, so leaks from physical damage are super common here.
Real quick – while you’re checking the condenser, look at the condition of the fins too. If they’re all bent up or clogged with bugs and debris, that’s gonna hurt your AC performance even if you don’t have a leak. You can carefully straighten minor fin damage with a fin comb, and spray it out with a garden hose to clean it.
If your condenser is leaking, you’re looking at a full replacement. A quality aftermarket condenser runs about $100-200, while OEM is more like $300-500. Shop labor for replacement is typically 2-3 hours, so you’re looking at $400-800 total at a shop. If you’re doing it yourself, budget about 3-4 hours for the job plus the cost of refrigerant to recharge it afterward.
The Front Compressor Seal: Most Common Leak
Alright, so here’s the number one most common leak point on AC systems – the front seal on your compressor. On this Jeep, you can see the compressor down behind the pulley there. And if you look right behind that pulley, you can see it’s yellow back there from the UV dye. That front compressor seal is leaking.
This happens because that seal is basically the only moving part in your AC system – the compressor shaft spins at about 6,000 RPM, and that seal has to keep all that high-pressure refrigerant from leaking out while the shaft is spinning. Over time, that seal just wears out. Heat makes it worse, and if your system has been running low on refrigerant, there isn’t enough oil circulating to keep that seal lubricated, which makes it fail even faster.
The front compressor seal is the most common AC leak point because it’s the only moving seal in the system – spinning at 6,000 RPM and dealing with 250+ PSI of pressure.
Now, you’ve got options here. You can replace just the front seal if you’re comfortable doing that – a seal kit is only about $20-30. But the thing is, if your compressor seal is already leaking, there’s a good chance the compressor itself has some wear. A lot of times it makes sense to just replace the whole compressor, especially if it’s starting to make noise or if the clutch isn’t engaging properly.
A remanufactured compressor runs about $150-300 depending on your vehicle, or $400-600 for a new OEM unit. At a shop, you’re looking at total costs of $500-1,200 for compressor replacement including labor and refrigerant. That’s why catching these leaks early is so important – the longer you run it low on refrigerant, the more damage you’re doing to that compressor.
💰 Money Saver
If you catch a compressor seal leak early and the compressor is still running smoothly, replacing just the seal can save you $300-500 versus replacing the entire compressor. But you need to do it soon – running low on refrigerant will trash the compressor and force a full replacement.
One more thing – whenever you’re replacing AC components, you need to replace the receiver-drier or accumulator too. That’s your system’s moisture filter, and it costs about $30-50. If you don’t replace it, any moisture that got in while the system was open will circulate and cause problems down the road. Also, anytime the system has been open to atmosphere, you need to vacuum it down for at least 30 minutes before recharging.
🔧 Pro Tip
When checking for compressor seal leaks, look at the clutch pulley area with your UV light. Yellow dye behind or around the pulley is a dead giveaway. The dye gets flung around by the spinning clutch, so you’ll usually see it pretty clearly if that seal is leaking.
What to Do After Finding Your Leak
Alright guys, so once you’ve found where your system is leaking, you’ve got some decisions to make. If it’s something simple like a hose connection or a compressor seal, that’s definitely DIY-able if you’ve got the tools and the EPA certification to handle refrigerant. For something like an evaporator that requires major disassembly, you might want to get some quotes from shops.
After you make your repair, the system needs to be properly evacuated – that means pulling a vacuum on it for at least 30 minutes to remove all the air and moisture. Then you recharge it with the correct amount of refrigerant. For most vehicles with R134a, you’re looking at somewhere between 0.88 to 1.65 pounds depending on the vehicle. Check your underhood sticker for the exact spec for your car.
If you’re working with a 2017 or newer vehicle, it might have R1234yf instead of R134a. You can’t mix these refrigerants, and R1234yf requires different equipment and different O-ring materials. Those seals need to be HNBR material because they hold up better to the newer refrigerant, especially in high heat.
Once everything is buttoned up and recharged, let the system run for about 10-15 minutes and then check your pressures. On the low side you should see about 25-45 PSI with the AC running, and the high side should be around 150-250 PSI depending on ambient temperature. Your vent temperature should be getting down to around 32-40°F. If something doesn’t look right, that’s when you start troubleshooting – could be a blockage, could be the wrong charge amount, could be a bad expansion valve or orifice tube.
If you’re also dealing with other cooling issues on your vehicle, make sure everything is in good shape. Sometimes people confuse engine cooling problems with AC problems because both systems are up front together.
Frequently Asked Questions
What are the most common signs of an AC leak in a car?
How can I tell if my car’s AC system needs refrigerant?
What tools are essential for detecting AC leaks?
Are there any DIY methods to fix a car AC leak?
How often should I check my car’s AC system for leaks?
