
Alright guys, today I’m gonna show you one tool that every single mechanic needs in their toolbox. We’re talking about a battery terminal cleaner, and the thing is, once you start using one of these, you’re gonna be like an addict – you gotta have it. I ain’t even playing, this thing becomes a really bad habit because it works so well. Battery terminal corrosion is one of those sneaky problems that can cause all kinds of electrical gremlins, and having the right tool makes cleaning them up super quick and easy.
Why Battery Terminals Corrode and Why You Should Care
Let me tell you what happens when you ignore those crusty white and blue deposits building up on your battery terminals. That corrosion is basically sulfuric acid residue reacting with the metal terminals, and it creates resistance. When you’ve got resistance at your battery connection, you’re gonna see all kinds of weird electrical issues.
Your battery might be putting out a solid 800 cold cranking amps, but if you’ve got corrosion adding more than 0.5 ohms of resistance, you’re not getting that power where it needs to go. Basically, it’s like trying to drink a milkshake through a clogged straw – the shake is fine, but you can’t get to it.
⚠️ Warning
Real quick – before you start messing with battery terminals, you need to wear safety glasses and nitrile gloves. That white crusty stuff has a pH of 1-2, which means it can burn your skin. Also, never smoke or use open flames within 6 feet of a battery because they produce hydrogen gas that can explode. I’m serious about this one, guys.
The other thing people don’t realize is that even clean-looking terminals can have hidden corrosion underneath the cable connection. If your voltage drop is more than 0.5V under load, you’ve got a problem that needs fixing.
The Tools You Actually Need for the Job
What we’re gonna do is break down exactly what tools you need for this job. You don’t need a whole bunch of expensive stuff, but there are a few things that make the job way easier.
🔧 Tools Needed
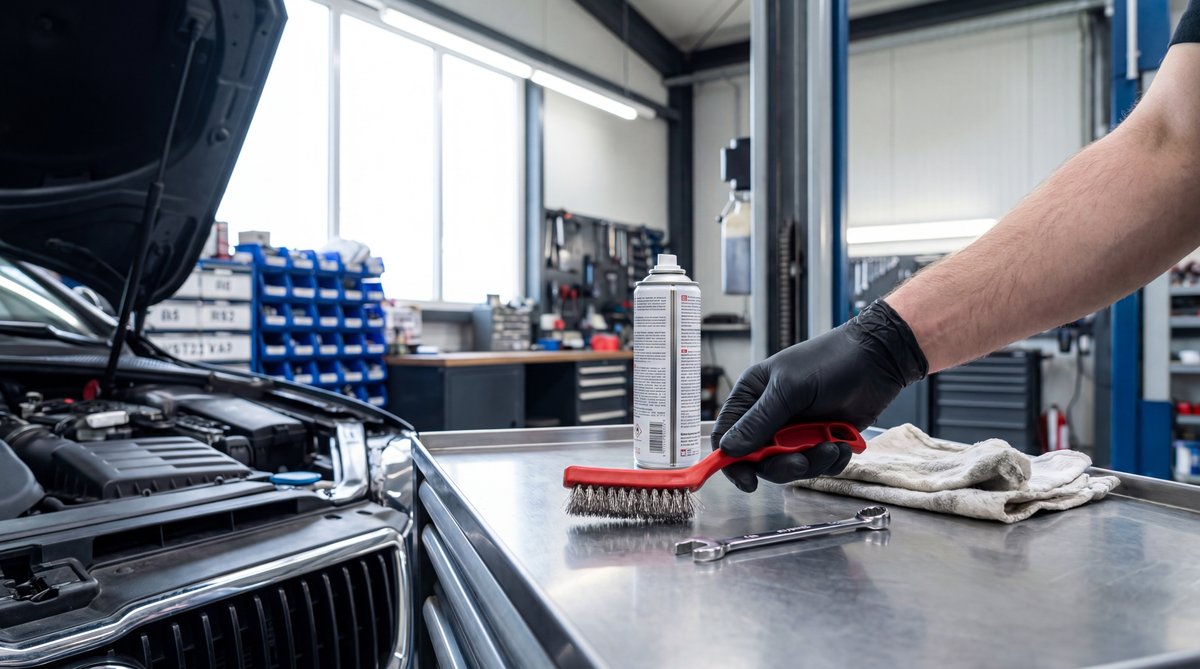
- Battery terminal cleaner spray (CRC 05360 is what I use)
- Wire brush with brass bristles
- Post cleaner brush (the cone-shaped one)
- Socket wrench set (8-13mm)
- Baking soda (Arm & Hammer works great)
- Distilled water
- Dielectric grease (Permatex 22058)
- Multimeter (for checking resistance)
Now, there are budget options and quality options. You can go cheap with a generic wire brush and some baking soda for like $5-10 total. Or you can step up to a proper CRC cleaning kit with Permatex dielectric grease for about $20-40. The thing is, even the expensive option is way cheaper than paying a shop to do this.
| DIY Cost | Shop Cost | You Save |
|---|---|---|
| $10-45 | $60-270 | $40-110+ |
When it comes to brands, I like CRC for the cleaner spray because it has that foaming action that really gets into all the crevices. For dielectric grease, Permatex is pretty much the standard – you only need a tiny bit per terminal so one tube lasts forever.
Cleaning Battery Terminals the Right Way
Alright guys, let’s get into the actual cleaning process. This whole job should only take you about 15-30 minutes from start to finish. The key thing is doing it in the right order so you don’t accidentally short something out.
🔧 Pro Tip
Always disconnect the negative terminal first, then the positive. When you reconnect, do it backwards – positive first, then negative. This prevents any sparks from arcing if your wrench accidentally touches the chassis while you’re working.
First thing, use your socket wrench to loosen the terminal clamps. On most batteries, you’re looking at either 8mm or 10mm bolts. Once they’re loose, wiggle the cables off the posts. If they’re really stuck from corrosion, you might need to use a terminal puller – don’t just yank on them or you could crack the battery case.
Now here’s where that baking soda mixture comes in. Mix it about 1:1 ratio – basically 2 tablespoons of baking soda per cup of distilled water. Pour this over the terminals and you’ll see it start fizzing. That fizzing is the baking soda neutralizing the sulfuric acid. Let it sit for a minute or two.
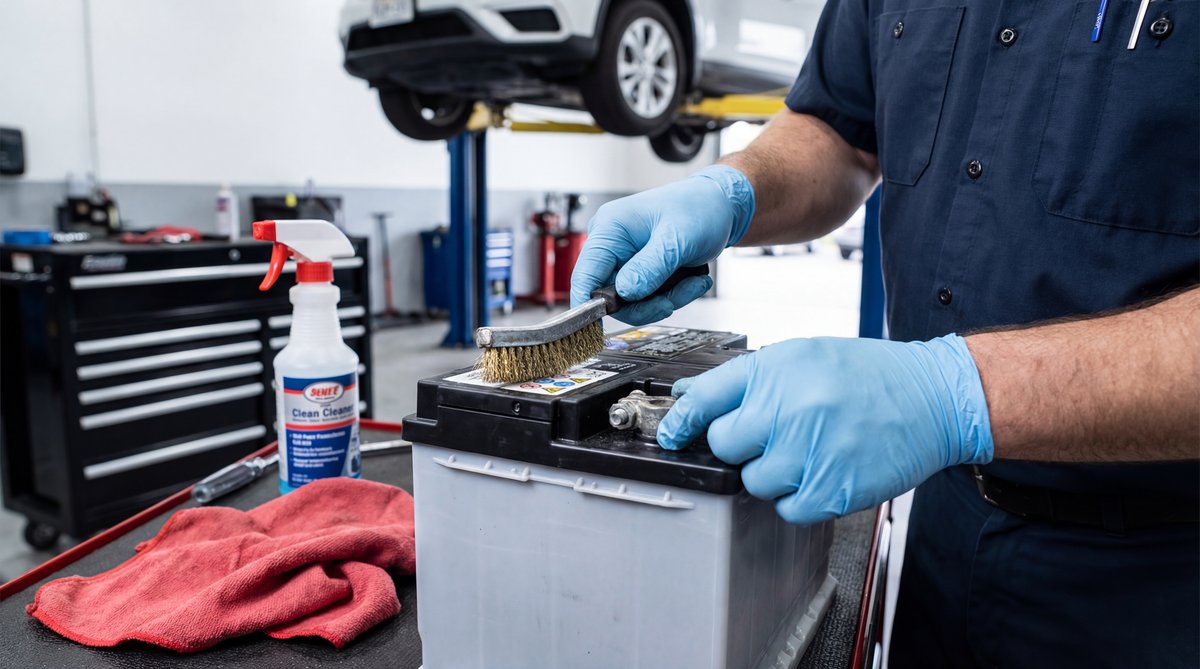
Then grab your wire brush and scrub the terminals. The brass bristles won’t damage the metal but they’ll remove all that corrosion. For the battery posts themselves, use that cone-shaped post cleaner brush. Twist it around each post until you see shiny metal. That’s what you want – bare, clean metal for good electrical contact.
❌ Common Mistake
The biggest mistake people make is not rinsing off all the baking soda residue. If you leave any residue behind, it actually increases resistance. After scrubbing, rinse everything with about a cup of distilled water and let it dry for at least 10 minutes. You want it completely dry before reconnecting.
Once everything is dry, apply a thin layer of dielectric grease to each terminal and post. We’re talking like 0.5 grams per terminal – just enough to fill in the microscopic gaps without getting grease everywhere. The grease prevents moisture from getting in and starting the corrosion process all over again.
Preventing Future Corrosion
Real quick, let me tell you how to keep this from becoming a constant problem. The thing is, some corrosion is normal over time, but if you’re seeing it come back within a month, something else is going on.
If you live in a humid area or anywhere near the ocean where there’s salt in the air, you’re gonna need to clean your terminals more often – probably every 3 months instead of every 6. That salt accelerates the corrosion process like crazy.
The best prevention is applying that dielectric grease every time you clean the terminals. Some guys like to use those red and green felt terminal protectors, and those work okay too, but I prefer the grease because it creates a complete seal against moisture.
💰 Money Saver
Check your terminals monthly as part of your regular maintenance. Just pop the hood and look for any white or blue buildup. If you catch it early and just wipe it off, it takes 30 seconds instead of needing a full cleaning job. This also prevents all those electrical gremlins that can cost you diagnostic time at a shop.
Another thing – if you’re dealing with a modern vehicle that has start-stop technology, you’ve got an EFB (Enhanced Flooded Battery) or AGM battery. These are more sensitive to voltage drops from corrosion. Batteries with 800+ CCA ratings need clean connections to deliver their full power, especially in cold weather when CCA can drop by 50% below freezing.
When to Replace Terminals Instead of Cleaning
Now, there comes a point where cleaning isn’t enough and you actually need to replace the terminals. Let me tell you what to look for.
If you see pitting in the metal that’s deeper than about 0.5mm, that terminal is done. The corrosion has eaten into the metal enough that you’re not gonna get a good connection anymore. Also, if your conductivity test shows more than 0.2 ohms resistance even after cleaning, it’s time for new terminals.
For replacement terminals, you’ve got a few options. OEM terminals like the Toyota 9098205035 positive terminal assembly run about $15-20. These come with an M8 nut with 1.25mm thread pitch, and the torque spec on these is 10-12 Nm. Don’t overtighten them or you’ll crack the battery post – use a torque wrench if you’ve got one.
If you’re running high-draw audio equipment, platinum-plated terminals can reduce resistance by 20-30% compared to stock lead terminals.
For you guys with aftermarket audio systems or other high-current draws, there are platinum-plated terminals that fit 0, 2, 4, or 8 AWG wires. These run about $25-35 but they’re worth it if you’re pulling serious amperage. They’ve got better conductivity and they resist corrosion better than standard terminals.
If you’re working on GM vehicles, ACDelco negative cables are the way to go. They use copper alloy terminals that meet SAE J1128 specs with heat resistance up to 105°C. That’s important because those cables can get hot under load.
When you’re installing new terminals, the process is basically the same as reconnecting after cleaning, but make sure you get that torque spec right. Too loose and you’ll have resistance and arcing. Too tight and you’ll damage the battery. The sweet spot is 10-12 Nm for M8 terminals.
🔧 Pro Tip
If you’re also dealing with hybrid battery issues on GM trucks, you might want to check out our guide on hybrid battery inverter removal since you’ll need good battery connections for that system to work properly too.
Frequently Asked Questions
What are the best brands for battery terminal cleaners?
How often should I clean my battery terminals?
Are there any safety precautions I should take when cleaning battery terminals?
What tools are essential for cleaning battery terminals?
How do I prevent corrosion on battery terminals?
