“`html
Alright guys, so you’re driving down the road and suddenly your car starts sputtering, loses power, or just completely dies on you. The thing is, this is one of the most common scenarios I see after 26 years as a master technician, and nine times out of ten, it’s gonna be your fuel pump. What we’re gonna do today is go over exactly how to tell if your fuel pump is bad—and here’s the best part—you can diagnose this problem without any tools whatsoever. I’m gonna show you a real quick test that might even get you back on the road temporarily if you’re stranded. Now, fuel pump failure is basically the number one cause of a car stalling while you’re driving, so understanding how to diagnose this problem is gonna save you time, money, and a whole lot of headaches.
Understanding What Your Fuel Pump Actually Does
Before we jump into diagnosing the problem, let’s talk real quick about what your fuel pump actually does, because understanding this is gonna help you make sense of all the symptoms we’re about to discuss. Basically, your fuel pump sits inside your gas tank—yeah, it’s actually submerged in gasoline—and its job is to push fuel from the tank up through the fuel lines to your engine. Modern fuel-injected vehicles need constant, pressurized fuel delivery to run properly.
The thing is, your fuel pump has to maintain a specific pressure to keep your engine running smoothly. For most standard fuel-injected engines, we’re talking about 30 to 45 PSI of fuel pressure. Now, if you’ve got a newer car with direct injection, that number jumps way up—we’re talking anywhere from 1,500 to 4,000+ PSI depending on the system. That’s a serious amount of pressure, and when your pump starts failing, it can’t maintain these numbers consistently.
Here’s what most people don’t realize: your fuel pump is actually cooled by the gasoline surrounding it in the tank. This is why running your car on empty all the time is terrible for your fuel pump—you’re basically making it run hot without proper cooling, which shortens its life significantly. I see people come into the shop all the time with failed fuel pumps on relatively low-mileage vehicles, and when I ask them about their driving habits, they tell me they regularly drive around with the gas light on. Don’t do that, guys. Keep at least a quarter tank of fuel in your vehicle at all times if you want your fuel pump to last.
Recognizing the Classic Symptoms of Fuel Pump Failure
Alright, so let’s get into the meat of this thing—what are the actual symptoms you’re gonna see when your fuel pump starts going bad? The thing is, fuel pumps rarely just die completely without warning. What happens is they start to weaken over time, and you’ll notice certain patterns in how your vehicle behaves.
The most common symptom I see is what we call a “stall under load” situation. You’re driving down the highway, everything seems fine, and then you go to accelerate or climb a hill, and suddenly the engine starts cutting out or the car completely stalls. What’s happening here is that your fuel pump can maintain enough pressure for normal cruising, but when the engine demands more fuel for acceleration, the weak pump just can’t keep up. This is basically your first warning sign that the pump is on its way out.
🔧 Pro Tip
If your car stalls while driving but starts right back up after sitting for 5-10 minutes, that’s a classic sign of a failing fuel pump. The pump motor is overheating and shutting down, then works again once it cools off. This cooling period is your diagnostic clue—ignition problems or electrical issues usually don’t follow this pattern.
Another huge symptom is difficulty starting, especially when the engine is hot. You go to the store, shut the car off, come back out 20 minutes later, and it cranks and cranks but won’t fire up. You wait a little longer, try again, and suddenly it starts. Sound familiar? That’s your fuel pump struggling to build pressure when it’s heat-soaked. Cold starts might be fine because the pump has had time to cool down overnight, but hot starts reveal the weakness.
Now here’s one that confuses a lot of people: surging or sputtering at highway speeds. You’re cruising along at 60-70 mph and the car feels like it’s jerking or losing power for a split second, then catches itself. This happens because the fuel pump is intermittently failing to maintain consistent pressure. The engine gets a surge of fuel, then a drop in fuel delivery, creating that jerking sensation. A lot of folks think this is a transmission problem, but it’s actually the fuel system starving for consistent pressure.
The number one symptom that tells me it’s definitely the fuel pump? The car stalls while driving, sits for 10 minutes, then starts right back up like nothing happened. That cooling period is the giveaway.
You might also notice a whining noise coming from the back of the vehicle where the fuel tank is located. A healthy fuel pump makes a low humming sound when you first turn the key to the “on” position—you might have to listen carefully to hear it. But a failing pump will make a much louder whining or grinding noise. If you hear that, your pump is definitely struggling and probably not gonna last much longer.
Loss of power is another telltale sign. The car runs, but it feels sluggish and doesn’t have the pickup it used to have. You press the gas pedal and there’s a delay or the car just doesn’t accelerate like it should. This happens because insufficient fuel pressure means the engine can’t produce the power it’s designed for. Basically, you’re running lean—there’s plenty of air but not enough fuel to match it.
The Roadside Test You Can Do Without Any Tools
Alright guys, here’s what you’ve been waiting for—the test you can do right on the side of the road without any tools whatsoever. This is something I’ve used countless times to diagnose fuel pump problems, and it works remarkably well. What we’re gonna do is use physics and a little mechanical sympathy to potentially get a stuck or failing fuel pump working again temporarily.
Here’s the situation: your car has stalled and won’t restart. You turn the key, it cranks over fine, but the engine won’t fire. You don’t hear any clicking from relays, the battery seems fine, all the lights work—it just won’t start. Here’s what you do: take your hand or your fist and give the bottom of the fuel tank a few solid whacks. Not hard enough to damage anything, but firm enough that you’re creating vibration through the tank.
⚠️ Warning
Before you do this test, make absolutely sure there are no fuel leaks and no smell of gasoline vapor around your vehicle. You’re working near the fuel tank, and while this test is generally safe, you never want to create sparks or excessive force near gasoline. Also, don’t hit the tank with any metal objects—use your hand or fist only.
The thing is, what happens sometimes is the brushes inside the fuel pump motor get stuck or the motor itself seizes up temporarily. By tapping on the tank, you’re creating vibration that travels through the fuel and can potentially unstick those brushes or free up a seized motor. I know it sounds too simple to work, but I’ve seen this get people back on the road more times than I can count.
After you tap on the tank, go ahead and try to start the car. If it fires right up, congratulations—you’ve just confirmed your fuel pump is bad. Now, here’s the important part: this is a temporary fix only. You need to get that fuel pump replaced as soon as possible because it’s gonna fail again, probably when you least expect it. Use this to get yourself to a shop or back home, but don’t think the problem is solved. The pump is on borrowed time at this point.
If tapping on the tank doesn’t work, there’s one more thing you can try. Turn your key to the “on” position without cranking the engine. You should hear that low hum I mentioned earlier as the fuel pump primes the system. Turn it off, wait a second, then turn it back to “on” again. Do this cycle about five times. What you’re doing is giving the fuel pump multiple opportunities to build pressure in the fuel rail. Sometimes a weak pump can’t build pressure in one cycle, but multiple cycles will get enough fuel up to the engine to allow it to start.
❌ Common Mistake
A lot of people think that if the car starts after tapping the tank, the problem is fixed and they can keep driving indefinitely. That’s not how it works. You’ve temporarily unstuck a failing component, but it’s going to fail again—and next time it might not respond to this trick. Don’t ignore the warning sign; get the pump replaced.
Checking Fuel Pressure and Related Components

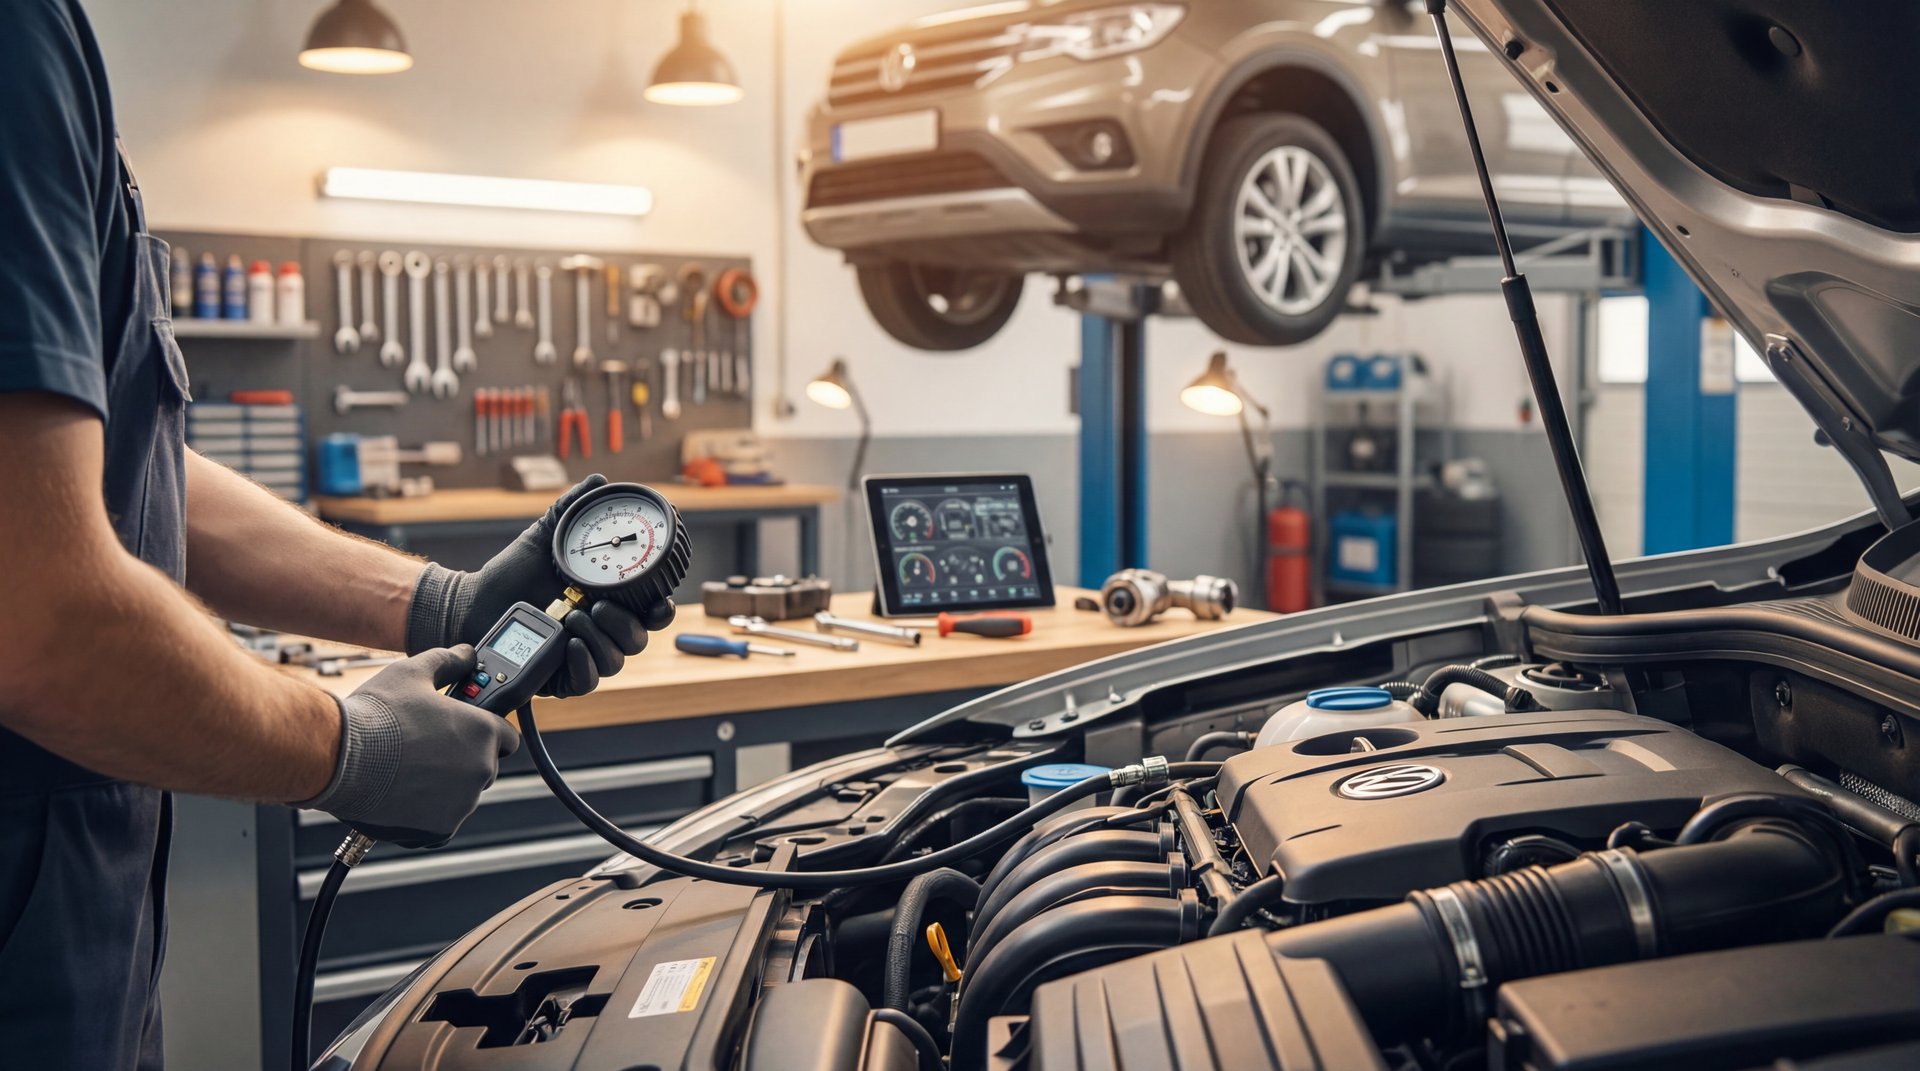
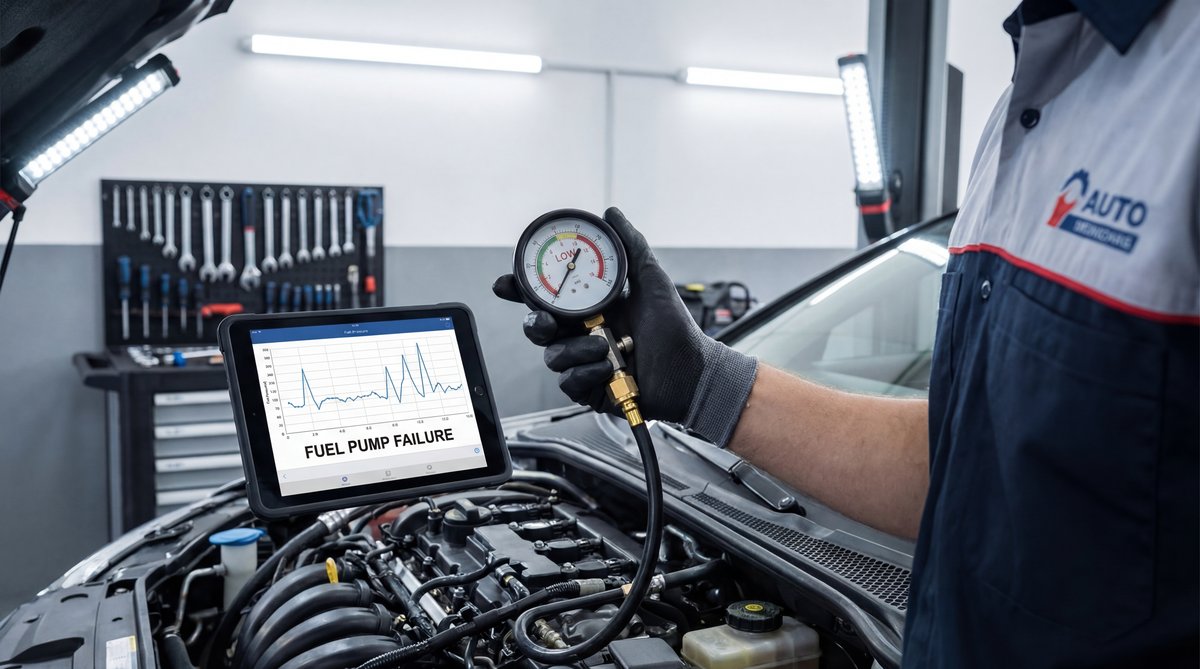
Now, if you want to get a bit more technical and you’ve got access to some basic tools, there are a few tests that’ll give you definitive proof of what’s going on. The most accurate test is checking actual fuel pressure with a fuel pressure gauge. You can pick one of these up for about $20-30 at any auto parts store, and it’s gonna tell you exactly whether your pump is delivering the pressure it should.
Here’s what we’re gonna do: you’ll need to locate your fuel rail test port—this is usually on top of the engine where the fuel rail is located, and it’ll have a cap that looks similar to a tire valve stem. With the engine off, attach your fuel pressure gauge to this port. Most gauges come with adapters to fit different vehicle types, so make sure you’ve got the right one threaded on securely.
Turn your key to the “on” position without starting the engine. The fuel pump will run for about two seconds to prime the system. Watch your gauge during this time. For most vehicles, you should see pressure jump up to somewhere between 30 and 60 PSI depending on your specific vehicle—you’ll want to look up the spec for your particular make and model. If you’re seeing pressure way below spec, or if the pressure drops off rapidly after the pump stops running, you’ve got a fuel delivery problem.
Now here’s the thing—before you condemn the fuel pump based on low pressure, you need to check a couple other components that can cause the same symptom. A clogged fuel filter is actually one of the most common causes of low fuel pressure, and it’s way cheaper and easier to replace than a fuel pump. If you’ve got over 50,000 miles on your vehicle and you’ve never changed the fuel filter, that should be your first suspect.
The fuel pump relay is another common culprit that gets overlooked all the time. This little relay provides power to your fuel pump, and when it fails, the pump won’t run at all. The thing is, you’ll get the exact same symptom as a bad pump—the car won’t start and you won’t hear the fuel pump priming. Relays are usually located in the fuse box under the hood or inside the vehicle. Your owner’s manual or a quick online search will tell you which relay is for the fuel pump. Try swapping it with another relay of the same type in your fuse box—a lot of vehicles use the same relay for multiple systems, so you can swap it with something like the horn or fog light relay to test it.
🔧 Tools Needed for Fuel Pressure Testing
- Fuel pressure gauge kit ($20-30)
- Shop towels or rags
- Safety glasses
- Fire extinguisher nearby (safety precaution)
- Vehicle-specific repair manual for pressure specs
You also want to check the actual fuse for the fuel pump circuit. A blown fuse will stop the pump dead in its tracks. Pull the fuel pump fuse and visually inspect it—if the little wire inside is broken, that’s your problem right there. Replace it with a fuse of the same amperage and see if the car starts. But here’s an important point: if that new fuse blows immediately, you’ve got an electrical short somewhere in the system and you need to track that down before replacing any components.
Understanding the Costs and Options for Fuel Pump Replacement
Alright, so you’ve determined your fuel pump is actually bad—let’s talk about what it’s gonna cost you and what your options are. The thing is, fuel pump replacement can range dramatically in price depending on your vehicle and whether you’re doing it yourself or taking it to a shop.
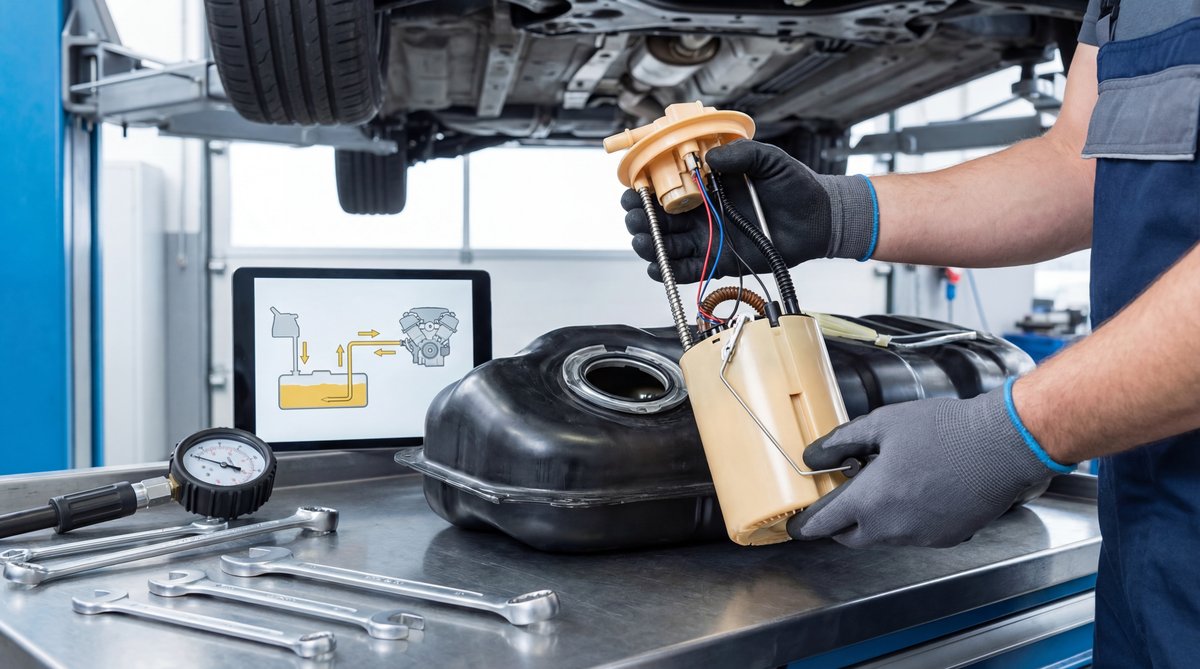
For parts alone, you’re typically looking at anywhere from $100 to $400 for the fuel pump assembly. Now, I say “assembly” because most modern vehicles don’t just have a standalone pump—you’re replacing the entire fuel pump module, which includes the pump itself, the fuel level sending unit (your gas gauge sensor), a fuel filter or sock, and all the wiring and connectors. Some vehicles allow you to replace just the pump motor, but in my experience, it’s usually worth replacing the whole assembly to avoid future problems with the other components.
| DIY Cost | Shop Cost | You Save |
|---|---|---|
| $150-450 | $500-900 | $350-500+ |
If you’re taking your vehicle to a shop, you’re gonna pay labor on top of the parts cost. Most fuel pump replacements take between 2 and 4 hours of labor, depending on how accessible your particular fuel tank is. At typical shop rates of $90 to $150 per hour, you’re looking at $180 to $600 in labor costs alone. So your total bill at a shop is probably gonna be somewhere between $500 and $900 for most vehicles—some can be even higher for luxury cars or difficult access situations.
Now here’s where it gets interesting: some vehicles have what’s called a fuel pump access panel. This is basically a removable panel in your trunk or under the rear seat that lets you get to the top of the fuel pump without dropping the entire gas tank. If your vehicle has this feature, the job becomes dramatically easier and faster. Instead of 3-4 hours of labor, we’re talking maybe 1-2 hours. Unfortunately, a lot of vehicles don’t have this access panel, which means the entire fuel tank has to be drained and dropped to get to the pump.
💰 Money Saver
Before you replace the fuel pump, check if your vehicle has a fuel pump access panel. Look under the rear seat cushion or in the trunk under the carpet. If you see a removable metal panel held in by screws, you’ve got easy access and can save hundreds in labor costs. If you don’t have this panel, seriously consider letting a shop do the work—dropping a fuel tank at home without a proper lift is difficult and potentially dangerous.
Here’s my honest recommendation: if your vehicle has an access panel and you’re reasonably handy with tools, this is a DIY-able job that can save you $300-500. But if your tank needs to be dropped, and you don’t have a vehicle lift or at least a good quality floor jack and jack stands, take it to a shop. Working under a vehicle supported only by a jack is incredibly dangerous, and dealing with a full or partially full gas tank adds another layer of risk. Your safety is worth way more than the money you’d save.
The Step-by-Step Process for Fuel Pump Replacement
For those of you who’ve decided to tackle this job yourself—and your vehicle has an access panel—let me walk you through the basic process so you know what you’re getting into. This isn’t gonna be a complete step-by-step guide for every vehicle out there, but it’ll give you a good overview of what’s involved.
First thing you’re gonna want to do is relieve the fuel pressure in the system. Even though you’re not running the engine, there’s still pressure in the fuel lines that needs to be released before you start disconnecting things. The easiest way to do this is to locate the fuel pump fuse or relay, remove it, then start the engine and let it run until it dies. This burns off the pressurized fuel in the lines. Once the engine dies, try starting it again a couple more times to make sure all the pressure is gone.
⚠️ Warning
You’re working with gasoline, which is extremely flammable and gives off toxic vapors. Work in a well-ventilated area—preferably outside or in a garage with the door open. No smoking, no open flames, no work lights that could create sparks. Have a fire extinguisher nearby just in case. Gasoline vapors are heavier than air and can travel along the ground to ignition sources, so be aware of your surroundings.
Next, you need to disconnect your battery. This is non-negotiable, guys. You’re gonna be working with electrical connections and you absolutely don’t want any chance of creating a spark around gasoline. Disconnect the negative terminal and tuck the cable somewhere it can’t accidentally touch the battery post.
Now you can access the fuel pump. If you’ve got a rear seat access panel, remove the rear seat cushion—it usually just pulls up from the front edge. You’ll see the access panel in the floor. Remove the screws holding it in place and lift it out. You’ll now be looking at the top of the fuel pump assembly.
Before you disconnect anything, take pictures with your phone. I can’t stress this enough—take pictures of how everything is connected, especially the electrical connectors and fuel lines. This’ll save you so much frustration during reassembly. Trust me on this one.
Disconnect the electrical connector to the fuel pump. Then you’ll need to disconnect the fuel lines. Most modern vehicles use quick-disconnect fittings that require a special tool to release—these tools are cheap, usually under $10 for a set. Have some shop towels ready because there’s gonna be some residual fuel in these lines that’ll drain out when you disconnect them.
🔧 Pro Tip
Here’s something most DIY guides don’t mention: before you remove the old fuel pump, use a marker to mark the orientation of the pump assembly relative to the tank. The fuel level sending unit float needs to be positioned correctly for your gas gauge to read accurately. If you install it rotated from the original position, your gas gauge might read incorrectly even though the pump works fine.
The fuel pump assembly itself is held in place by either a large locking ring or a series of bolts around the perimeter. For the locking ring type, you’ll need a special spanner wrench or you can carefully tap it counterclockwise with a hammer and punch. Once it’s loose, lift the entire pump assembly straight up and out of the tank. Be careful—there’s usually a lot more residual fuel in there than you’d expect, and the assembly has a long pickup tube that extends down into the tank.
Before installing the new pump, compare it side-by-side with the old one to make absolutely sure you’ve got the right part. Check that the electrical connector matches, the fuel line fittings are the same, and the mounting flange is identical. Also, there’s usually a rubber seal or O-ring that seals the pump to the tank opening—make sure this came with your new pump or transfer the old one if it’s in good condition.
Installation is basically the reverse of removal. Lower the new pump assembly into the tank, being careful not to damage the float arm. Make sure it’s oriented correctly using the mark you made earlier. Secure it with the locking ring or bolts, reconnect the fuel lines and electrical connector, and you’re basically done. Reinstall the access panel and rear seat.
Here’s the critical final step that a lot of people forget: before you start the car, turn the key to “on” for two seconds, then off, then on again. Do this about five times without cranking the engine. This allows the fuel pump to prime the system and build pressure. After the fifth cycle, try starting the car. It might take a few seconds of cranking on the first attempt, but it should fire up.
Related Maintenance and Preventive Measures
Now that we’ve covered diagnosis and replacement, let’s talk about the other components in your fuel system that you should be thinking about. The thing is, if your fuel pump failed, there’s probably a reason—and addressing related components now can prevent future problems and help your new pump last as long as possible.
First and foremost is your fuel filter. If you’ve never replaced it, or if you can’t remember the last time it was done, do it now while you’re already in there working on the fuel system. A clogged fuel filter makes your fuel pump work harder than it should, which shortens its life. Most manufacturers recommend replacing the fuel filter every 30,000 to 50,000 miles, but I see people go way beyond that all the time. Some newer vehicles have the fuel filter integrated into the fuel pump assembly, which means it gets replaced when you do the pump, but many vehicles have an inline filter somewhere along the fuel line that should be serviced separately.
While you’ve got the system apart, inspect all your fuel lines for cracks, leaks, or damage. Fuel lines, especially rubber sections, degrade over time and can develop small cracks that leak fuel or allow air into the system. Air in the fuel system creates a whole host of problems including hard starting and rough running. If you see any damage to fuel lines, replace them now while access is easy.
Check your fuel pressure regulator as well. On some vehicles this is part of the fuel pump assembly, but on others it’s a separate component on the fuel rail. A failing fuel pressure regulator can cause symptoms similar to a bad fuel pump—poor acceleration, rough idle, hard starting. If your vehicle has a vacuum-operated fuel pressure regulator, disconnect the vacuum line and check for gasoline inside it. If you see fuel in the vacuum line, your regulator diaphragm is leaking and it needs to be replaced.
Here’s something most people don’t think about: your gas cap. A bad gas cap can actually cause drivability issues because modern fuel systems are sealed and need to maintain proper pressure and vacuum. If your gas cap isn’t sealing correctly, you’ll often get a check engine light with an EVAP system code, but it can also cause running problems in some cases. Gas caps are cheap—if yours is old or damaged, replace it.