
Alright guys, so you’ve got a check engine light staring at you, and the scanner’s showing one of these VVT codes – P0010, P0011, P0012, P0013, P0014, or P0028. Before you start throwing money at expensive repairs or letting the dealership talk you into a massive bill, hold up. The thing is, most of the time these variable valve timing codes can be fixed for way less than you think. We’re talking simple maintenance stuff that you might’ve just let slide. Today I’m gonna walk you through exactly what causes these codes and, more importantly, how to fix them without wasting your hard-earned cash. Let’s get into it.
Understanding VVT Codes and What They Mean
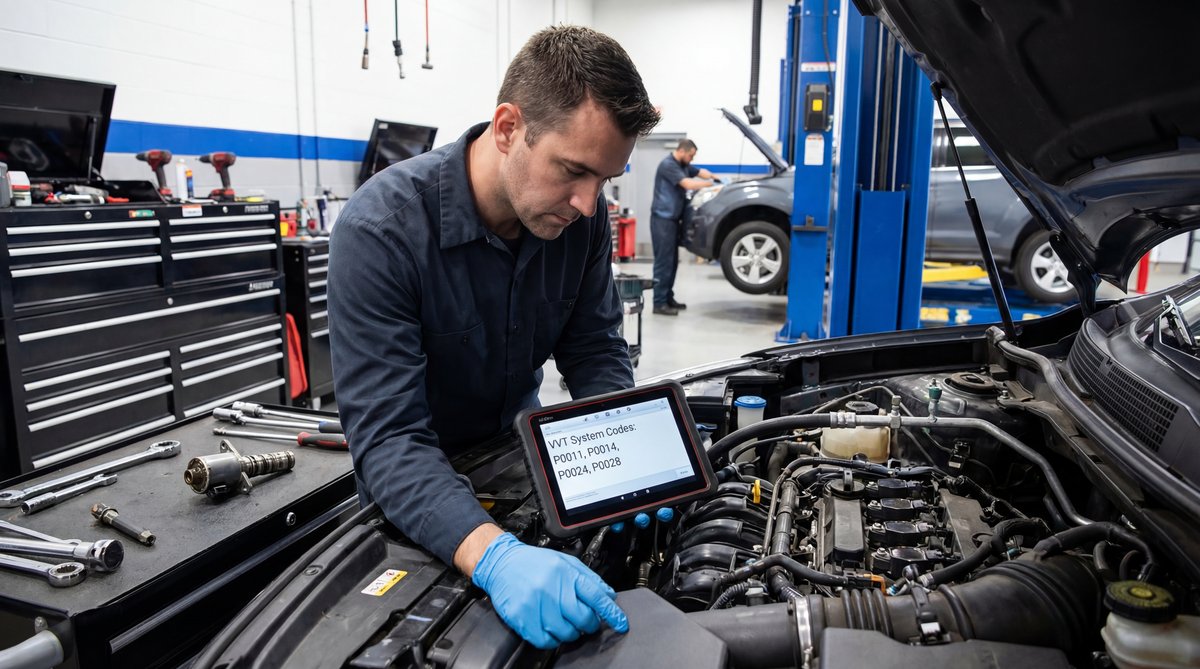
Real quick, let me break down what these codes actually mean because understanding them helps you fix the problem. Variable valve timing is basically a system that adjusts when your engine’s valves open and close depending on how hard you’re driving. It helps with fuel economy, power, and emissions – pretty much everything.
Here’s what we’re gonna do – I’ll explain each code:
- P0010: Camshaft Position Actuator Circuit issue on Bank 1 – electrical problem with the solenoid
- P0011: Timing Over-Advanced on Bank 1 – camshaft timing is too far ahead
- P0012: Timing Over-Retarded on Bank 1 – camshaft timing is too far behind
- P0013: Camshaft Position Actuator Circuit issue on Bank 2
- P0014: Timing Over-Advanced on Bank 2
- P0028: Timing Over-Retarded on Bank 2
Now, Bank 1 and Bank 2 just refer to different sides of the engine if you’ve got a V6 or V8. Four-cylinder engines typically only have Bank 1. The thing is, all these codes point to the same basic problem area – your VVT solenoid system isn’t working correctly.
🔧 Pro Tip
These codes are super common on vehicles from the early 2000s to 2025, especially Toyota, Nissan, Honda, and basically any modern engine with variable valve timing. If your car has over 100,000 miles and you’ve been slacking on oil changes, you’re pretty much guaranteed to see these codes eventually.
Checking Your Oil Level and Condition First

Before you do anything else – and I mean anything – check your oil. I can’t tell you how many times I’ve seen people drop $200-300 on parts when all they needed was a basic oil change. The VVT system runs on oil pressure, so if your oil’s low, dirty, or the wrong viscosity, the whole system goes haywire.
Pull your dipstick and check two things:
- Oil level: Is it between the minimum and maximum marks? If it’s low, top it off with the correct oil for your vehicle.
- Oil condition: What color is it? Fresh oil is amber or light brown. If it’s black, gritty, or sludgy, you need an oil change ASAP.
⚠️ Warning
Using the wrong oil viscosity can cause VVT codes even if the oil is clean. Check your owner’s manual for the correct spec – most modern engines need 5W-30 or 0W-20 synthetic. Don’t just throw in whatever’s on sale.
According to automotive performance experts, dirty or incorrect viscosity oil is the number one cause of VVT codes. If your oil hasn’t been changed in 5,000+ miles or it looks like coffee sludge, do an oil change first before touching anything else.
💰 Money Saver
A $40 oil change might clear your code completely. Clear the code after changing your oil, drive for a day or two, and see if it comes back. This simple step saves hundreds compared to replacing parts you might not even need.
| DIY Oil Change | Shop Oil Change | Dealer VVT Diagnosis |
|---|---|---|
| $30-$50 | $70-$120 | $150-$250 |
Cleaning the VVT Solenoids
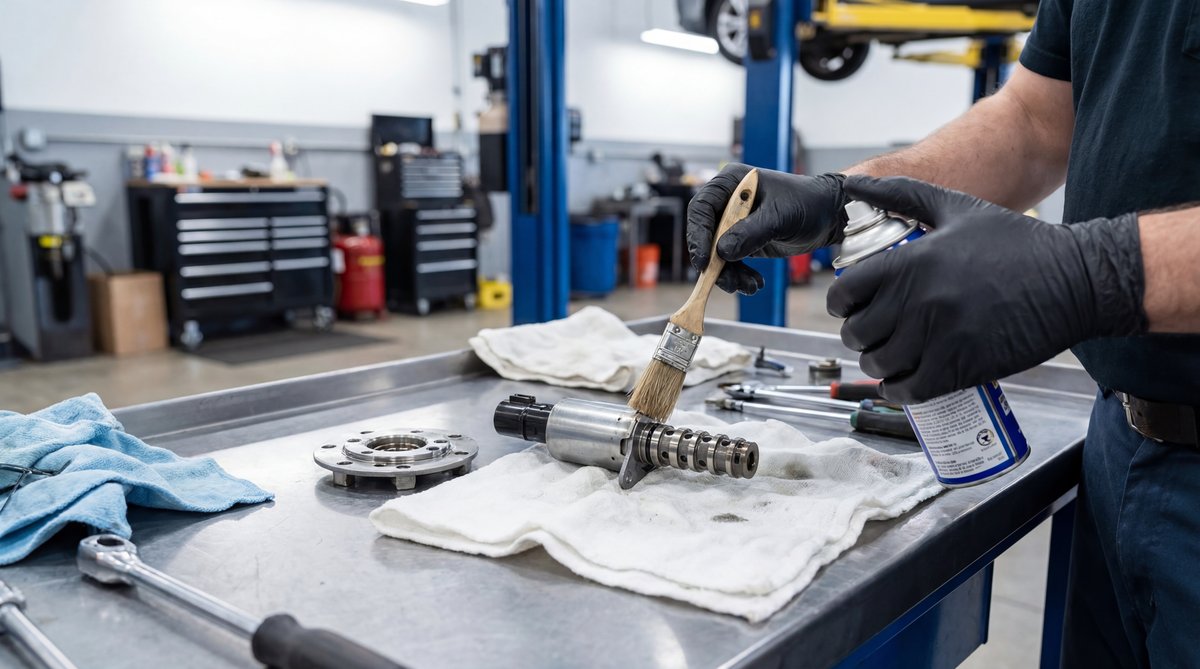
Alright, so you’ve checked your oil and it’s good, or you’ve changed it and the code’s still there. Next step is cleaning the VVT solenoids. These little guys are basically valves that control oil flow to the camshaft actuators. They’re electronic and they get gunked up with oil deposits over time.
Here’s what we’re gonna do to clean them without removing them first:
🔧 Tools Needed
- 10mm socket and ratchet
- 8mm socket (some vehicles)
- Extension bars
- Carburetor cleaner or brake cleaner
- Clean shop rags
- Safety glasses and gloves
The solenoids are usually located on the cylinder head, near the front of the engine. On most vehicles, they’re pretty accessible once you remove the engine cover. Look for a small cylindrical component with an electrical connector on top – that’s your VVT solenoid.
- Disconnect the battery: Safety first, guys. Disconnect the negative terminal and wait a few minutes before working on electrical components to prevent electrical shorts.
- Remove the electrical connector: Press the tab and wiggle it off gently. Don’t force it.
- Unbolt the solenoid: Usually one 10mm bolt holds it in place. Use your socket and remove it.
- Pull out the solenoid: Twist and pull gently. If it’s stuck, wiggle it back and forth – don’t yank on it or you’ll damage the O-ring.
- Clean the screen and valve: Spray carburetor cleaner into the solenoid ports and on the screen filter at the bottom. You’ll see all kinds of crud come out. Keep spraying until it runs clear.
❌ Common Mistake
Don’t use compressed air to blow into the solenoid – you can damage the internal valve mechanism. Just use cleaner spray and let it drain naturally onto a rag.
Once it’s clean, check the O-ring at the base. If it’s cracked or hard, replace it – they’re cheap insurance against oil leaks. Before you reinstall, put a little clean engine oil on the O-ring to help it seal properly.
Replacing the VVT Solenoid

If cleaning didn’t work or if your solenoid is damaged, you’re gonna need to replace it. The good news is these are not expensive parts, and the job is basically the same as removing it for cleaning.
🔧 Additional Tools for Replacement
- Torque wrench (optional but recommended)
- New VVT solenoid (OEM or quality aftermarket)
- New O-ring (usually included with solenoid)
- Fresh engine oil for lubrication
When you’re buying a replacement solenoid, don’t cheap out. You want OEM or a premium brand like Denso, Bosch, or ACDelec. Cheap no-name solenoids fail quickly. For example, Nissan Kicks and Rogue models from 2020-2025 use specific part numbers – intake solenoid 23753-5TA2A and exhaust 23753-5TA1A. Always verify the part number for your specific vehicle.
Installation is straightforward:
- Lubricate the new O-ring: Dip it in fresh engine oil – this is critical for proper sealing.
- Insert the new solenoid: Slide it straight in, no twisting. It should seat smoothly.
- Torque the mounting bolt: Tighten to about 50 inch-pounds (roughly 4 foot-pounds). If you don’t have a torque wrench, snug it down firmly but don’t overtighten – you’ll crack the plastic housing.
- Reconnect the electrical connector: You should hear and feel a click.
- Reconnect the battery: Hook up the negative terminal.
Don’t waste your money on repairs before checking oil level and condition and cleaning the VVT valve timing solenoids. Nine times out of ten, that’s all you need to do.
| DIY Solenoid Replacement | Shop Replacement | You Save |
|---|---|---|
| $40-$120 | $250-$450 | $200-$330 |
Troubleshooting If Codes Keep Coming Back
Okay, so you’ve changed the oil, cleaned or replaced the solenoid, cleared the code, and it’s back. That’s frustrating, but it tells us we need to look deeper. Here’s what could be going on:
Timing chain stretch: If your timing chain has stretched beyond spec (usually more than half an inch of slack), it throws off the whole VVT system. The solenoid can’t compensate for mechanical timing errors. Unfortunately, timing chain replacement is a big job – we’re talking $800-$1500 at a shop. This is one of those times where professional help makes sense unless you’re comfortable with major engine work.
Wiring issues: Check the wiring harness running to the solenoid. Look for damaged wires, corroded pins in the connector, or oil contamination. Oil can wick up into the connector and cause electrical problems. Clean it with electrical contact cleaner if needed.
Oil pressure problems: Low oil pressure throughout the engine can prevent the VVT system from working even with a new solenoid. This could indicate worn bearings or a failing oil pump – serious issues that need professional diagnosis.
🔧 Pro Tip
Use a digital multimeter to test the solenoid’s electrical resistance. Most VVT solenoids should read between 6-30 ohms. If it’s open circuit (infinite resistance) or shorted (near zero), the solenoid is bad even if it looks okay.
After any repair, clear the codes with your scanner, take the car for a good 15-20 minute drive mixing city and highway speeds, then scan again. If the code doesn’t come back after a few drive cycles, you’re good to go.
⚠️ Warning
If you hear rattling or knocking from the engine, especially on cold starts, your timing chain might be the problem. Don’t ignore this – a broken timing chain can destroy your engine. Get it checked out by a professional immediately.
Frequently Asked Questions
What are the most common symptoms of a faulty VVT solenoid?
The most obvious symptom is the check engine light with one of those VVT codes. But you might also notice rough idle, poor acceleration, decreased fuel economy, or a rattling noise from the engine on startup. Some people report the engine feeling “flat” or lacking power, especially at highway speeds. Basically, if your engine isn’t running as smooth as it used to and you’ve got these codes, the VVT system is your prime suspect.
How can I tell if my VVT solenoid needs replacing or just cleaning?
Honestly, the only way to know for sure is to pull it out and look at it. If the screen filter is clogged with sludge but the solenoid itself looks okay and moves freely, cleaning might work. If the solenoid is physically damaged, corroded, or you test it with a multimeter and it’s out of spec, replace it. My recommendation is always try cleaning first since it costs you nothing but time. If the code comes back after cleaning and an oil change, then spring for the new part.
What tools are essential for replacing a VVT solenoid?
You really don’t need much – that’s the beauty of this repair. A basic 10mm socket with a ratchet and extension will get most solenoids out. Some vehicles might need an 8mm. Bring some shop rags, fresh engine oil to lube the O-ring, and wear safety glasses and gloves. If you want to do it right, a torque wrench set to 50 inch-pounds is ideal for reinstallation, but it’s not absolutely necessary if you’re careful not to overtighten.
Are there any specific safety precautions I should take when replacing a VVT solenoid?
Yeah, definitely disconnect your battery before you start working on the electrical connector – this prevents shorts and accidental airbag deployment. Let the engine cool down completely before touching anything under the hood to avoid burns. Wear safety glasses because you’ll be spraying cleaner and oil can drip down. And when you’re removing the solenoid, twist and wiggle it gently rather than yanking on it – you don’t want to break it off in the engine block. That’s a nightmare scenario.
How does the VVT system improve engine performance?
The VVT system basically gives your engine multiple personalities. At low RPMs and light throttle, it adjusts valve timing for better fuel economy and smoother idle. When you step on it and RPMs climb, it advances or retards the cam timing to maximize power and torque. This is why modern engines with VVT technology can be both fuel-efficient and powerful at the same time – something old-school fixed-timing engines could never do. It’s pretty clever engineering when it works right.
🔧 Final Thoughts
Alright guys, bottom line is this: don’t let a VVT code scare you into thinking you need a whole new engine or some crazy expensive repair. Start simple – check your oil, change it if needed, clean the solenoids, and clear the code. Most of the time, that’s all it takes. You’ll save yourself hundreds of dollars and feel pretty good about fixing it yourself. Let me know in the comments if this worked for you, and if you’ve got questions, drop them below and I’ll help you out. Stay safe out there and keep wrenching!
Listen to this article